Lately, I have been playing a lot with TestCafe which is a testing tool for website, there are 2 parts of TestCafe, the first part is TestCafe studio which is a tests editor tool where you can create or edit new tests that will be eventually used in the TestCafe test runner, both TestCafe and the test runner runs on Windows, MacOS, and Linux.
So what we are going to do today is to install TestCafe on Ubuntu Linux 18.04, in this tutorial we will only install the test runner because, in the end, my main goal is to use TestCafe to emulate the load on a server, so let’s get started
First, we need to install NodeJS and NPM, this is kind of tricky depending on your OS version, for example, if you run this command :
sudo apt -y install nodejs
in Ubunto 18.04 you will end up installing NodeJS version 8 something… that’s too old for what we need to do, so first let’s install the latest version of NodeJS, in this case, this is version 12
4) Now add the newly created mode for your display device, the structure of the command is “xrandr –addmode DisplayId Resolution”, you should replace the DisplayId for the id you got in step 1 and the resolution from what you got in
xrandr –addmode HDMI-2 “2560x1080_60.00”
Add New Resolution To Display
5) Set the new resolution
Set The New Resolution
6) So far we added the new resolution and associated it to the monitor that we want, this is not permanent it will just work until you reboot, so to make these changes permanent you need to edit your profile using the following command
gedit ~/.profile
Paste the commands from step 3 and 4 and save the file
Sometimes you want to send a zip with your visual studio solution or project, but after you archive your files you realize that the file size is huge, well worry no more you can use the following script (a .bat file) to clear all the temporary files in your visual studio solution
just save the following code in a ms-dos bat file, name the file ClearTeam.bat
rem start of the script
@echo off

for /d /r . %%d in (bin,obj,packages) do @if exist "%%d" rd /s/q "%%d"
FOR /R %%H IN (*.log) DO del "%%H"
FOR /r %%G IN (*.bak) DO del "%%G"
FOR /R %%J IN (*.suo) DO del "%%J"

IF EXIST .vs rd .vs /s/q
rem end of the script
to run it, just double click in the bat file or execute it but call the file name in console, in this case, ClearTeam.bat
I have been using XPO from DevExpress since day one. For me is the best O.R.M in the dot net world, so when I got the news that XPO was going to be free of charge I was really happy because that means I can use it in every project without adding cost for my customers.
Nowadays all my customer needs some type of mobile development, so I have decided to master the combination of XPO and Xamarin
Now there is a problem when using XPO and Xamarin and that is the network topology, database connections are no designed for WAN networks.
Let’s take MS SQL server as an example, here are the supported communication protocols
TCP/IP.
Named Pipes
To quote what Microsoft web site said about using the protocols above in a WAN network
In a fast-local area network (LAN) environment, Transmission Control Protocol/Internet Protocol (TCP/IP) Sockets and Named Pipes clients are comparable with regard to performance. However, the performance difference between the TCP/IP Sockets and Named Pipes clients becomes apparent with slower networks, such as across wide area networks (WANs) or dial-up networks. This is because of the different ways the interprocess communication (IPC) mechanisms communicate between peers.”
So, what other options do we have? Well if you are using the full DotNet framework you can use WCF.
So, it looks like WCF is the solution here since is mature and robust communication framework but there is a problem, the implementation of WCF for mono touch (Xamarin iOS) and mono droid (Xamarin Android)
You can read about Xamarin limitations in the following links
I don’t want to go into details about how the limitation of each platform affects XPO and WCF but basically the main limitation is the ability to use reflection and emit new code which is needed to generate the WCF client, also in WCF there are problems in the serialization behaviors.
So basically, what we need to do is to replace the WCF layer with some other technology to communicate to the database server
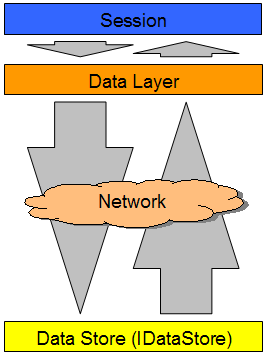
The technology I’ve selected for this AspNetCore which I would say is a really nice technology that is modern, multi-platform and easy to use. Here below you can see what is the architecture of the solution
AspNetCore
Rest API
So, what we need basically is to be able to communicate the data layer with the data store through a network architecture.
The network architecture that I have chosen is a rest API which is one of the strong fronts of AspNetCore. The rest API will work as the server that forward the communication from XPO to the Database and vice versa, you can find a project template of the server implementation here https://www.jocheojeda.com/download/560/ this implementation references one nuget where I have written the communication code, you can fine the nuget here https://nuget.bitframeworks.com/feeds/main/BIT.Xpo.AgnosticDataStore.Server/19.1.5.1
There are times when you have been working on your new exciting project and it looks so good that you just want to release it as soon as possible so the world can be blessed with your new NuGet package but wait your new library is a complex library and require special setup instructions after it has been installed.
Well, we can solve that problem by adding a readme file with all the setup instructions, to do that add the following XML snippet to your csproj file, then you can just add a ReadMe.txt to your project. Now when the end-user install your NuGet package the read me file will automatically open
Sometimes during the development stage, you need to add package references to your project that are only needed either during the development or compilation stage but they are not actually required by the emitted assembly.
So how do we avoid to flood the end project with package dependencies that are actually not needed? Well the answer is super simple but is not obvious, so let’s see the following example
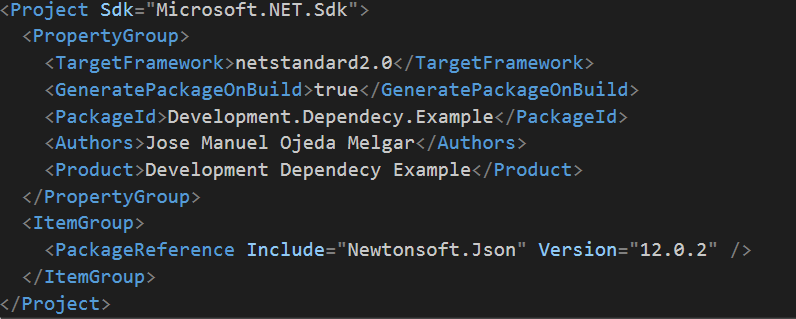
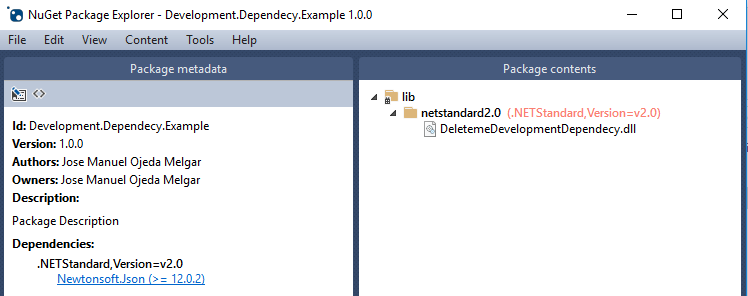
Now we can use the package explorer to open the package produced by the csproj above.
as you can see the package Newtonsoft.Json is included as a dependency since we include it on the csproj as package reference. So how can we fix that? the answer depend on how now you create your NuGet package, in this case, I’m going to focus my answer on excluding the dependency in a package created by the info in the csproj file (there is a different approach if you use the nuspec file).
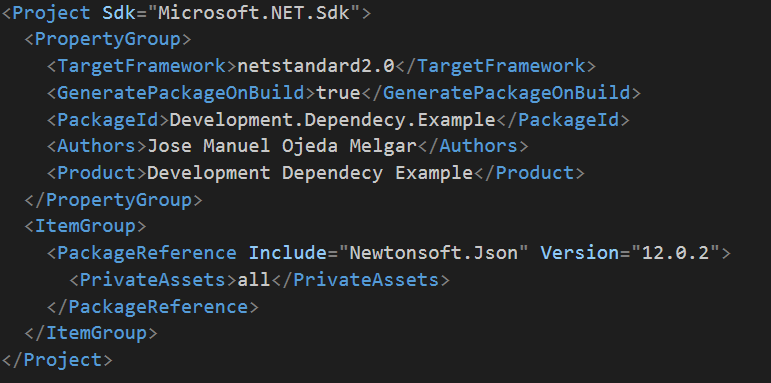
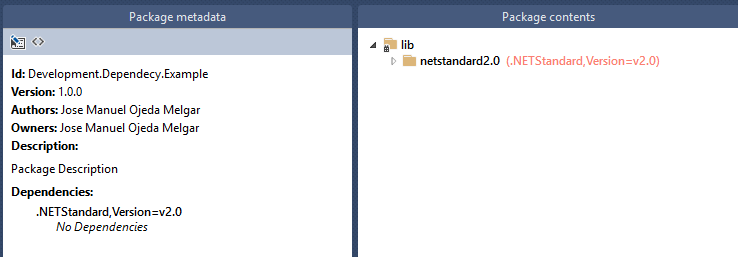
To exclude a package reference you have to add the private asset attribute as shown in the image below.
First, let’s start with that is Brevitas, if someone asks me (the creator) I will say that Brevitas is an application framework for Xamarin Forms that you can use to develop L.O.B (Line of Business) Applications. Creating mobile apps using MVVM pattern is fun, but it requires an incredible amount of time, I have been a long time user of the application framework XAF and I love its productivity-oriented approach. So when I created Brevitas that was my main goal, to save time for me and other developers, if you save development time and make money at the same time you can dedicate more time to yourself and your loved ones.
For Oscar & Юлия
Because everything that is good in my life was born this day
I have a new project that I want to deploy and I don’t want it to depend on the dot net framework, so I decided to create a self-contained executable. At first, I thought it was an easy process and don’t get me wrong, it is, but I could not find all the pieces of the puzzle in one single blog post or youtube video, so I decided to write a really small tutorial about it, let’s begin
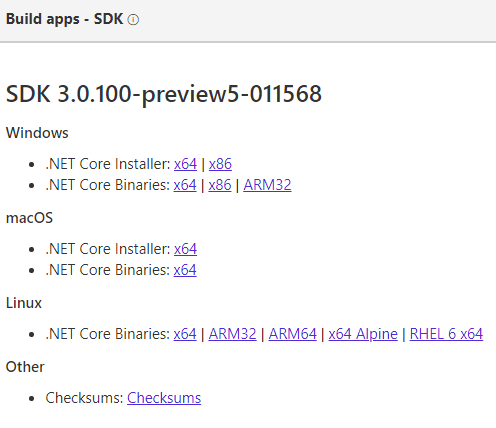
1 – Install the net core 3 SDK (still in preview). You can download it here
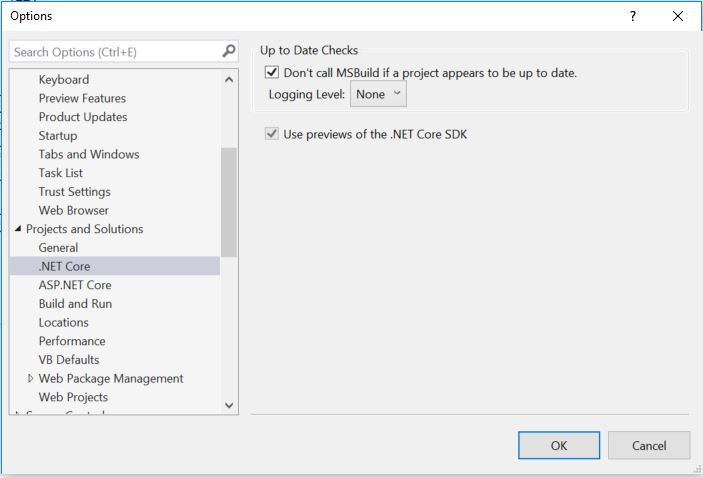
2 – Configure Visual Studio 2019 to use the preview version of net core by going to: Tools -> Options -> Projects and Solutions -> .NET Core -> Use Previews of the .NET Core SDK.
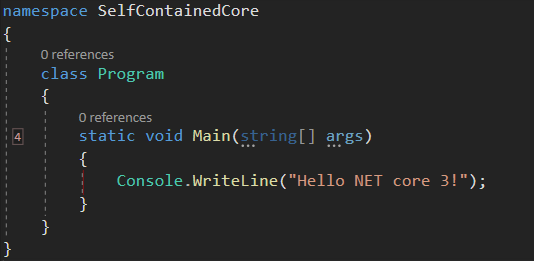
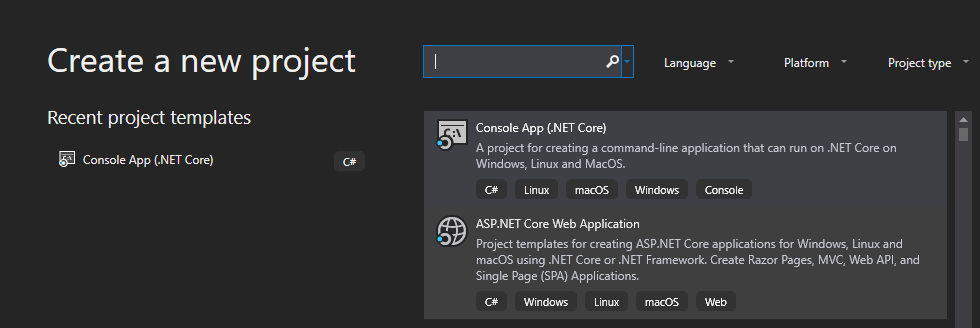
3 – Create a new net core console application in Visual Studio 2019: File-> New -> Project
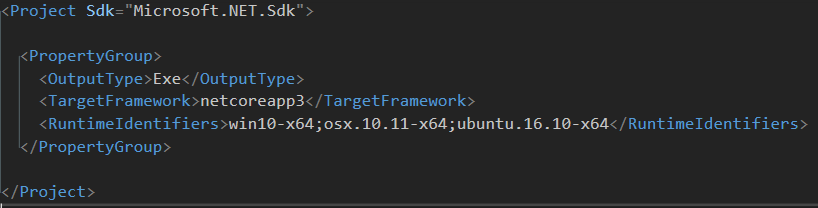
4 – Edit your csproj and add the runtime identifiers <RuntimeIdentifiers>win10-x64;osx.10.11-x64;ubuntu.16.10-x64</RuntimeIdentifiers>
\
4 – Open a console window in the directory where your csproject is located and run the following command to create a single executable for windows:


 \
\