by Joche Ojeda | Oct 8, 2025 | Oqtane, Tenants
OK — it’s time for today’s Oqtane blog post!
Yesterday, I wrote about changing the runtime mode in Oqtane and how that allows you to switch between
Blazor Server and Blazor WebAssembly functionality.
Today, I decided to explore how multi-tenancy works — specifically, how Oqtane manages multiple sites within the same
installation.
Originally, I wanted to cover the entire administrative panel and all of its modules in one post, but that would’ve been too big.
So, I’m breaking it down into smaller topics. This post focuses only on site functionality and how
multi-tenancy works from the administrative side — basically, how to set up tenants in Oqtane.
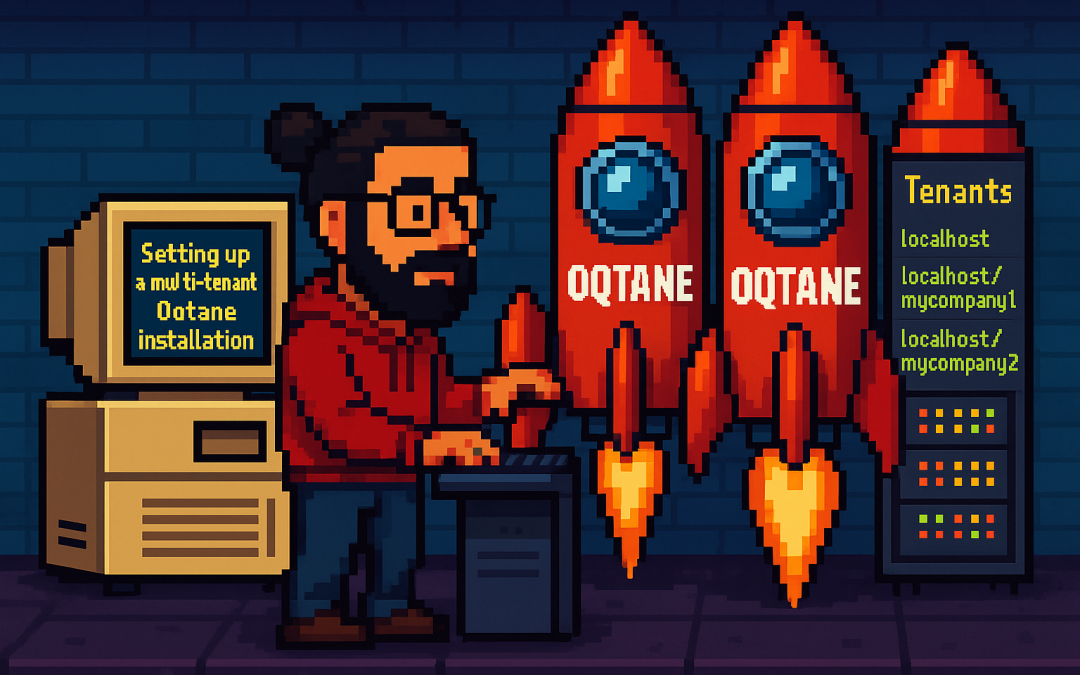
Setting Up a Multi-Tenant Oqtane Installation
To make these experiments easy to replicate, I decided to use SQLite as my database.
I created a new .NET Oqtane application using the official templates and added it to a
GitHub repository.
Here’s what I did:
- Set up the host configuration directly in
appsettings.json.
- Ran the app, went to the admin panel, and created two additional sites.
You can see the screenshots below showing the settings for each site.
At first, it was a bit confusing — I thought I could simply use different ports for each site (like 8081,
8082, etc.), but that’s not how Oqtane works. Everything runs in the same process, so all tenants
share the same port.
Instead of changing ports, you configure different URL paths or folders. For example:
http://localhost:8080/ → the main hosthttp://localhost:8080/mycompany1 → first tenanthttp://localhost:8080/mycompany2 → second tenant
Site Managment
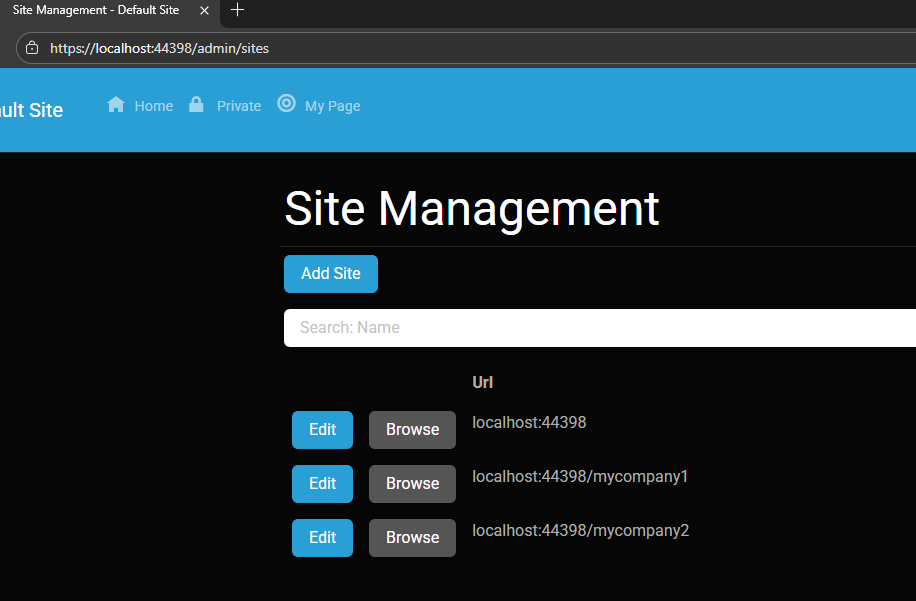
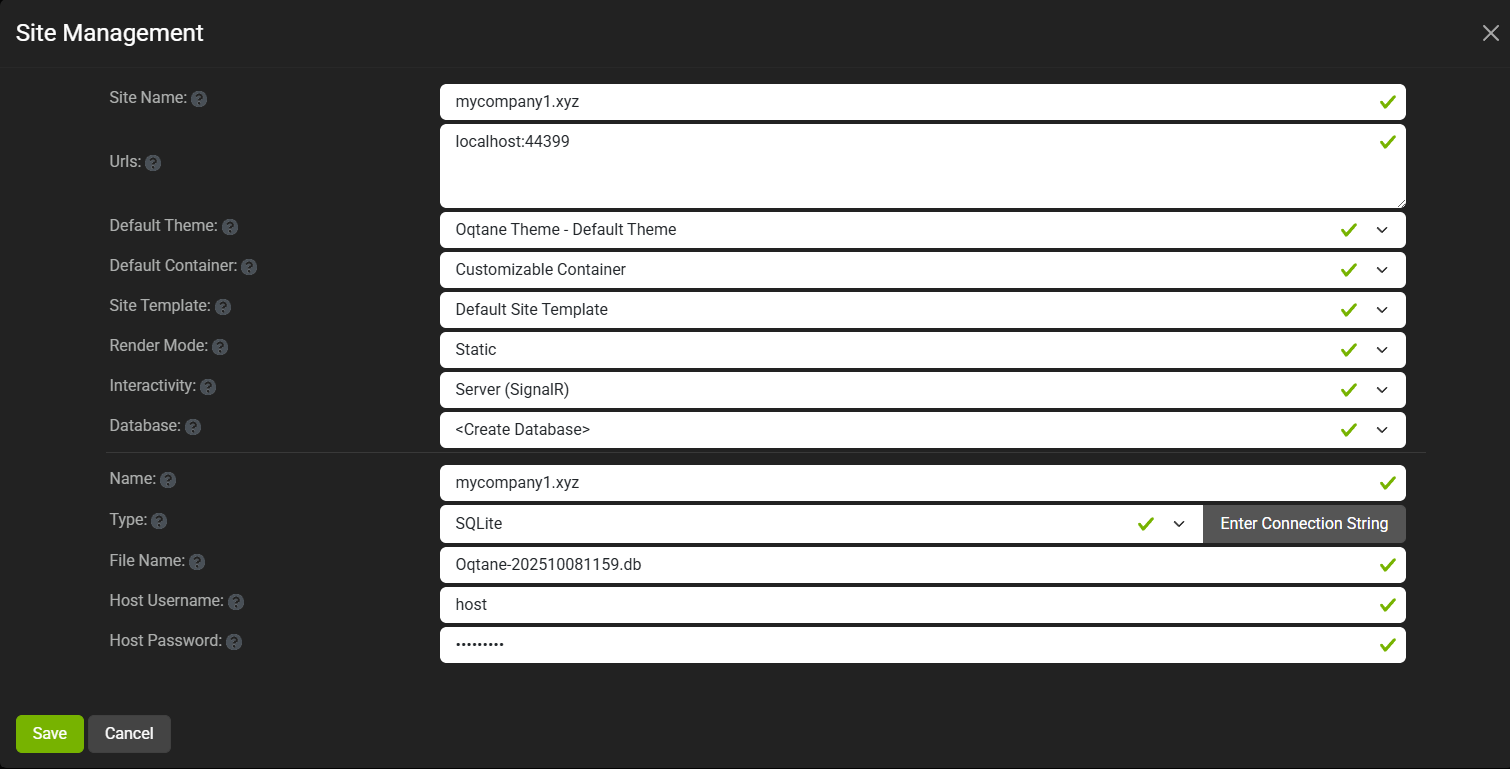
Site MyCompany1
Site MyCompany2
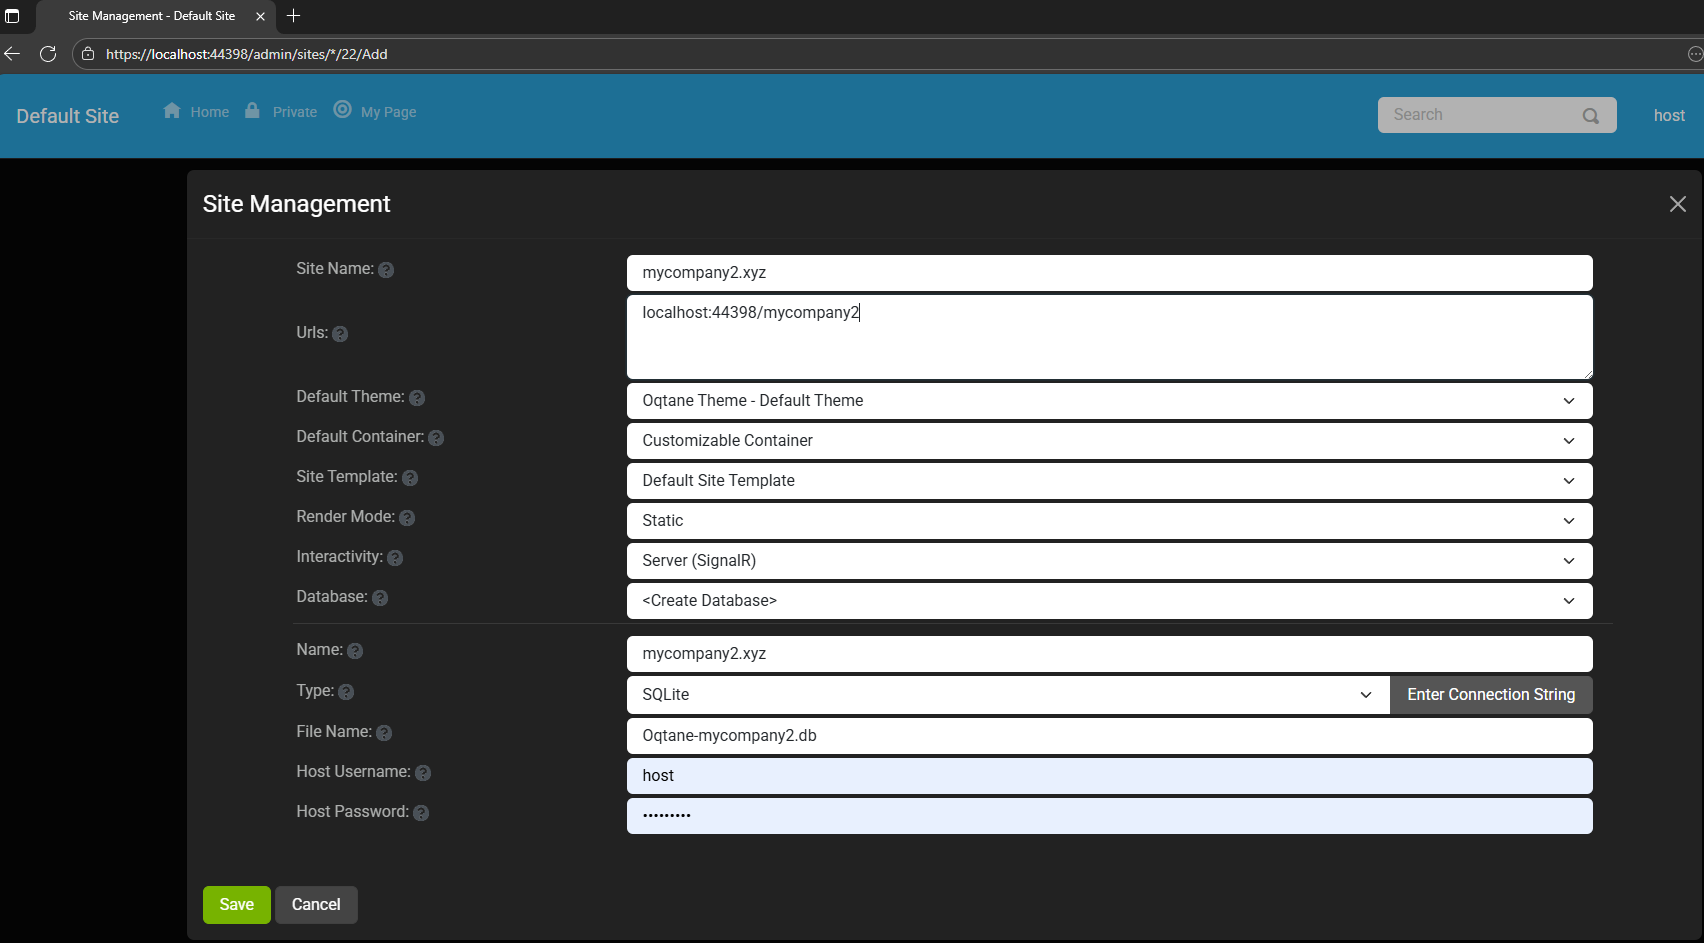
Each tenant can:
- Use a separate database or share the same one as the host
- Have its own theme
- Maintain independent site settings
In the short GIF animation I attached to the repository, you can see how each site has its
own unique visual theme — it’s really neat to watch.
When you add a new site, its connection string is also stored automatically in the application settings. So, if you download
the repository and run it locally, you’ll be able to access all the sites and see how the URLs and configurations work.
Here is the repository egarim/OqtaneMultiTenant: an example of how to use multi tenant in oqtane
Why I’m Doing These Posts
These blog entries are like my personal research notes — documenting what I discover while working with Oqtane.
I’m keeping each experiment small and reproducible so I can:
- Share them with others easily
- Download them later and reproduce the same setup, including data and configuration
What’s Next
In the next post, I’ll cover virtual hosting — how to use domain names that forward to specific
URLs or tenants. I’ve already done some research on that, but I don’t want to overload this post with too many topics.
For now, I’ll just attach the screenshots showing the different site configurations and URLs, along with a link to the GitHub
repository so you can try it yourself.
If you have any questions, feel free to reach out! I’ll keep documenting everything as I go.
One of the great things about Oqtane is that it’s open source — you can always dive into the code, or if you’re
stuck, open a GitHub issue. Shaun Walker and the community are incredibly helpful, so don’t hesitate to ask.
Thanks again to the Oqtane team for building such an amazing framework.

by Joche Ojeda | Mar 7, 2025 | Uncategorized, Uno Platform
This year I decided to learn something new, specifically something UI-related. Usually, I only do back-end type of code. Most of my code has no UI representation, and as you might know, that’s why I love XAF from Developer Express so much—because I don’t have to write a UI. I only have to define the business model and the actions, and then I’m good to go.
But this time, I wanted to challenge myself, so I said, “OK, let’s learn something that is UI-related.” I’ve been using .NET for about 18 years already, so I wanted to branch out while still leveraging my existing knowledge.
I was trying to decide which technology to go with, so I checked with the people in my office (XARI). We have the .NET team, which is like 99% of the people, and then we have one React person and a couple of other developers using different frameworks. They suggested Flutter, and I thought, “Well, maybe.”
I checked the setup and tried to do it on my new Surface computer, but it just didn’t work. Even though Flutter looks fine, moving from .NET (which I’ve been writing since day one in 2002) to Dart is a big challenge. I mean, writing code in any case is a challenge, but I realized that Flutter was so far away from my current infrastructure and setup that I would likely learn it and then forget it because I wouldn’t use it regularly.
Then I thought about checking React, but it was kind of the same idea. I could go deep into this for like one month, and then I would totally forget it because I wouldn’t update the tooling, and so on.
So I decided to take another look at Uno Platform. We’ve used Uno Platform in the office before, and I love this multi-platform development approach. The only problem I had at that time was that the tooling wasn’t quite there yet. Sometimes it would compile, sometimes you’d get a lot of errors, and the static analysis would throw a lot of errors too. It was kind of hard—you’d spend a lot of time setting up your environment, and compilation was kind of slow.
But when I decided to take a look again recently, I remembered that about a year ago they released new project templates and platform extensions that help with the setup of your environment. So I tried it, and it worked well! I have two clean setups right now: my new Surface computer that I reset maybe three weeks ago, and my old MSI computer with 64 gigabytes of RAM. These gave me good places to test.
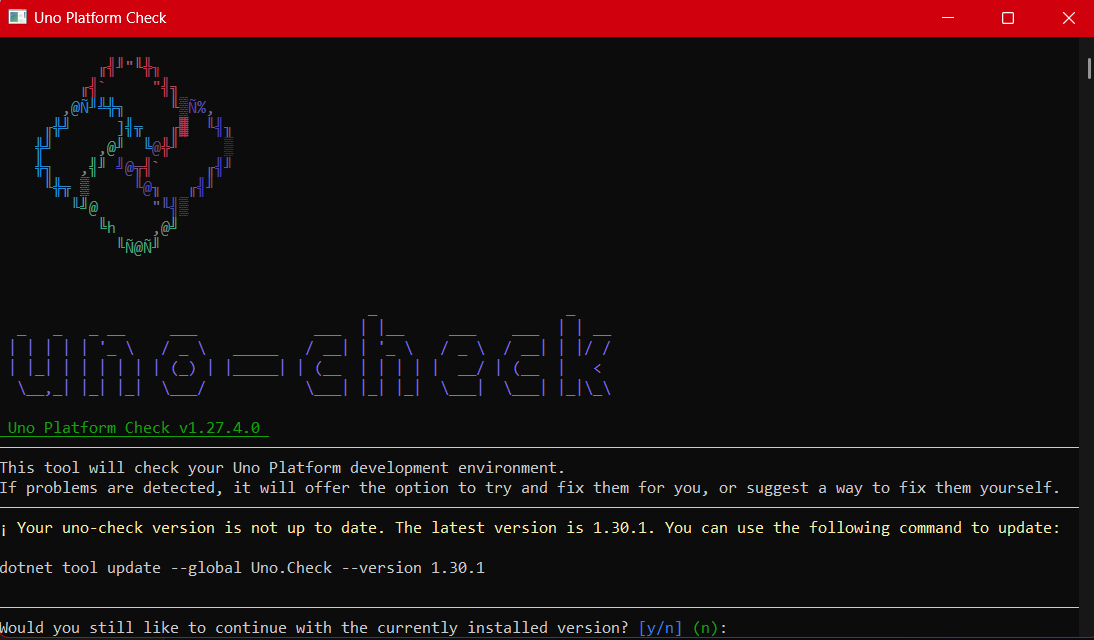
I decided to go to the Uno Platform page and follow the “Getting Started” guide. The first thing you need to do is use some commands to install a tool that checks your setup to see if you have all the necessary workloads. That was super simple. Then you have to add the extension to Visual Studio—I’m using Visual Studio in this case just to add the project templates. You can do this in Rider or Visual Studio Code as well, but the traditional Visual Studio is my tool of preference.
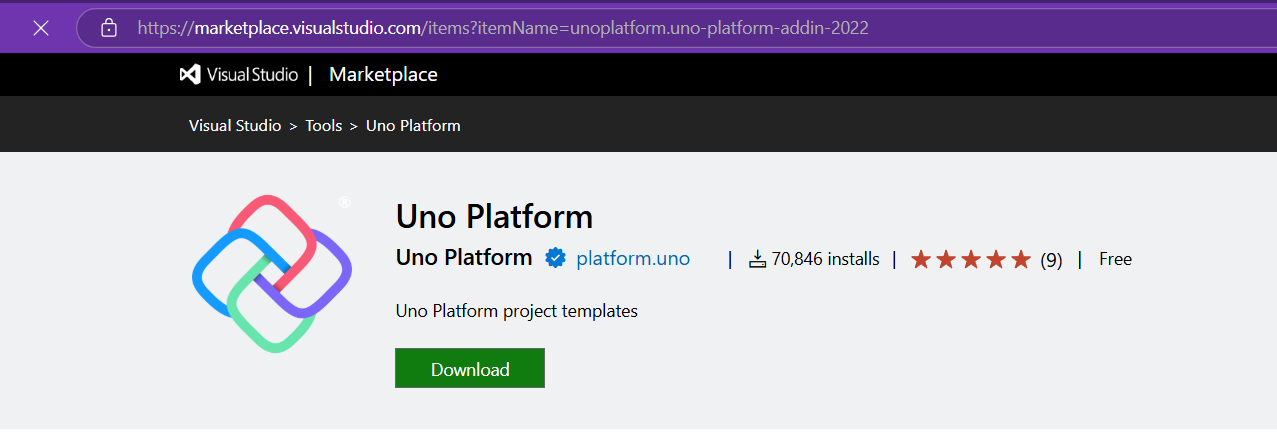
Uno Platform – Visual Studio Marketplace
Setup your environment with uno check
After completing all the setup, you get a menu with a lot of choices, but they give you a set of recommended options that follow best practices. That’s really nice because you don’t have to think too much about it. After that, I created a few projects. The first time I compiled them, it took a little bit, but then it was just like magic—they compiled extremely fast!
You have all these choices to run your app on: WebAssembly, Windows UI, Android, and iOS, and it works perfectly. I fell in love again, especially because the tooling is actually really solid right now. You don’t have to struggle to make it work.
Since then, I’ve been checking the examples and trying to write some code, and so far, so good. I guess my new choice for a UI framework will be Uno because it builds on my current knowledge of .NET and C#. I can take advantage of the tools I already have, and I don’t have to switch languages. I just need to learn a new paradigm.
I will write a series of articles about all my adventures with Uno Platform. I’ll share links about getting started, and after this, I’ll create some sample applications addressing the challenges that app developers face: how to implement navigation, how to register services, how to work with the Model-View-ViewModel pattern, and so on.
I would like to document every challenge I encounter, and I hope that you can join me in these Uno adventures!
About Us
YouTube
https://www.youtube.com/c/JocheOjedaXAFXAMARINC
Our sites
Let’s discuss your XAF
https://calendly.com/bitframeworks/bitframeworks-free-xaf-support-hour/
Our free A.I courses on Udemy
by Joche Ojeda | Mar 6, 2025 | Visual Studio
Visual Studio Sign-In Issues: A Simple Fix
For a long time, I had a problem with my Visual Studio installation. I was unable to sign in with different accounts or change my account. I tried resetting my computer to the default settings, but the issue persisted.
In December, I bought a new Microsoft Surface, which basically fixed the problem. However, I still have my own computer – a really good MSI gaming machine with 64 gigabytes of RAM. I decided to use it as a secondary computer, but the main problem remained: even after resetting my Windows setup to default and cleaning all programs, I was unable to sign in with a different account. I was essentially stuck.
Today, I decided to tackle this issue. It’s been a really busy week (it’s Thursday already), but I’ve accomplished a lot, including finishing two Udemy courses on Semantic Kernel and Microsoft AI Extensions. Having some free time, I played around with my old computer to see if I could fix it – and fortunately, I was able to!
The Solution
Here’s what I did to fix the sign-in problem:
- Go to Visual Studio Options > Environment > Accounts
- Change “Add and reauthenticate accounts using:” from “Windows authentication broker” to something else like “Embedded web browser” or “System browser”
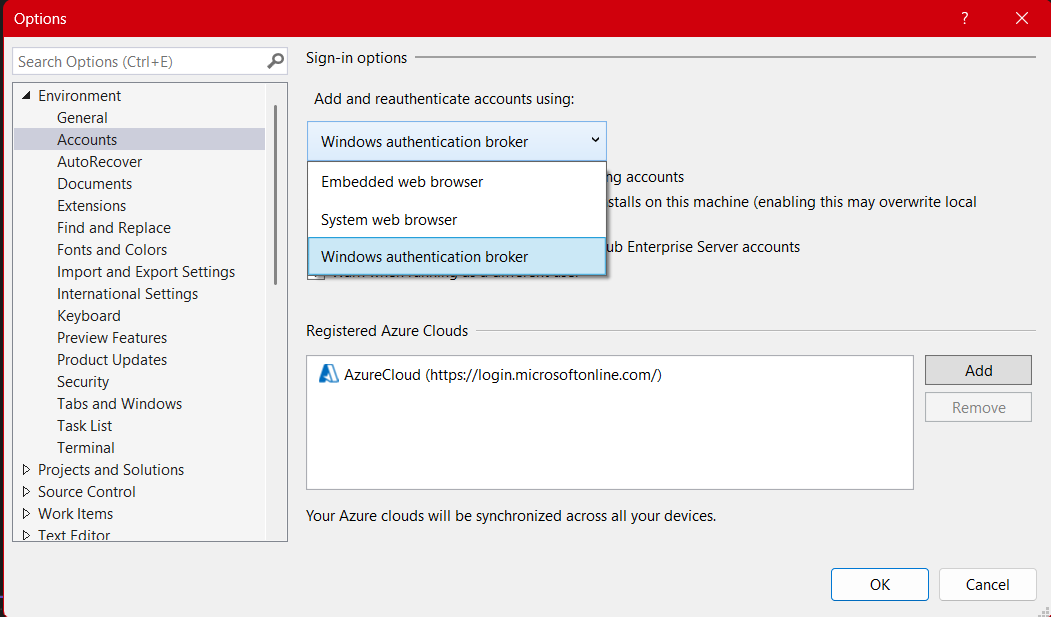
After changing to System browser or Embedded web browser, I was able to complete the entire sign-in flow without issues.
If you’re experiencing similar problems with Visual Studio account authentication, give this simple fix a try!

by Joche Ojeda | Jan 17, 2025 | DevExpress, dotnet
My mom used to say that fashion is cyclical – whatever you do will eventually come back around. I’ve come to realize the same principle applies to technology. Many technologies have come and gone, only to resurface again in new forms.
Take Command Line Interface (CLI) commands, for example. For years, the industry pushed to move away from CLI towards graphical interfaces, promising a more user-friendly experience. Yet here we are in 2025, witnessing a remarkable return to CLI-based tools, especially in software development.
As a programmer, efficiency is key – particularly when dealing with repetitive tasks. This became evident when my business partner Javier and I decided to create our own application templates for Visual Studio. The process was challenging, mainly because Visual Studio’s template infrastructure isn’t well maintained. Documentation was sparse, and the whole process felt cryptic.
Our first major project was creating a template for Xamarin.Forms (now .NET MAUI), aiming to build a multi-target application template that could work across Android, iOS, and Windows. We relied heavily on James Montemagno’s excellent resources and videos to navigate this complex territory.
The task became significantly easier with the introduction of the new SDK-style projects. Compared to the older MSBuild project types, which were notoriously complex to template, the new format makes creating custom project templates much more straightforward.
In today’s development landscape, most application templates are distributed as NuGet packages, making them easier to share and implement. Interestingly, these packages are primarily designed for CLI use rather than Visual Studio’s graphical interface – a perfect example of technology coming full circle.
Following this trend, DevExpress has developed a new set of application templates that work cross-platform using the CLI. These templates leverage SkiaSharp for UI rendering, enabling true multi-IDE and multi-OS compatibility. While they’re not yet compatible with Apple Silicon, that support is likely coming in future updates.
The templates utilize CLI under the hood to generate new project structures. When you install these templates in Visual Studio Code or Visual Studio, they become available through both the CLI and the graphical interface, offering developers the best of both worlds.
Here is the official DevExpress blog post for the new application templates
https://www.devexpress.com/subscriptions/whats-new/#project-template-gallery-net8
Templates for Visual Studio
DevExpress Template Kit for Visual Studio – Visual Studio Marketplace
Templates for VS Code
DevExpress Template Kit for VS Code – Visual Studio Marketplace
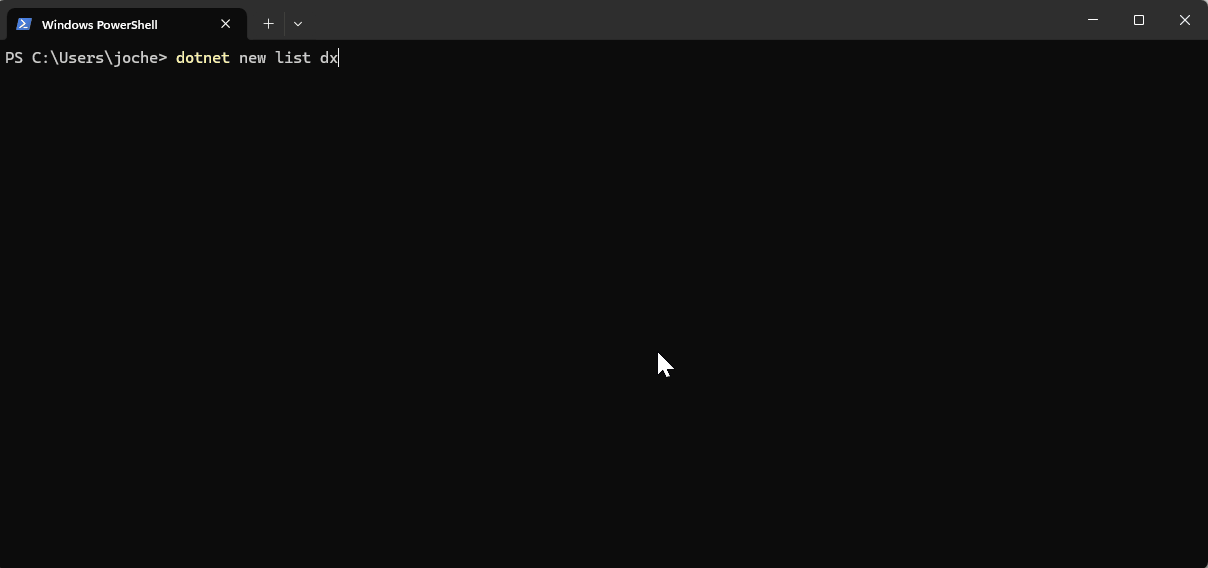
If you want to see the list of the new installed DevExpress templates, you can use the following command on the terminal
dotnet new list dx
I’d love to hear your thoughts on this technological cycle. Which approach do you prefer for creating new projects – CLI or graphical interface? Let me know in the comments below!

by Joche Ojeda | Jun 21, 2024 | Database
Understanding ASCII vs. UTF-8 in Database Queries: A Practical Guide
When dealing with databases, understanding how different character encodings impact queries is crucial. Two common encoding standards are ASCII and UTF-8. This blog post delves into their differences, how they affect case-sensitive queries, and provides practical examples to illustrate these concepts.
ASCII vs. UTF-8: What’s the Difference?
ASCII (American Standard Code for Information Interchange)
- Description: A character encoding standard using 7 bits to represent each character, allowing for 128 unique symbols. These include control characters (like newline), digits, uppercase and lowercase English letters, and some special symbols.
- Range: 0 to 127.
UTF-8 (8-bit Unicode Transformation Format)
- Description: A variable-width character encoding capable of encoding all 1,112,064 valid character code points in Unicode using one to four 8-bit bytes. UTF-8 is backward compatible with ASCII.
- Range: Can represent characters in a much wider range, including all characters in all languages, as well as many symbols and special characters.
ASCII and UTF-8 Position Examples
Let’s compare the positions of some characters in both ASCII and UTF-8:
| Character |
ASCII Position |
UTF-8 Position |
| A |
65 |
65 |
| B |
66 |
66 |
| … |
… |
… |
| Y |
89 |
89 |
| Z |
90 |
90 |
| [ |
91 |
91 |
| \ |
92 |
92 |
| ] |
93 |
93 |
| ^ |
94 |
94 |
| _ |
95 |
95 |
| ` |
96 |
96 |
| a |
97 |
97 |
| b |
98 |
98 |
| … |
… |
… |
| y |
121 |
121 |
| z |
122 |
122 |
| Last ASCII (DEL) |
127 |
127 |
| ÿ |
Not present |
195 191 (2 bytes) |
Case Sensitivity in Database Queries
Case sensitivity can significantly impact database queries, as different encoding schemes represent characters differently.
ASCII Example
-- Case-sensitive query in ASCII-encoded database
SELECT * FROM users WHERE username = 'Alice';
-- This will not return rows with 'alice', 'ALICE', etc.
UTF-8 Example
-- Case-sensitive query in UTF-8 encoded database
SELECT * FROM users WHERE username = 'Ålice';
-- This will not return rows with 'ålice', 'ÅLICE', etc.
Practical Example with Positions
For ASCII, the characters included in the range >= 'A' and <= 'z' are:
A has a position of 65.a has a position of 97.
In a case-sensitive search, these positions are distinct, so A is not equal to a.
For UTF-8, the characters included in this range are the same since UTF-8 is backward compatible with ASCII for characters in this range.
Query Example
Let’s demonstrate a query example for usernames within the range >= 'A' and <= 'z'.
-- Query for usernames in the range 'A' to 'z'
SELECT * FROM users WHERE username >= 'A' AND username <= 'z';
Included Characters
Based on the ASCII positions, the range >= 'A' and <= 'z' includes:
- All uppercase letters:
A to Z (positions 65 to 90)
- Special characters:
[, \, ], ^, _, and ` (positions 91 to 96)
- All lowercase letters:
a to z (positions 97 to 122)
Practical Example with Positions
Given the following table:
-- Create a table
CREATE TABLE users (
    id INT PRIMARY KEY,
    username VARCHAR(255) CHARACTER SET utf8 COLLATE utf8_bin
);

-- Insert some users
INSERT INTO users (id, username) VALUES (1, 'Alice');   -- A = 65, l = 108, i = 105, c = 99, e = 101
INSERT INTO users (id, username) VALUES (2, 'alice');   -- a = 97, l = 108, i = 105, c = 99, e = 101
INSERT INTO users (id, username) VALUES (3, 'Ålice');   -- Å = 195 133, l = 108, i = 105, c = 99, e = 101
INSERT INTO users (id, username) VALUES (4, 'ålice');   -- å = 195 165, l = 108, i = 105, c = 99, e = 101
INSERT INTO users (id, username) VALUES (5, 'Z');       -- Z = 90
INSERT INTO users (id, username) VALUES (6, 'z');       -- z = 122
INSERT INTO users (id, username) VALUES (7, 'ÿ');       -- ÿ = 195 191
INSERT INTO users (id, username) VALUES (8, '_special');-- _ = 95, s = 115, p = 112, e = 101, c = 99, i = 105, a = 97, l = 108
INSERT INTO users (id, username) VALUES (9, 'example'); -- e = 101, x = 120, a = 97, m = 109, p = 112, l = 108, e = 101
Query Execution
-- Execute the query
SELECT * FROM users WHERE username >= 'A' AND username <= 'z';
Query Result
This query will include the following usernames based on the range:
Alice (A = 65, l = 108, i = 105, c = 99, e = 101)Z (Z = 90)example (e = 101, x = 120, a = 97, m = 109, p = 112, l = 108, e = 101)_special (_ = 95, s = 115, p = 112, e = 101, c = 99, i = 105, a = 97, l = 108)alice (a = 97, l = 108, i = 105, c = 99, e = 101)z (z = 122)
However, it will not include:
Ålice (Å = 195 133, l = 108, i = 105, c = 99, e = 101, outside the specified range)ålice (å = 195 165, l = 108, i = 105, c = 99, e = 101, outside the specified range)ÿ (ÿ = 195 191, outside the specified range)
Conclusion
Understanding the differences between ASCII and UTF-8 character positions and ranges is crucial when performing case-sensitive queries in databases. For example, querying for usernames within the range >= 'A' and <= 'z' will include a specific set of characters based on their ASCII positions, impacting which rows are returned in your query results.
By grasping these concepts, you can ensure your database queries are accurate and efficient, especially when dealing with different encoding schemes.