Oqtane Notes: Understanding Site Settings vs. App Settings
OK — it’s time for another blog post (or maybe just a mental note) about Oqtane.
I’ve been doing what feels like a million installations of it lately. Honestly, if the Oqtane team gets a notification every time I spin up a new instance, they’re probably tired of seeing my name by now. I’ve been spending nearly every free minute exploring the framework — I love diving into new technologies, digging into the source code, and figuring out how things really work.
One of the most beautiful parts about Oqtane is that it’s open source. You can simply go into the repository and inspect the source code yourself. Some parts might not be obvious at first glance, but the project’s creator, Shaun Walker, is incredibly responsive and helpful to the community. I think I’ve only posted a couple of issues over the years, but every single time I’ve woken up the next morning with a thoughtful response waiting — even though I’m usually several time zones ahead in Europe. He really knows Oqtane inside and out.
Hosting Models and Render Modes
As you probably know, one of Oqtane’s biggest strengths is its flexibility with Blazor hosting models. It can run as Server or WebAssembly, and you can switch between them with a simple configuration change.
On top of that, Oqtane supports different render modes for components: Interactive or Static. In simple terms, you can choose to render content on the server (similar to how PHP works) or make it fully interactive like a standard Blazor app where the state refreshes dynamically.
You can toggle these behaviors with just a few clicks in the admin backend — which is awesome once you understand how the settings are actually applied.
My Confusion (and the Lesson Learned)
This post was originally meant to be a follow-up to the previous one about database configuration, but I ran into an interesting issue while testing API controllers. I wanted to confirm that when I ran the application in WebAssembly mode, it would hit the API controllers correctly.
It didn’t — at least not at first.
I spent quite a while trying to figure out why. Oqtane has both app-level settings (in appsettings.json) and site-level settings (in the admin panel), and it wasn’t immediately clear which ones took priority. I initially thought I could just change the render and runtime options in appsettings.json, restart the app, and see the effect. But it didn’t work that way.
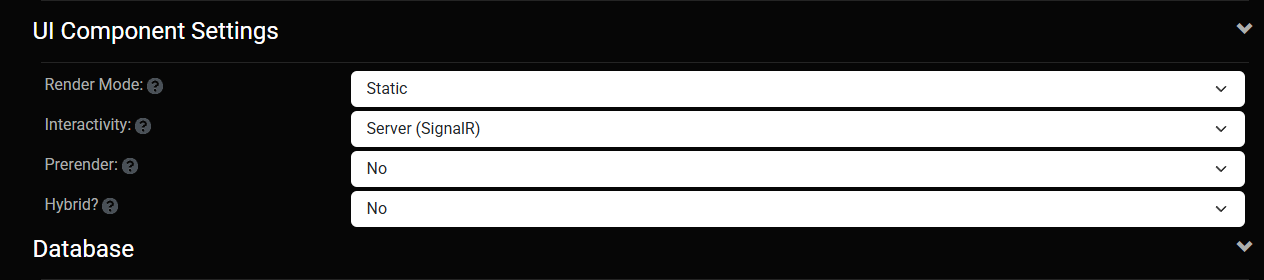
After some trial and error — and a helpful reply from Shaun — I realized my mistake. When you first spin up a new site, Oqtane uses the values defined in appsettings.json. But once that site exists, it maintains its own configuration separately. From that point forward, any runtime or render mode changes must be made in the site settings from the admin panel, not in the original configuration file.
Server Runtime
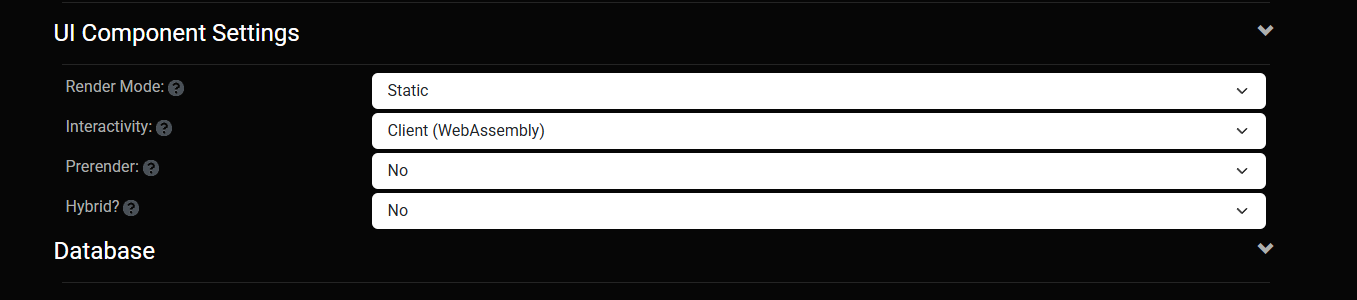
WebAssembly Runtime
The Takeaway
If you edit appsettings.json after your first site is already created, it won’t affect the existing site — those values only apply when a new site is initialized.
So, to summarize:
Before the first run → Configure defaults in appsettings.json.
After the site is running → Change settings from the admin backend.
That was the source of my confusion. Hopefully, this note saves someone else a few hours of head-scratching.
Thanks again to Shaun and the entire Oqtane team for keeping this project alive and so well supported.
These posts are just my personal notes, but I hope they help someone who’s following the same learning path.
In this article, I’ll show you what to do after you’ve obtained and opened an Oqtane solution. Specifically, we’ll go through two different ways to set up your database for the first time.
Using the setup wizard — this option appears automatically the first time you run the application.
Configuring it manually — by directly editing the appsettings.json file to skip the wizard.
Both methods achieve the same result. The only difference is that, if you configure the database manually, you won’t see the setup wizard during startup.
Step 1: Running the Application for the First Time
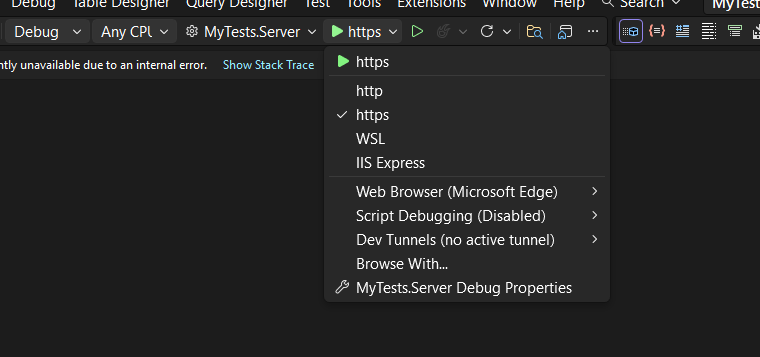
Once your solution is open in Visual Studio, set the Server project as the startup project. Then run it just as you would with any ASP.NET Core application.
You’ll notice several run options — I recommend using the HTTPS version instead of IIS Express (I stopped using IIS Express because it doesn’t work well on ARM-based computers).
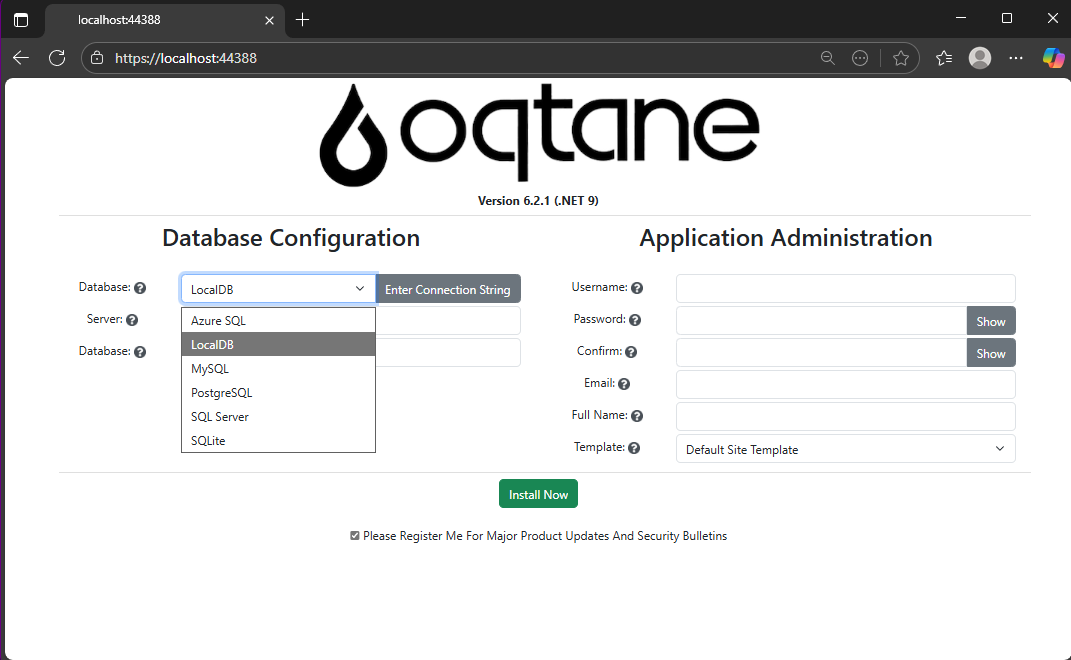
When you run the application for the first time and your settings file is still empty, you’ll see the Database Setup Wizard. As shown in the image, the wizard allows you to select a database provider and configure it through a form.
There’s also an option to paste your connection string directly. Make sure it’s a valid Entity Framework Core connection string.
After that, fill in the admin user’s details — username, email, and password — and you’re done. Once this process completes, you’ll have a working Oqtane installation.
Step 2: Setting Up the Database Manually
If you prefer to skip the wizard, you can configure the database manually. To do this, open the appsettings.json file and add the following parameters:
The database provider type (e.g., SQLite, SQL Server, PostgreSQL, etc.)
The connection string
The admin email and password for the first user — known as the host user (essentially the root or super admin).
This is the method I usually use now since I’ve set up Oqtane so many times recently that I’ve grown tired of the wizard. However, if you’re new to Oqtane, the wizard is a great way to get started.
Wrapping Up
That’s it for this setup guide! By now, you should have a running Oqtane installation configured either through the setup wizard or manually via the configuration file. Both methods give you a solid foundation to start exploring what Oqtane can do.
In the next article, we’ll dive into the Oqtane backend, exploring how the framework handles modules, data, and the underlying architecture that makes it flexible and powerful. Stay tuned — things are about to get interesting!
It’s Sunday — so maybe it’s time to write an article to break the flow I’ve been in lately. I’ve been deep into researching design patterns for Oqtane, the web application framework created by Shaun Walker.
Today I woke up really early, around 4:30 a.m. I went downstairs, made coffee, and decided to play around with some applications I had on my list. One of them was HotKey Typer by James Montemagno.
I ran it for the first time and instantly loved it. It’s super simple and useful — but I had a problem. I started using glasses a few years ago, and I generally have trouble with small UI elements on the computer. I usually work at 150% scaling. Unfortunately, James’s app has a fixed window size, so everything looked cut off.
Since I’ve been coding a lot lately, I figured it would be an easy fix. I tweaked it — and it worked! Everything looked better, but a bit too large, so I adjusted it again… and again… and again. Before I knew it, I had turned it into a totally different application.
I was vibe coding for four or five hours straight. In the end, I added a lot of new functionality because I genuinely loved the app and the idea behind it. I added sets (or collections) — basically groups of snippets you can assign to keys 1–9. Then I added autosave, a settings screen, and a reset option for the collections. Every time I finished one feature, I said, “Just one more thing.” Five minutes turned into five hours.
When I was done, I recorded a demo video. It was a lot of fun — and the result was genuinely useful. I even want to create an installer for myself so I can easily reinstall it if I ever reformat my computer. (I used to be that guy who formatted his PC every month. Not anymore… but you never know.)
Lessons From Vibe Coding
I learned a lot from this little experiment. I’ve been vibe coding nonstop for about three months now — I’ve even used up all my Copilot credits before the 25th of the month more than once! Vibe coding is a lot of fun, but it can easily spiral out of control and take you in the wrong direction.
Next week, I want to change my approach a bit — maybe follow a more structured pattern.
Another thing this reminded me of is how important it is to work in a team. My business partner, José Javier Columbie, has always helped me with that. We’ve been working together for about 10 years now. I’m the kind of developer who keeps rewriting, refactoring, optimizing, making things faster, reusable, turning them into plugins or frameworks — and sometimes the original task was actually quite small.
That’s where Javier comes in. He’s the one who says, “José, it’s done. This is what they asked for, and this is what we’re delivering.” He keeps me grounded. Every developer needs that — or at least needs to learn how to set that boundary for themselves.
Final Thoughts
So that’s my takeaway from today’s vibe coding session: have fun, but know when to stop.
I’ll include below the links to:
James Montemagno’s original HotKey Typer repository
Most of us have fallen into the trap of what I like to call vibe coding. It’s that moment when you’re excited about an idea, you open your editor, call on your favorite AI assistant, and just… vibe. You throw half-baked requirements at the model, it spits out a lot of code, and for a while, it feels like progress.
The problem is, vibe coding usually leads to garbage code, wasted time, and mounting frustration. I know this because I recently spent six hours vibe coding a feature I could have completed in under ten minutes—once I stopped vibing and started documenting.
What Is Vibe Coding?
Vibe coding is coding without a plan. It’s asking an AI to build something from incomplete context, hoping it magically fills in the blanks.
It can look like:
Pasting vague prompts into an LLM: “Build me an activity stream module.”
Copy-pasting stack overflow snippets without really understanding them.
Letting AI hallucinate structures, dependencies, and business rules you never specified.
And it feels productive, because you see code flying across your screen. But what’s really happening is that the AI is guessing. It compiles imaginary versions of your system in its “head,” tries different routes, and produces lots of words that look like solutions but don’t actually fit your framework or needs. The result: chaos disguised as progress.
My Oqtane Activity Stream Story
Here’s a concrete example.
I wanted to build an activity stream—basically, a social-network-style feed—on top of Oqtane, a .NET-based CMS. Now, I know the domain of activity streams really well, but I decided to test how far I could get if I let AI build an Oqtane module for me as if I knew nothing about the framework.
For six hours, I vibe coded. I kept prompting the AI with fragments like:
“Make an Oqtane module for an activity feed.”
“Add a timeline of user events.”
“Hook this up to Oqtane’s structure.”
And the AI did what it does best: it generated code. Lots of it. But the code didn’t fit the Oqtane module lifecycle. It missed important patterns, created unnecessary complexity, and left me stuck in a trial-and-error spiral.
Six hours later, I had nothing usable. Just a pile of messy code and a headache.
The Switch to Vibe Documenting
Then I stepped back. Instead of continuing to let the AI guess, I wrote down what I already knew:
How an Oqtane module is structured.
What the activity stream needed to display.
The key integration points with the CMS.
In other words, I documented the requirements as if I were teaching someone new to Oqtane. Then, I fed that documentation to the AI.
The result? In about eight minutes, I had a clean, working Oqtane module for my activity stream. No trial and error. No hallucinated patterns. Just code that fit perfectly into the framework.
Why Documentation Beats Guesswork
The lesson was obvious: the AI is only as good as the clarity of its input. Documentation gives it structure, reducing the entropy of the problem. Without it, you’re effectively asking the AI to be psychic. With it, you’re giving the AI a blueprint it can execute on with precision.
Think about it this way:
Vibe coding = lots of code, little progress.
Vibe documenting = clear plan, fast progress.
The irony is that documentation often feels slower up front—but it saves exponential time later. In my case, it turned six wasted hours into eight minutes of actual productivity.
The Human Programmer’s Role
This experience reinforced something important: the human programmer isn’t going anywhere. Our role is to act as the bridge between vague ideas and structured requirements.
We’re the ones who take messy, half-formed thoughts and turn them into clear steps. That’s not just busywork—that’s the essence of engineering. Once those steps exist, the AI can handle the grunt work of coding far more effectively than it can guess at our intentions.
In other words: humans reduce chaos; AI executes clarity.
The Guru Lesson
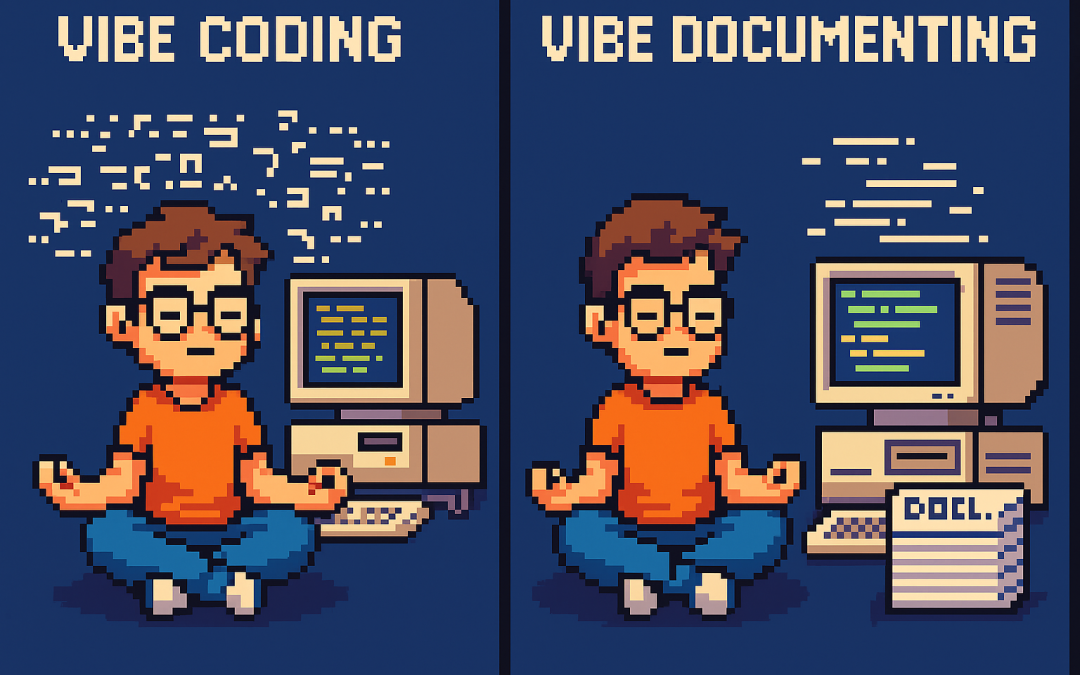
I like to think of it as a guru’s journey. On one side, the vibe coder sits cross-legged in front of a retro computer, letting chaotic lines of code swirl around them. On the other, the vibe documenter floats serenely, armed with neat stacks of documentation, watching clean code flow effortlessly.
The wisdom is simple: don’t vibe code. Vibe document. It’s the difference between six hours of chaos and eight minutes of clarity.
Conclusion
AI coding assistants are incredible, but they’re not mind readers. If you skip documentation, you’ll spend hours wrestling with hallucinated code. If you take the time to document, you’ll unlock the real power of AI: rapid, reliable execution.
So the next time you feel the urge to vibe code, pause. Write down your requirements. Document your framework. Then let the AI do what it does best: build from clarity.
Because vibe coding wastes time—but vibe documenting saves it.
Virtual hosting is a technique used by Apache (and other web servers) to host multiple websites on a single server. With virtual hosting, a single physical server can host multiple virtual servers, each with its own domain name, IP address, and content.
Virtual hosting can be implemented in two ways:
Name-based virtual hosting: In this approach, the server uses the domain name provided in the HTTP request to determine which virtual host should serve the request. For example, if a user requests a page from “example.com”, the server will use the virtual host configured for that domain and serve the appropriate content.
IP-based virtual hosting: In this approach, each virtual host is assigned a separate IP address, and the server uses the IP address in the HTTP request to determine which virtual host should serve the request. For example, if a user requests a page from the IP address assigned to “example.com”, the server will use the virtual host configured for that IP address and serve the appropriate content.
Virtual hosting allows a server to serve multiple websites, each with its own domain name and content, using a single physical server. This makes hosting more efficient and cost-effective, especially for smaller websites that don’t require dedicated servers.
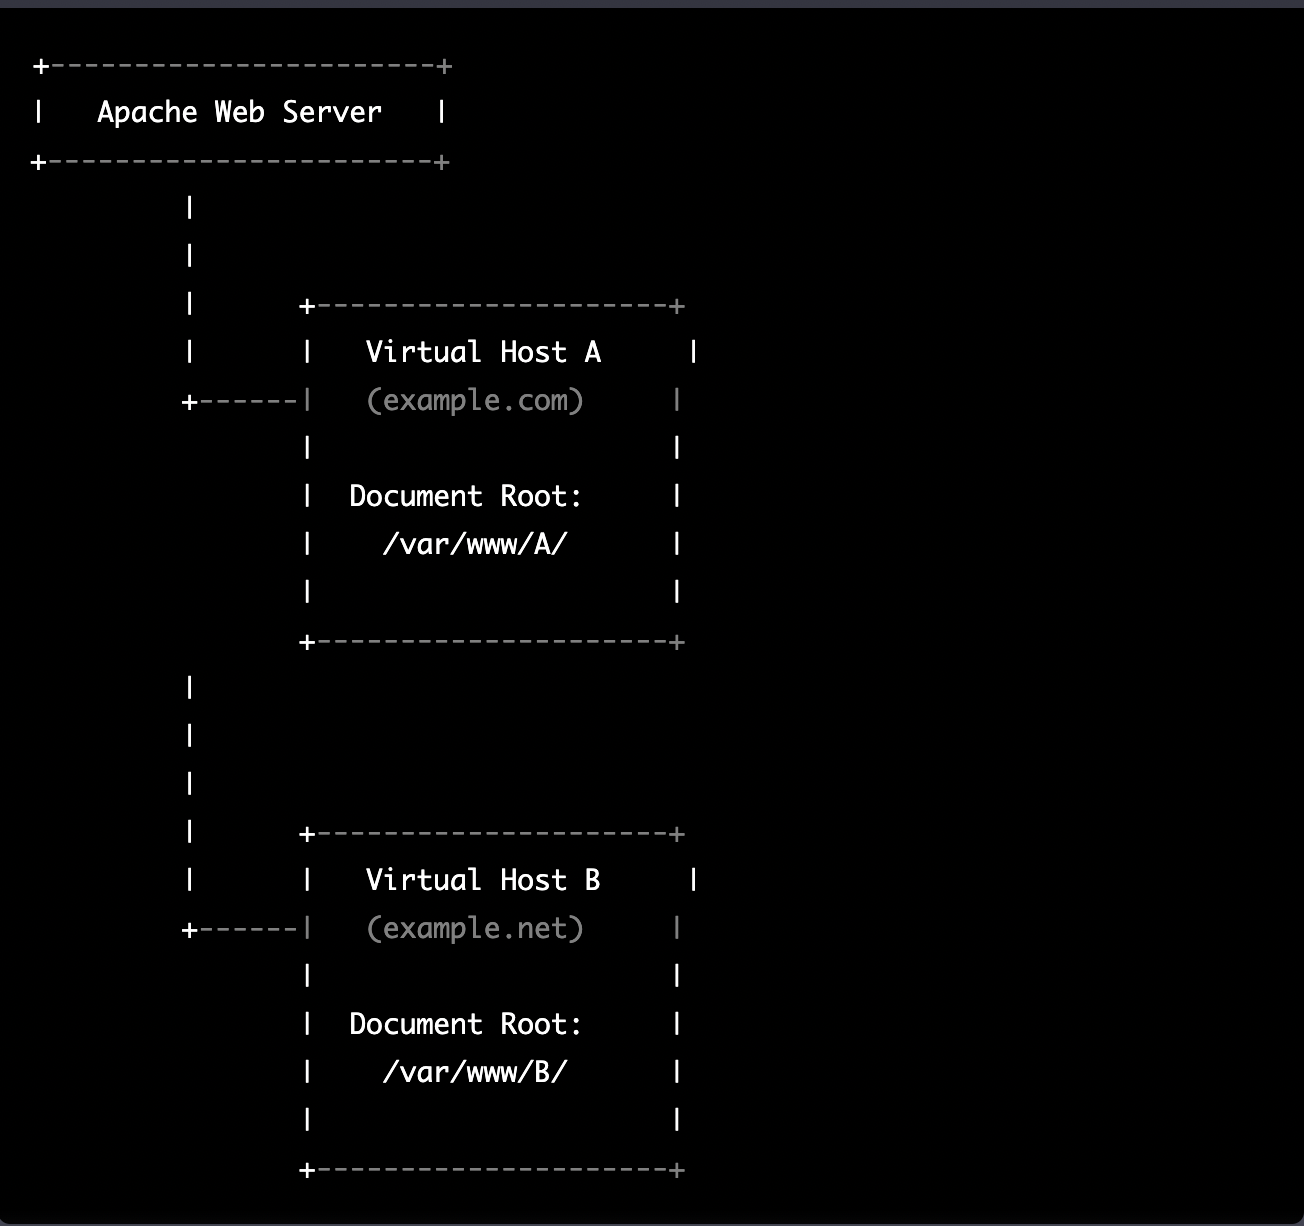
The following diagram represents the most common virtual hosting setup
ASP.NET Core and Blazor applications have the capability to run their own in-process web server, Kestrel. Kestrel can be bound to a specific IP address or port number, enabling the applications to be hosted in virtual environments. To accomplish this, each application can be bound to a unique port number.
+-----------------------+
|   Apache Web Server   |
+-----------------------+
         |
         |
         |      +---------------------+
         |      |   Virtual Host A    |
         +------|   (example.com)     |
                |                     |
                |  Proxy to:          |
                |http://localhost:8016|
                |                     |
                +---------------------+
         |
         |
         |      +---------------------+
         |      |   Virtual Host B    |
         +------|   (example.net)     |
                |                     |
                |  Proxy to:          |
                |http://localhost:8017|
                |                     |
                +---------------------+
As shown in the diagram, physical folders for the document root are no longer utilized. Rather, a proxy is created to the Kestrel web server, which runs our ASP.NET Core applications
There are various approaches that can be used based on the specific use case. For the sake of simplicity in this example, we will be utilizing the configuration method. This involves appending the configuration JSON for the Kestrel web server, as shown in the following example.
As demonstrated, utilizing Oqtane in virtual hosting environments is a straightforward process. There is no need to recompile the source code, as configuring the application for virtual hosting can be easily accomplished through a single configuration section in the appsettings.json file.