
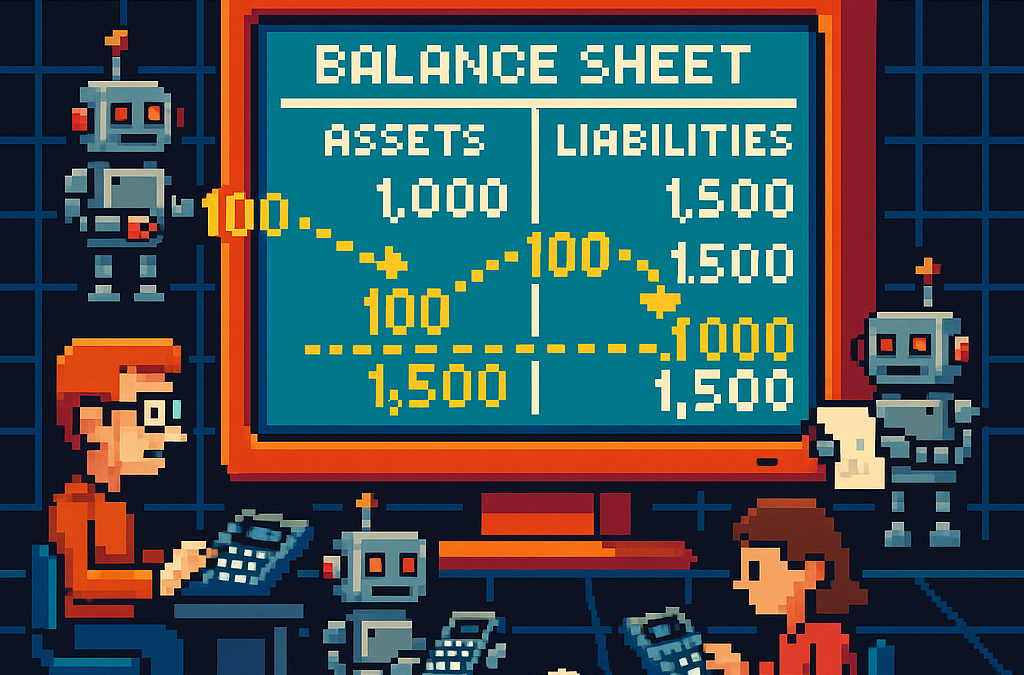
by Joche Ojeda | Jan 21, 2026 | Uncategorized
This is a story about testing XAF applications — and why now is finally the right time to do it properly.
With Copilot agents and AI-assisted coding, writing code has become cheaper and faster than ever. Features that used to take days now take hours. Boilerplate is almost free.
And that changes something important.
For the first time, many of us actually have time to do the things we always postponed:
- documenting the source code,
- writing proper user manuals,
- and — yes — writing tests.
But that immediately raises the real question:
What kind of tests should I even write?
Most developers use “unit tests” as a synonym for “tests”. But once you move beyond trivial libraries and into real application frameworks, that definition becomes fuzzy very quickly.
And nowhere is that more obvious than in XAF.
I’ve been working with XAF for something like 15–18 years (I’ve honestly lost count). It’s my preferred application framework, and it’s incredibly productive — but testing it “as-is” can feel like wrestling a framework-shaped octopus.
So let’s clarify something first.
You don’t test the framework. You test your logic.
XAF already gives you a lot for free:
- CRUD
- UI generation
- validation plumbing
- security system
- object lifecycle
- persistence
DevExpress has already tested those parts — thousands of times, probably millions by now.
So you do not need to write tests like:
- “Can ObjectSpace save an object?”
- “Does XAF load a View?”
- “Does the security system work?”
You assume those things work.
Your responsibility is different.
You test the decisions your application makes.
That principle applies to XAF — and honestly, to any serious application framework.
The mental shift: what is a “unit”, really?
In classic theory, a unit is the smallest piece of code with a single responsibility — usually a method.
In real applications, that definition is often too small to be useful.
Sometimes the real “unit” is:
- a workflow,
- a business decision,
- a state transition,
- or a rule spanning multiple objects.
In XAF especially, the decision matters more than the method.
That’s why the right question is not “how do I unit test XAF?”
The right question is:
Which decisions in my app are important enough to protect?
The test pyramid for XAF
A practical, realistic test pyramid for XAF looks like this:
- Fast unit tests for pure logic
- Unit tests with thin seams around XAF-specific dependencies
- Integration tests with a real ObjectSpace (confidence tests)
- Minimal UI tests only for critical wiring
Let’s go layer by layer.
1) Push logic out of XAF into plain services (fast unit tests)
This is the biggest win you’ll ever get.
The moment you move important logic out of:
- Controllers
- Rules
- ObjectSpace-heavy code
…testing becomes boring — and boring is good.
Put non-UI logic into:
- Domain services (e.g.
IInvoicePricingService)
- Use-case handlers (
CreateInvoiceHandler, PostInvoiceHandler)
- Pure methods (no ObjectSpace, no View, no security calls)
Now you can test with plain xUnit / NUnit and simple mocks or fakes.
What is a service?
A service is code that makes business decisions.
It answers questions like:
- “Can this invoice be posted?”
- “Is this discount valid?”
- “What is the total?”
- “Is the user allowed to approve this?”
A service:
- contains real logic
- is framework-agnostic
- is the thing you most want to unit test
If code decides why something happens, it belongs in a service.
2) Unit test XAF-specific logic with thin seams
Some logic will always touch XAF concepts. That’s fine.
The trick is not to eliminate XAF — it’s to isolate it.
You do that by introducing seams.
What is a seam?
A seam is a boundary where you can replace a real dependency with a fake one in a test.
A seam:
- usually contains no business logic
- exists mainly for testability
- is often an interface or wrapper
Common XAF seams:
ICurrentUser instead of SecuritySystem.CurrentUserIClock instead of DateTime.Now- repositories / unit-of-work instead of raw
IObjectSpace
IUserNotifier instead of direct UI calls
Seams don’t decide anything — they just let you escape the framework in tests.
What does “adapter” mean in XAF?
An adapter is a very thin class whose job is to:
- translate XAF concepts (View, ObjectSpace, Actions, Rules)
- into calls to your services and use cases
Adapters:
- contain little or no business logic
- are allowed to be hard to unit test
- exist to connect XAF to your code
Typical XAF adapters:
- Controllers
- Appearance Rules
- Validation Rules
- Action handlers
- Property setters that delegate to services
The adapter is not the brain.
The brain lives in services.
What should you test here?
- Appearance Rules
Test the decision behind the rule (e.g. “Is this field editable now?”).
Then confirm via integration tests that the rule is wired correctly.
- Validation Rules
Test the validation logic itself (conditions, edge cases).
Optionally verify that the XAF rule triggers when expected.
- Calculated properties / non-trivial setters
- Controller decision logic once extracted from the Controller
3) Integration tests with a real ObjectSpace (confidence tests)
Unit tests prove your logic is correct.
Integration tests prove your XAF wiring still behaves.
They answer questions like:
- Does persistence work?
- Do validation and appearance rules trigger?
- Do lifecycle hooks behave?
- Does security configuration work as expected?
4) Minimal UI tests (only for critical wiring)
UI automation is expensive and fragile.
Keep UI tests only for:
- Critical actions
- Essential navigation flows
- Known production regressions
The key mental model
A rule is not the unit.
The decision behind the rule is the unit.
Test the decision directly.
Use integration tests to confirm the glue still works.
Closing thought
Test your app’s decisions, not the framework’s behavior.
That’s the difference between a test suite that helps you move faster
and one that quietly turns into a tax.
by Joche Ojeda | May 5, 2025 | Uncategorized
Integration testing is a critical phase in software development where individual modules are combined and tested as a group. In our accounting system, we’ve created a robust integration test that demonstrates how the Document module and Chart of Accounts module interact to form a functional accounting system. In this post, I’ll explain the components and workflow of our integration test.
The Architecture of Our Integration Test
Our integration test simulates a small retail business’s accounting operations. Let’s break down the key components:
Test Fixture Setup
The AccountingIntegrationTests class contains all our test methods and is decorated with the [TestFixture] attribute to identify it as a NUnit test fixture. The Setup method initializes our services and data structures:
[SetUp]
public async Task Setup()
{
    // Initialize services
    _auditService = new AuditService();
    _documentService = new DocumentService(_auditService);
    _transactionService = new TransactionService();
    _accountValidator = new AccountValidator();
    _accountBalanceCalculator = new AccountBalanceCalculator();

    // Initialize storage
    _accounts = new Dictionary<string, AccountDto>();
    _documents = new Dictionary<string, IDocument>();
    _transactions = new Dictionary<string, ITransaction>();

    // Create Chart of Accounts
    await SetupChartOfAccounts();
}
This method:
- Creates instances of our services
- Sets up in-memory storage for our entities
- Calls
SetupChartOfAccounts() to create our initial chart of accounts
Chart of Accounts Setup
The SetupChartOfAccounts method creates a basic chart of accounts for our retail business:
private async Task SetupChartOfAccounts()
{
    // Clear accounts dictionary in case this method is called multiple times
    _accounts.Clear();

    // Assets (1xxxx)
    await CreateAccount("Cash", "10100", AccountType.Asset, "Cash on hand and in banks");
    await CreateAccount("Accounts Receivable", "11000", AccountType.Asset, "Amounts owed by customers");
    // ... more accounts

    // Verify all accounts are valid
    foreach (var account in _accounts.Values)
    {
        bool isValid = _accountValidator.ValidateAccount(account);
        Assert.That(isValid, Is.True, $"Account {account.AccountName} validation failed");
    }

    // Verify expected number of accounts
    Assert.That(_accounts.Count, Is.EqualTo(17), "Expected 17 accounts in chart of accounts");
}
This method:
- Creates accounts for each category (Assets, Liabilities, Equity, Revenue, and Expenses)
- Validates each account using our
AccountValidator
- Ensures we have the expected number of accounts
Individual Transaction Tests
We have separate test methods for specific transaction types:
Purchase of Inventory
CanRecordPurchaseOfInventory demonstrates recording a supplier invoice:
[Test]
public async Task CanRecordPurchaseOfInventory()
{
    // Arrange - Create document
    var document = new DocumentDto { /* properties */ };

    // Act - Create document, transaction, and entries
    var createdDocument = await _documentService.CreateDocumentAsync(document, TEST_USER);
    // ... create transaction and entries

    // Validate transaction
    var isValid = await _transactionService.ValidateTransactionAsync(
        createdTransaction.Id, ledgerEntries);

    // Assert
    Assert.That(isValid, Is.True, "Transaction should be balanced");
}
This test:
- Creates a document for our inventory purchase
- Creates a transaction linked to that document
- Creates ledger entries (debiting Inventory, crediting Accounts Payable)
- Validates that the transaction is balanced (debits = credits)
Sale to Customer
CanRecordSaleToCustomer demonstrates recording a customer sale:
[Test]
public async Task CanRecordSaleToCustomer()
{
    // Similar pattern to inventory purchase, but with sale-specific entries
    // ...

    // Create ledger entries - a more complex transaction with multiple entries
    var ledgerEntries = new List<ILedgerEntry>
    {
        // Cash received
        // Sales revenue
        // Cost of goods sold
        // Reduce inventory
    };

    // Validate transaction
    // ...
}
This test is more complex, recording both the revenue side (debit Cash, credit Sales Revenue) and the cost side (debit Cost of Goods Sold, credit Inventory) of a sale.
Full Accounting Cycle Test
The CanExecuteFullAccountingCycle method ties everything together:
[Test]
public async Task CanExecuteFullAccountingCycle()
{
    // Run these in a defined order, with clean account setup first
    _accounts.Clear();
    _documents.Clear();
    _transactions.Clear();

    await SetupChartOfAccounts();

    // 1. Record inventory purchase
    await RecordPurchaseOfInventory();

    // 2. Record sale to customer
    await RecordSaleToCustomer();

    // 3. Record utility expense
    await RecordBusinessExpense();

    // 4. Create a payment to supplier
    await RecordPaymentToSupplier();

    // 5. Verify account balances
    await VerifyAccountBalances();
}
This test:
- Starts with a clean state
- Records a sequence of business operations
- Verifies the final account balances
Mock Account Balance Calculator
The MockAccountBalanceCalculator is a crucial part of our test that simulates how a real database would work:
public class MockAccountBalanceCalculator : AccountBalanceCalculator
{
    private readonly Dictionary<string, AccountDto> _accounts;
    private readonly Dictionary<Guid, List<LedgerEntryDto>> _ledgerEntriesByTransaction = new();
    private readonly Dictionary<Guid, decimal> _accountBalances = new();

    public MockAccountBalanceCalculator(
        Dictionary<string, AccountDto> accounts,
        Dictionary<string, ITransaction> transactions)
    {
        _accounts = accounts;

        // Create mock ledger entries for each transaction
        InitializeLedgerEntries(transactions);

        // Calculate account balances based on ledger entries
        CalculateAllBalances();
    }

    // Methods to initialize and calculate
    // ...
}
This class:
- Takes our accounts and transactions as inputs
- Creates a collection of ledger entries for each transaction
- Calculates account balances based on these entries
- Provides methods to query account balances and ledger entries
The InitializeLedgerEntries method creates a collection of ledger entries for each transaction:
private void InitializeLedgerEntries(Dictionary<string, ITransaction> transactions)
{
    // For inventory purchase
    if (transactions.TryGetValue("InventoryPurchase", out var inventoryPurchase))
    {
        var entries = new List<LedgerEntryDto>
        {
            // Create entries for this transaction
            // ...
        };
        _ledgerEntriesByTransaction[inventoryPurchase.Id] = entries;
    }

    // For other transactions
    // ...
}
The CalculateAllBalances method processes these entries to calculate account balances:
private void CalculateAllBalances()
{
    // Initialize all account balances to zero
    foreach (var account in _accounts.Values)
    {
        _accountBalances[account.Id] = 0m;
    }

    // Process each transaction's ledger entries
    foreach (var entries in _ledgerEntriesByTransaction.Values)
    {
        foreach (var entry in entries)
        {
            if (entry.EntryType == EntryType.Debit)
            {
                _accountBalances[entry.AccountId] += entry.Amount;
            }
            else // Credit
            {
                _accountBalances[entry.AccountId] -= entry.Amount;
            }
        }
    }
}
This approach closely mirrors how a real accounting system would work with a database:
- Ledger entries are stored in collections (similar to database tables)
- Account balances are calculated by processing all relevant entries
- The calculator provides methods to query this data (similar to a repository)
Balance Verification
The VerifyAccountBalances method uses our mock calculator to verify account balances:
private async Task VerifyAccountBalances()
{
    // Create mock balance calculator
    var mockBalanceCalculator = new MockAccountBalanceCalculator(_accounts, _transactions);

    // Verify individual account balances
    decimal cashBalance = mockBalanceCalculator.CalculateAccountBalance(
        _accounts["Cash"].Id,
        _testDate.AddDays(15)
    );
    Assert.That(cashBalance, Is.EqualTo(-2750m), "Cash balance is incorrect");

    // ... verify other account balances

    // Also verify the accounting equation
    // ...
}
The Benefits of Our Collection-Based Approach
Our redesigned MockAccountBalanceCalculator offers several advantages:
- Data-Driven: All calculations are based on collections of data, not hardcoded values.
- Flexible: New transactions can be added easily without changing calculation logic.
- Maintainable: If transaction amounts change, we only need to update them in one place.
- Realistic: This approach closely mirrors how a real database-backed accounting system would work.
- Extensible: We can add support for more complex queries like filtering by date range.
The Goals of Our Integration Test
Our integration test serves several important purposes:
- Verify Module Integration: Ensures that the Document module and Chart of Accounts module work correctly together.
- Validate Business Workflows: Confirms that standard accounting workflows (purchasing, sales, expenses, payments) function as expected.
- Ensure Data Integrity: Verifies that all transactions maintain balance (debits = credits) and that account balances are accurate.
- Test Double-Entry Accounting: Confirms that our system properly implements double-entry accounting principles where every transaction affects at least two accounts.
- Validate Accounting Equation: Ensures that the fundamental accounting equation (Assets = Liabilities + Equity + (Revenues – Expenses)) remains balanced.
Conclusion
This integration test demonstrates the core functionality of our accounting system using a data-driven approach that closely mimics a real database. By simulating a retail business’s transactions and storing them in collections, we’ve created a realistic test environment for our double-entry accounting system.
The collection-based approach in our MockAccountBalanceCalculator allows us to test complex accounting logic without an actual database, while still ensuring that our calculations are accurate and our accounting principles are sound.
While this test uses in-memory collections rather than a database, it provides a strong foundation for testing the business logic of our accounting system in a way that would translate easily to a real-world implementation.
Repo
egarim/SivarErp: Open Source ERP
About Us
YouTube
https://www.youtube.com/c/JocheOjedaXAFXAMARINC
Our sites
Let’s discuss your XAF
This call/zoom will give you the opportunity to define the roadblocks in your current XAF solution. We can talk about performance, deployment or custom implementations. Together we will review you pain points and leave you with recommendations to get your app back in track
https://calendly.com/bitframeworks/bitframeworks-free-xaf-support-hour
Our free A.I courses on Udemy

by Joche Ojeda | Apr 2, 2025 | Testing
In the last days, I have been dealing with a chat prototype that uses SignalR. I’ve been trying to follow the test-driven development (TDD) approach as I like this design pattern. I always try to find a way to test my code and define use cases so that when I’m refactoring or writing code, as long as the tests pass, I know everything is fine.
When doing ORM-related problems, testing is relatively easy because you can set up a memory provider, have a clean database, perform your operations, and then revert to normal. But when testing APIs, there are several approaches.
Some approaches are more like unit tests where you get a controller and directly pass values by mocking them. However, I prefer tests that are more like integration tests – for example, I want to test a scenario where I send a message to a chat and verify that the message send event was real. I want to show the complete set of moving parts and make sure they work together.
In this article, I want to explore how to do this type of test with REST APIs by creating a test host server. This test host creates two important things: a handler and an HTTP client. If you use the HTTP client, each HTTP operation (POST, GET, etc.) will be sent to the controllers that are set up for the test host. For the test host, you do the same configuration as you would for any other host – you can use a startup class or add the services you need and configure them.
I wanted to do the same for SignalR chat applications. In this case, you don’t need the HTTP client; you need the handler. This means that each request you make using that handler will be directed to the hub hosted on the HTTP test host.
Here’s the code that shows how to create the test host:
// ARRANGE
// Build a test server
var hostBuilder = new HostBuilder()
    .ConfigureWebHost(webHost =>
    {
        webHost.UseTestServer();
        webHost.UseStartup<Startup>();
    });

var host = await hostBuilder.StartAsync();

//Create a test server
var server = host.GetTestServer();
And now the code for handling SignalR connections:
         // Create SignalR connection
         var connection = new HubConnectionBuilder()
             .WithUrl("http://localhost/chathub", options =>
             {
                 // Set up the connection to use the test server
                 options.HttpMessageHandlerFactory = _ => server.CreateHandler();
             })
             .Build();

         string receivedUser = null;
         string receivedMessage = null;

         // Set up a handler for received messages
         connection.On<string, string>("ReceiveMessage", (user, message) =>
         {
             receivedUser = user;
             receivedMessage = message;
         });
//if we take a closer look, we can see the creation of the test handler "server.CreateHandler"
var connection = new HubConnectionBuilder() .WithUrl("http://localhost/chathub", options =>
{
// Set up the connection to use the test server
options.HttpMessageHandlerFactory = _ => server.CreateHandler();
}) .Build();
Now let’s open a SignalR connection and see if we can connect to our test server:
          string receivedUser = null;
          string receivedMessage = null;

          // Set up a handler for received messages
          connection.On<string, string>("ReceiveMessage", (user, message) =>
          {
              receivedUser = user;
              receivedMessage = message;
          });

          // ACT
          // Start the connection
          await connection.StartAsync();

          // Send a test message through the hub
          await connection.InvokeAsync("SendMessage", "TestUser", "Hello SignalR");

          // Wait a moment for the message to be processed
          await Task.Delay(100);

          // ASSERT
          // Verify the message was received correctly
          Assert.That("TestUser"==receivedUser);
          Assert.That("Hello SignalR"== receivedMessage);

          // Clean up
          await connection.DisposeAsync();
You can find the complete source of this example here: https://github.com/egarim/TestingSignalR/blob/master/UnitTest1.cs