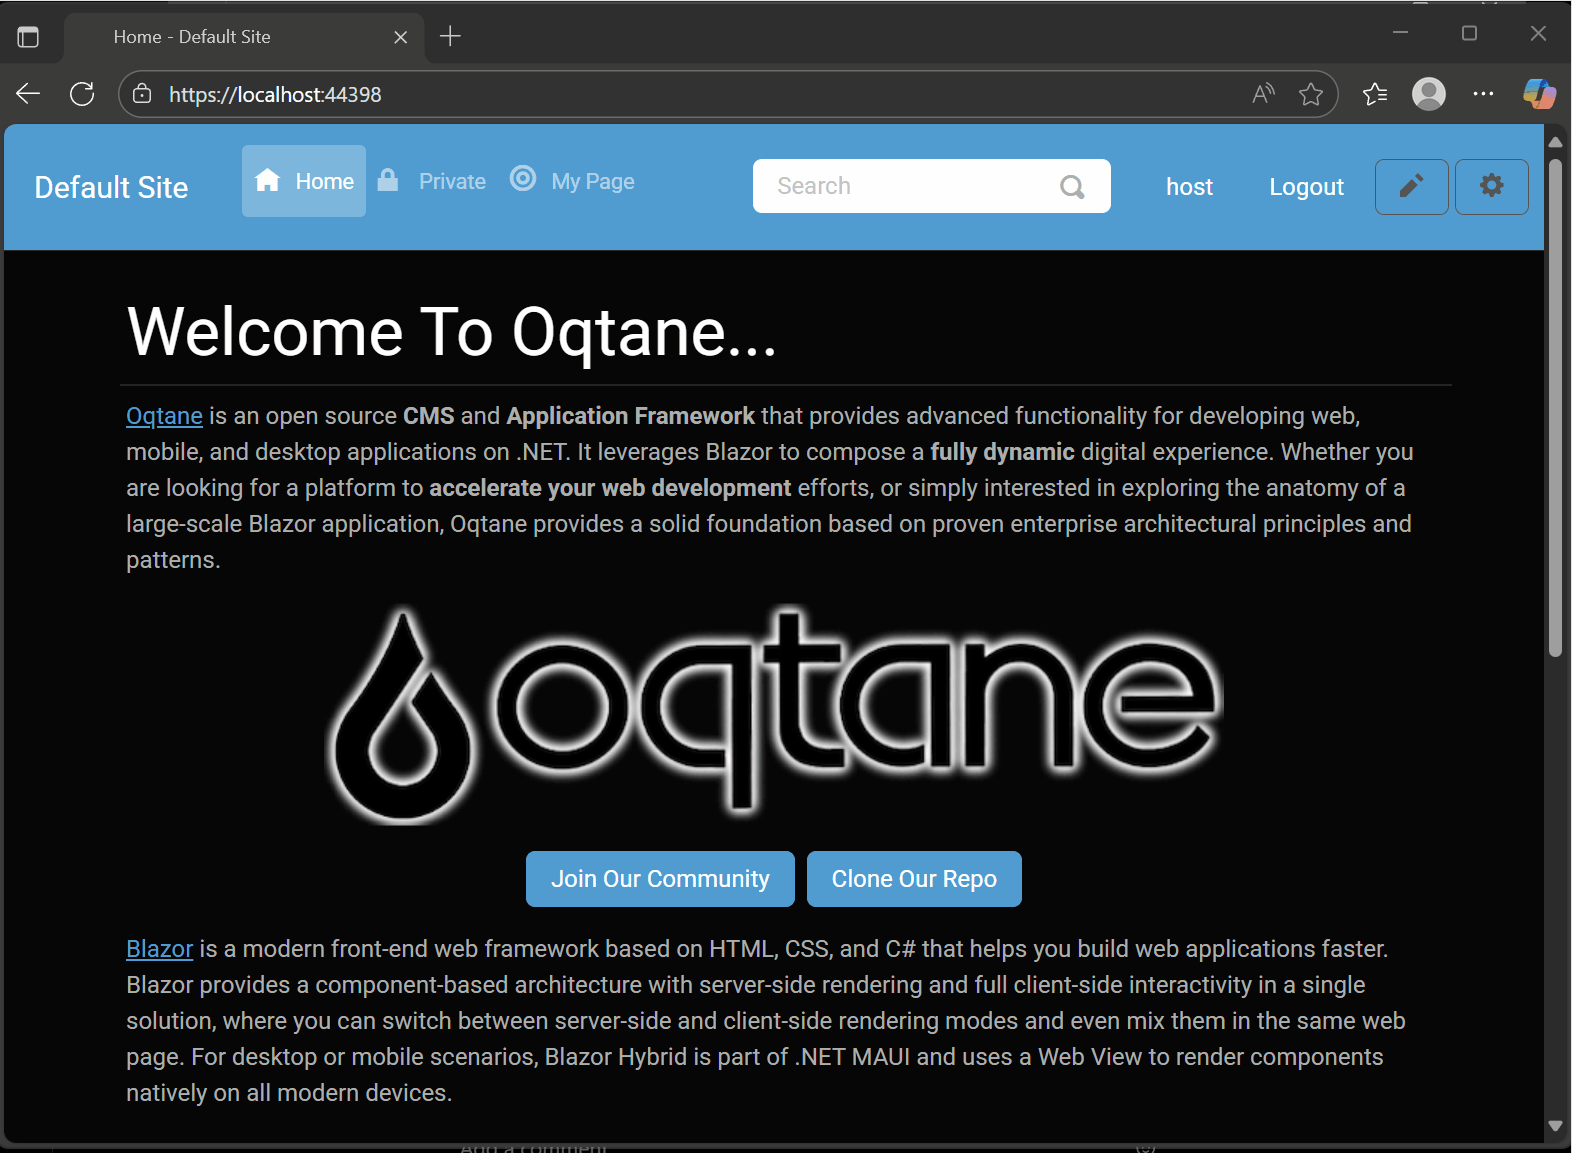
by Joche Ojeda | Oct 8, 2025 | Oqtane, Tenants
OK — it’s time for today’s Oqtane blog post!
Yesterday, I wrote about changing the runtime mode in Oqtane and how that allows you to switch between
Blazor Server and Blazor WebAssembly functionality.
Today, I decided to explore how multi-tenancy works — specifically, how Oqtane manages multiple sites within the same
installation.
Originally, I wanted to cover the entire administrative panel and all of its modules in one post, but that would’ve been too big.
So, I’m breaking it down into smaller topics. This post focuses only on site functionality and how
multi-tenancy works from the administrative side — basically, how to set up tenants in Oqtane.
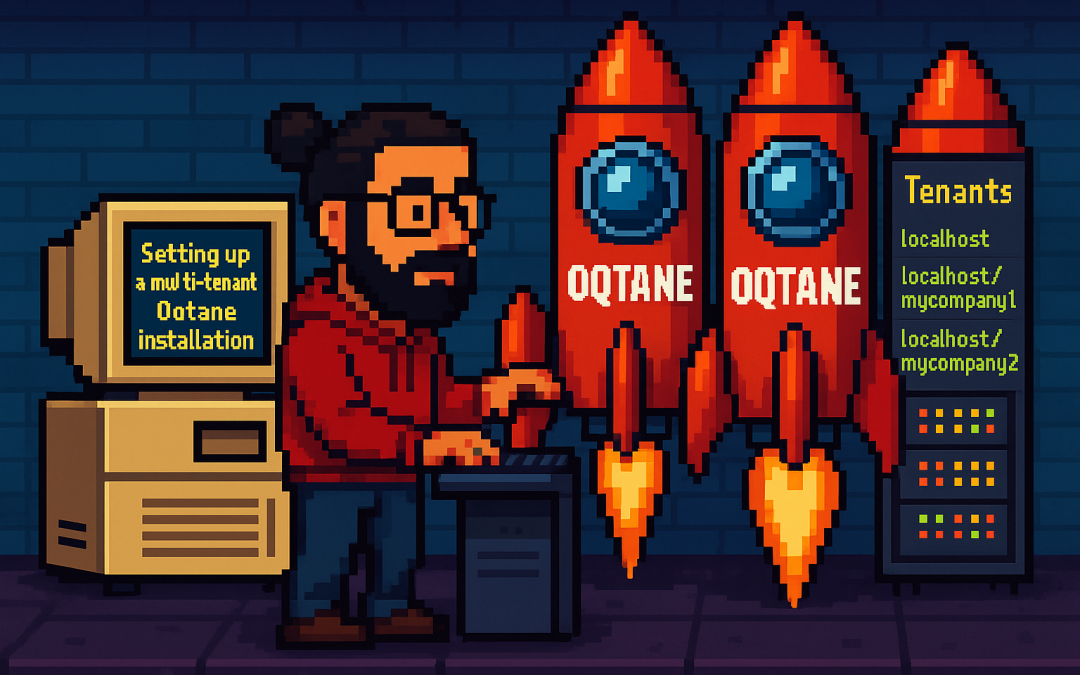
Setting Up a Multi-Tenant Oqtane Installation
To make these experiments easy to replicate, I decided to use SQLite as my database.
I created a new .NET Oqtane application using the official templates and added it to a
GitHub repository.
Here’s what I did:
- Set up the host configuration directly in
appsettings.json.
- Ran the app, went to the admin panel, and created two additional sites.
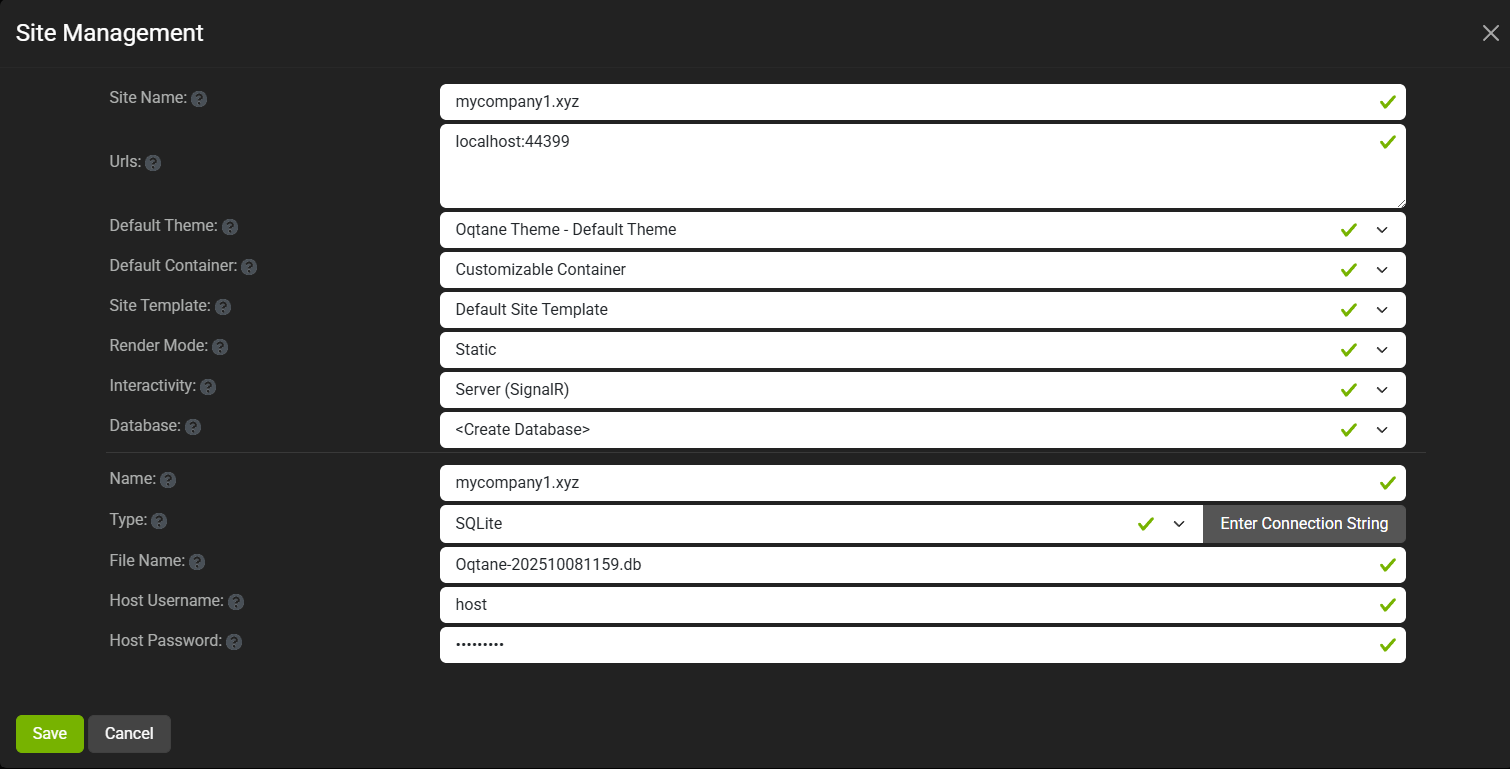
You can see the screenshots below showing the settings for each site.
At first, it was a bit confusing — I thought I could simply use different ports for each site (like 8081,
8082, etc.), but that’s not how Oqtane works. Everything runs in the same process, so all tenants
share the same port.
Instead of changing ports, you configure different URL paths or folders. For example:
http://localhost:8080/ → the main hosthttp://localhost:8080/mycompany1 → first tenanthttp://localhost:8080/mycompany2 → second tenant
Site Managment
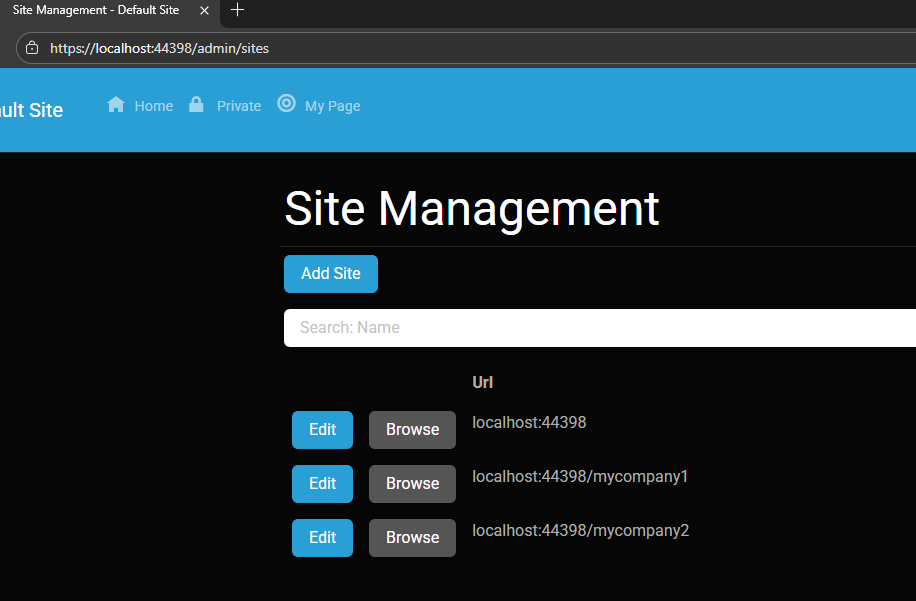
Site MyCompany1
Site MyCompany2
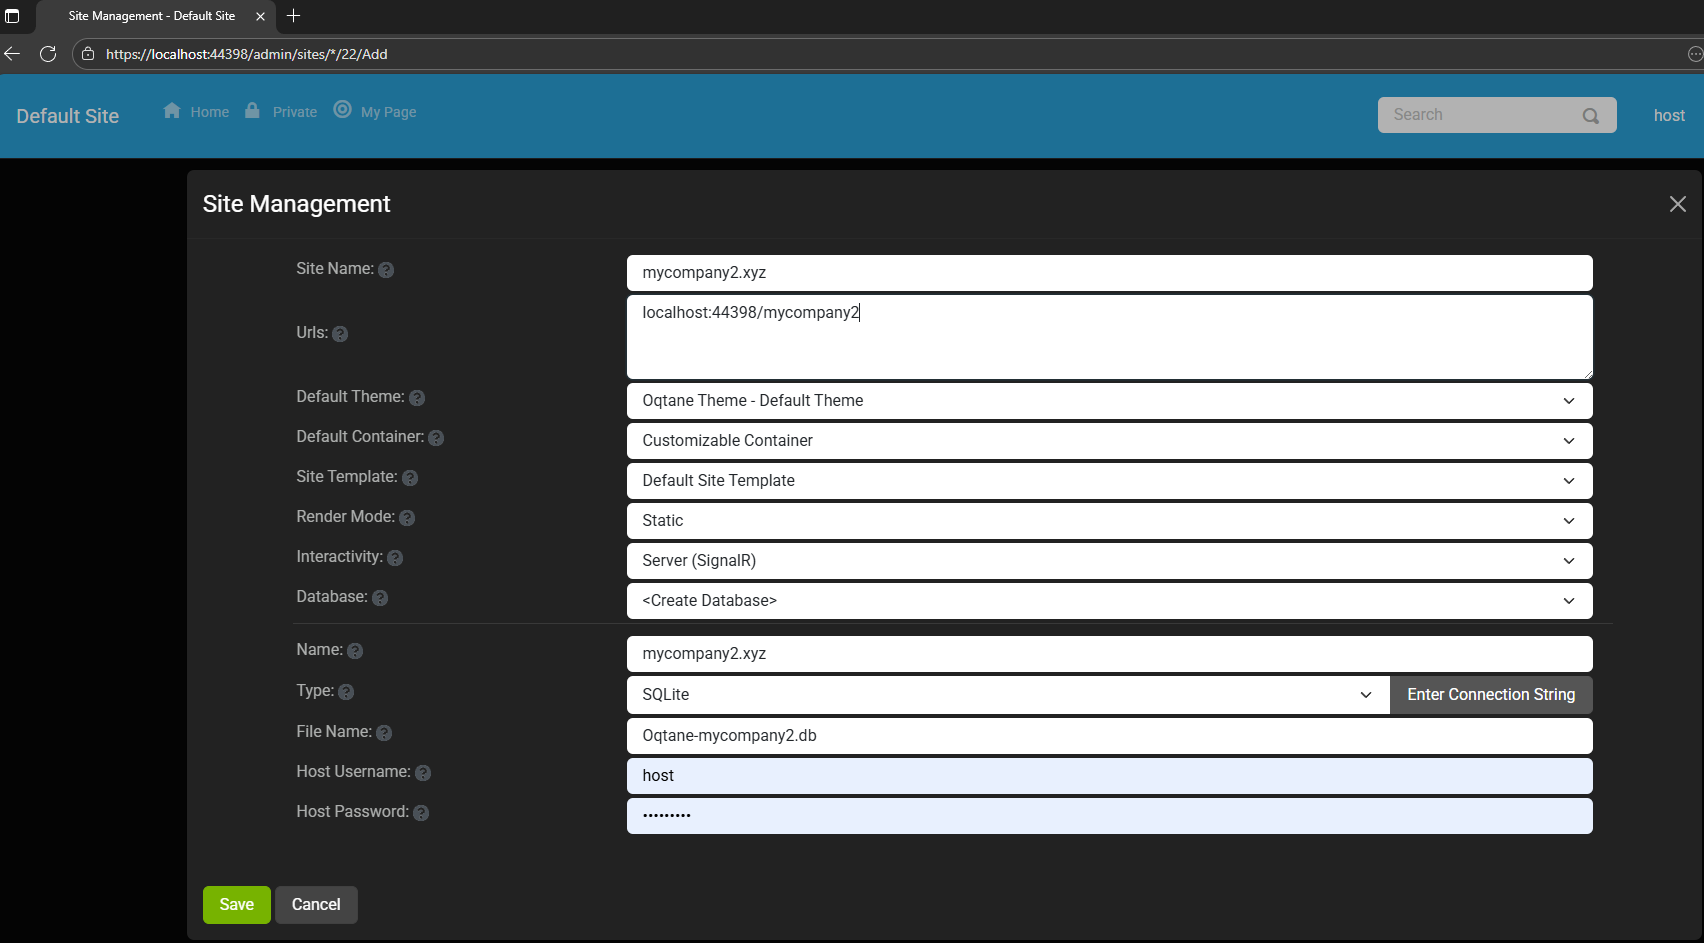
Each tenant can:
- Use a separate database or share the same one as the host
- Have its own theme
- Maintain independent site settings
In the short GIF animation I attached to the repository, you can see how each site has its
own unique visual theme — it’s really neat to watch.
When you add a new site, its connection string is also stored automatically in the application settings. So, if you download
the repository and run it locally, you’ll be able to access all the sites and see how the URLs and configurations work.
Here is the repository egarim/OqtaneMultiTenant: an example of how to use multi tenant in oqtane
Why I’m Doing These Posts
These blog entries are like my personal research notes — documenting what I discover while working with Oqtane.
I’m keeping each experiment small and reproducible so I can:
- Share them with others easily
- Download them later and reproduce the same setup, including data and configuration
What’s Next
In the next post, I’ll cover virtual hosting — how to use domain names that forward to specific
URLs or tenants. I’ve already done some research on that, but I don’t want to overload this post with too many topics.
For now, I’ll just attach the screenshots showing the different site configurations and URLs, along with a link to the GitHub
repository so you can try it yourself.
If you have any questions, feel free to reach out! I’ll keep documenting everything as I go.
One of the great things about Oqtane is that it’s open source — you can always dive into the code, or if you’re
stuck, open a GitHub issue. Shaun Walker and the community are incredibly helpful, so don’t hesitate to ask.
Thanks again to the Oqtane team for building such an amazing framework.
by Joche Ojeda | Oct 7, 2025 | Oqtane
Oqtane Notes: Understanding Site Settings vs. App Settings
OK — it’s time for another blog post (or maybe just a mental note) about Oqtane.
I’ve been doing what feels like a million installations of it lately. Honestly, if the Oqtane team gets a notification every time I spin up a new instance, they’re probably tired of seeing my name by now. I’ve been spending nearly every free minute exploring the framework — I love diving into new technologies, digging into the source code, and figuring out how things really work.
One of the most beautiful parts about Oqtane is that it’s open source. You can simply go into the repository and inspect the source code yourself. Some parts might not be obvious at first glance, but the project’s creator, Shaun Walker, is incredibly responsive and helpful to the community. I think I’ve only posted a couple of issues over the years, but every single time I’ve woken up the next morning with a thoughtful response waiting — even though I’m usually several time zones ahead in Europe. He really knows Oqtane inside and out.
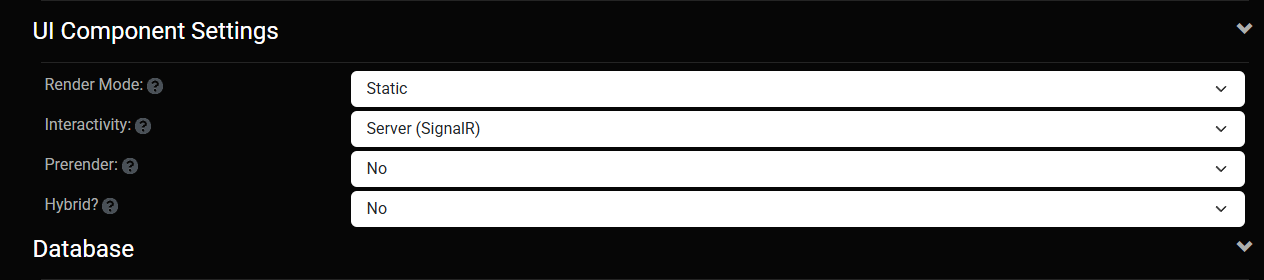
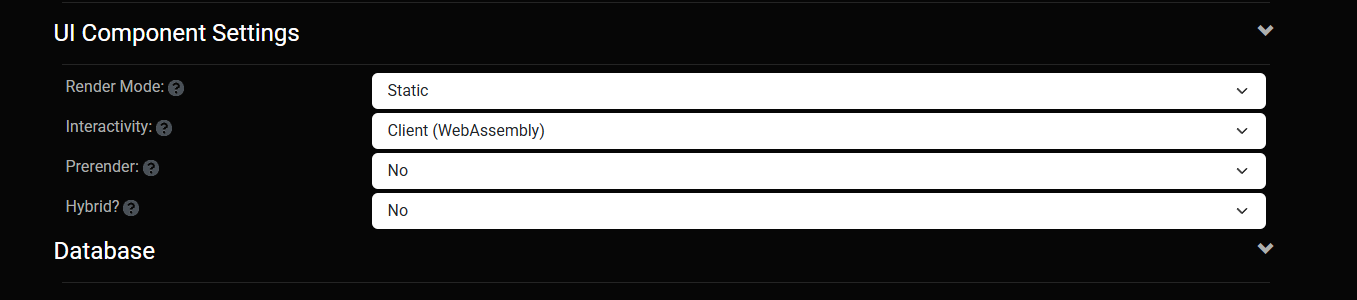
Hosting Models and Render Modes
As you probably know, one of Oqtane’s biggest strengths is its flexibility with Blazor hosting models. It can run as Server or WebAssembly, and you can switch between them with a simple configuration change.
On top of that, Oqtane supports different render modes for components: Interactive or Static. In simple terms, you can choose to render content on the server (similar to how PHP works) or make it fully interactive like a standard Blazor app where the state refreshes dynamically.
You can toggle these behaviors with just a few clicks in the admin backend — which is awesome once you understand how the settings are actually applied.
My Confusion (and the Lesson Learned)
This post was originally meant to be a follow-up to the previous one about database configuration, but I ran into an interesting issue while testing API controllers. I wanted to confirm that when I ran the application in WebAssembly mode, it would hit the API controllers correctly.
It didn’t — at least not at first.
I spent quite a while trying to figure out why. Oqtane has both app-level settings (in appsettings.json) and site-level settings (in the admin panel), and it wasn’t immediately clear which ones took priority. I initially thought I could just change the render and runtime options in appsettings.json, restart the app, and see the effect. But it didn’t work that way.
After some trial and error — and a helpful reply from Shaun — I realized my mistake. When you first spin up a new site, Oqtane uses the values defined in appsettings.json. But once that site exists, it maintains its own configuration separately. From that point forward, any runtime or render mode changes must be made in the site settings from the admin panel, not in the original configuration file.
Server Runtime

WebAssembly Runtime
The Takeaway
If you edit appsettings.json after your first site is already created, it won’t affect the existing site — those values only apply when a new site is initialized.
So, to summarize:
- Before the first run → Configure defaults in
appsettings.json.
- After the site is running → Change settings from the admin backend.
That was the source of my confusion. Hopefully, this note saves someone else a few hours of head-scratching.
Thanks again to Shaun and the entire Oqtane team for keeping this project alive and so well supported.
These posts are just my personal notes, but I hope they help someone who’s following the same learning path.
by Joche Ojeda | Oct 5, 2025 | Oqtane, ORM
In this article, I’ll show you what to do after you’ve obtained and opened an Oqtane solution. Specifically, we’ll go through two different ways to set up your database for the first time.
- Using the setup wizard — this option appears automatically the first time you run the application.
- Configuring it manually — by directly editing the
appsettings.json file to skip the wizard.
Both methods achieve the same result. The only difference is that, if you configure the database manually, you won’t see the setup wizard during startup.
Step 1: Running the Application for the First Time
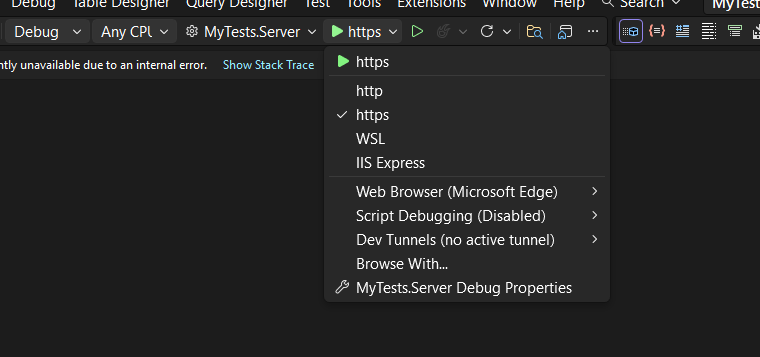
Once your solution is open in Visual Studio, set the Server project as the startup project. Then run it just as you would with any ASP.NET Core application.
You’ll notice several run options — I recommend using the HTTPS version instead of IIS Express (I stopped using IIS Express because it doesn’t work well on ARM-based computers).
When you run the application for the first time and your settings file is still empty, you’ll see the Database Setup Wizard. As shown in the image, the wizard allows you to select a database provider and configure it through a form.
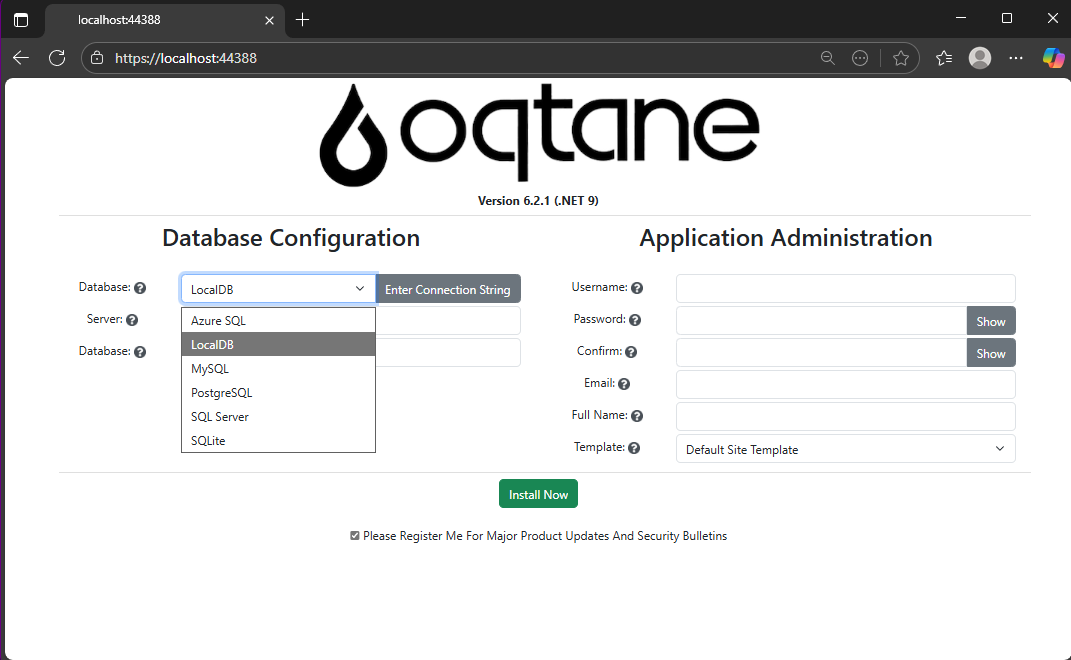
There’s also an option to paste your connection string directly. Make sure it’s a valid Entity Framework Core connection string.
After that, fill in the admin user’s details — username, email, and password — and you’re done. Once this process completes, you’ll have a working Oqtane installation.
Step 2: Setting Up the Database Manually
If you prefer to skip the wizard, you can configure the database manually. To do this, open the appsettings.json file and add the following parameters:
{
"DefaultDBType": "Oqtane.Database.Sqlite.SqliteDatabase, Oqtane.Server",
"ConnectionStrings": {
  "DefaultConnection": "Data Source=Oqtane-202510052045.db;"
},
"Installation": {
  "DefaultAlias": "https://localhost:44388",
  "HostPassword": "MyPasswor25!",
  "HostEmail": "joche@myemail.com",
  "SiteTemplate": "",
  "DefaultTheme": "",
  "DefaultContainer": ""
}
}
Here you need to specify:
- The database provider type (e.g., SQLite, SQL Server, PostgreSQL, etc.)
- The connection string
- The admin email and password for the first user — known as the host user (essentially the root or super admin).
This is the method I usually use now since I’ve set up Oqtane so many times recently that I’ve grown tired of the wizard. However, if you’re new to Oqtane, the wizard is a great way to get started.
Wrapping Up
That’s it for this setup guide! By now, you should have a running Oqtane installation configured either through the setup wizard or manually via the configuration file. Both methods give you a solid foundation to start exploring what Oqtane can do.
In the next article, we’ll dive into the Oqtane backend, exploring how the framework handles modules, data, and the underlying architecture that makes it flexible and powerful. Stay tuned — things are about to get interesting!