
by Joche Ojeda | Feb 9, 2026 | A.I
Last week I was in Sochi on a ski trip. Instead of skiing, I got sick.
So I spent a few days locked in a hotel room, doing what I always do when I can’t move much: working. Or at least what looks like work. In reality, it’s my hobby.
YouTube wasn’t working well there, so I downloaded a few episodes in advance. Most of them were about OpenClaw and its creator, Peter Steinberger — also known for building PSPDFKit.
What started as passive watching turned into one of those rare moments of clarity you only get when you’re forced to slow down.
Shipping Code You Don’t Read (In the Right Context)
In one of the interviews, Peter said something that immediately caught my attention: he ships code he doesn’t review.
At first that sounds reckless. But then I realized… I sometimes do the same.
However, context matters.
Most of my daily work is research and development. I build experimental systems, prototypes, and proofs of concept — either for our internal office or for exploring ideas with clients. A lot of what I write is not production software yet. It’s exploratory. It’s about testing possibilities.
In that environment, I don’t always need to read every line of generated code.
If the use case works and the tests pass, that’s often enough.
I work mainly with C#, ASP.NET, Entity Framework, and XAF from DevExpress. I know these ecosystems extremely well. So if something breaks later, I can go in and fix it myself. But most of the time, the goal isn’t to perfect the implementation — it’s to validate the idea.
That’s a crucial distinction.
When writing production code for a customer, quality and review absolutely matter. You must inspect, verify, and ensure maintainability. But when working on experimental R&D, the priority is different: speed of validation and clarity of results.
In research mode, not every line needs to be perfect. It just needs to prove whether the idea works.
Working “Without Hands”
My real goal is to operate as much as possible without hands.
By that I mean minimizing direct human interaction with implementation. I want to express intent clearly enough so agents can execute it.
If I can describe a system precisely — especially in domains I know deeply — then the agent should be able to build, test, and refine it. My role becomes guiding and validating rather than manually constructing everything.
This is where modern development is heading.
The Problem With Vibe Coding
Peter talked about something that resonated deeply: when you’re vibe coding, you produce a lot of AI slop.
You prompt. The AI generates. You run it. It fails. You tweak. You run again. Still wrong. You tweak again.
Eventually, the human gets tired.
Even when you feel close to a solution, it’s not done until it’s actually done. And manually pushing that process forward becomes exhausting.
This is where many AI workflows break down. Not because the AI can’t generate solutions — but because the loop still depends too heavily on human intervention.
Closing the Loop
The key idea is simple and powerful: agentic development works when the agent can test and correct itself.
You must close the loop.
Instead of: human → prompt → AI → human checks → repeat
You want: AI → builds → tests → detects errors → fixes → tests again → repeat
The agent needs tools to evaluate its own output.
When AI can run tests, detect failures, and iterate automatically, something shifts. The process stops being experimental prompting and starts becoming real engineering.
Spec-Driven vs Self-Correcting Systems
Spec-driven development still matters. Some people dismiss it as too close to waterfall, but every methodology has flaws.
The real evolution is combining clear specifications with self-correcting loops.
The human defines:
- The specification
- The expected behavior
- The acceptance criteria
Then the AI executes, tests, and refines until those criteria are satisfied.
The human doesn’t need to babysit every iteration. The human validates the result once the loop is closed.
Engineering vs Parasitic Ideas
There’s a concept from a book about parasitic ideas.
In social sciences, parasitic ideas can spread because they’re hard to disprove. In engineering, bad ideas fail quickly.
If you design a bridge incorrectly, it collapses. Reality provides immediate feedback.
Software — especially AI-generated software — needs the same grounding in reality. Without continuous testing and validation, generated code can drift into something that looks plausible but doesn’t work.
Closing the loop forces ideas to confront reality.
Tests are that reality.
Taking the Human Out of the Repetitive Loop
The goal isn’t removing humans entirely. It’s removing humans from repetitive validation.
The human should:
- Define the specification
- Define what “done” means
- Approve the final result
The AI should:
- Implement
- Test
- Detect issues
- Fix itself
- Repeat until success
When that happens, development becomes scalable in a new way. Not because AI writes code faster — but because AI can finish what it starts.
What I Realized in That Hotel Room
Getting sick in Sochi wasn’t part of the plan. But it forced me to slow down long enough to notice something important.
Most friction in modern development isn’t writing code. It’s closing loops.
We generate faster than we validate. We start more than we finish. We rely on humans to constantly re-check work that machines could verify themselves.
In research and experimental work, it’s fine not to inspect every line — as long as the system proves its behavior. In production work, deeper review is essential. Knowing when each approach applies is part of modern engineering maturity.
The future of agentic development isn’t just better models. It’s better loops.
Because in the end, nothing is finished until the loop is closed.

by Joche Ojeda | Feb 4, 2026 | A.I
How GitHub Copilot Became My Sysadmin, Writer, and Creative Partner
When people talk about GitHub Copilot, they almost always describe it the same way: an AI that writes code.
That’s true—Copilot can write code—but treating it as “just a coding tool” is like calling a smartphone
“a device for making phone calls.”
The moment you start using Copilot inside Visual Studio Code, something important changes:
it stops being a code generator and starts behaving more like a context-aware work partner.
Not because it magically knows everything—but because VS Code gives it access to the things that matter:
your files, your folders, your terminals, your scripts, your logs, and even your remote machines.
That’s why this article isn’t about code autocomplete. It’s about the other side of Copilot:
the part that’s useful for people who are building, maintaining, writing, organizing, diagnosing, or shipping
real work—especially the messy kind.
Copilot as a Linux Server Sidekick
One of my most common uses for Copilot has nothing to do with application logic.
I use it for Linux server setup and diagnostics.
If you run Copilot in VS Code and you also use Remote development (SSH), you essentially get a workspace that can:
- Connect to Linux servers over SSH
- Edit remote configuration files safely
- Run commands and scripts in an integrated terminal
- Search through logs and system files quickly
- Manage folders like they’re local projects
That means Copilot isn’t “helping me code.” It’s helping me operate.
I often set up hosting and administration tools like Virtualmin or Webmin, or configure other infrastructure:
load balancers, web servers, SSL, firewall rules, backups—whatever the server needs to become stable and usable.
In those situations Copilot becomes the assistant that speeds up the most annoying parts:
the remembering, the searching, the cross-checking, and the “what does this error actually mean?”
What this looks like in practice
Instead of bouncing between browser tabs and old notes, I’ll use Copilot directly in the workspace:
- “Explain what this service error means and suggest the next checks.”
- “Read this log snippet and list the most likely causes.”
- “Generate a safe Nginx config for this domain layout.”
- “Create a hardening checklist for a fresh VPS.”
- “What would you verify before assuming this is a network issue?”
The benefit isn’t that Copilot is always right. The benefit is that it helps you move faster with less friction—
and it keeps your work inside the same place where the files and commands actually live.
Copilot as an Operations Brain (Not Just a Code Brain)
Here’s the real mental shift:
Copilot doesn’t need to write code to be useful. It needs context.
In VS Code, that context includes the entire workspace: configuration files, scripts, documentation, logs,
command history, and whatever you’re currently working on. Once you realize that, Copilot becomes useful for:
- Debugging infrastructure problems
- Translating “error messages” into “actionable steps”
- Drafting repeatable setup scripts
- Creating operational runbooks and checklists
- Turning tribal knowledge into documentation
It’s especially valuable when the work is messy and practical—when you’re not trying to invent something new,
you’re trying to make something work.
Copilot as a Writing Workspace
Now switch gears. One of the best non-coding Copilot stories I’ve seen is my cousin Alexandra.
She’s writing a small storybook.
She started the way a lot of people do: writing by hand, collecting pages, keeping ideas in scattered places.
At one point she was using Copilot through Microsoft Office, but I suggested a different approach:
Use VS Code as the creative workspace.
Not because VS Code is “a writing tool,” but because it gives you structure for free:
- A folder becomes the book
- Each chapter becomes a file
- Markdown becomes a simple, readable format
- Git (optionally) becomes version history
- Copilot becomes the editor, brainstormer, and consistency checker
In that setup, Copilot isn’t writing the story for you. It’s helping you shape it:
rewrite a paragraph, suggest alternatives, tighten dialogue, keep a consistent voice,
summarize a scene, or generate a few options when you’re stuck.
Yes, Even Illustrations (Within Reason)
This surprises people: you can also support simple illustrations inside a VS Code workspace.
Not full-on painting, obviously—but enough for many small projects.
VS Code can handle things like vector graphics (SVG), simple diagram formats, and text-driven visuals.
If you describe a scene, Copilot can help generate a starting SVG illustration, and you can iterate from there.
It’s not about replacing professional design—it’s about making it easier to prototype, experiment,
and keep everything (text + assets) together in one organized place.
The Hidden Superpower: VS Code’s Ecosystem
Copilot is powerful on its own. But its real strength comes from where it lives.
VS Code brings the infrastructure:
- Extensions for almost any workflow
- Remote development over SSH
- Integrated terminals and tasks
- Search across files and folders
- Versioning and history
- Cross-platform consistency
So whether you’re configuring a server, drafting a runbook, organizing a book, or building a folder-based project,
Copilot adapts because the workspace defines the context.
The Reframe
If there’s one idea worth keeping, it’s this:
GitHub Copilot is not a coding tool. It’s a general-purpose work companion that happens to be excellent at code.
Once you stop limiting it to source files, it becomes:
- A sysadmin assistant
- A documentation partner
- A creative editor
- A workflow accelerator
- A “second brain” inside the tools you already use
And the best part is that none of this requires a new platform or a new habit.
It’s the same VS Code workspace you already know—just used for more than code.
by Joche Ojeda | Oct 16, 2025 | Events, Oqtane
OK, I’m still blocked from GitHub Copilot, so I still have more things to write about.
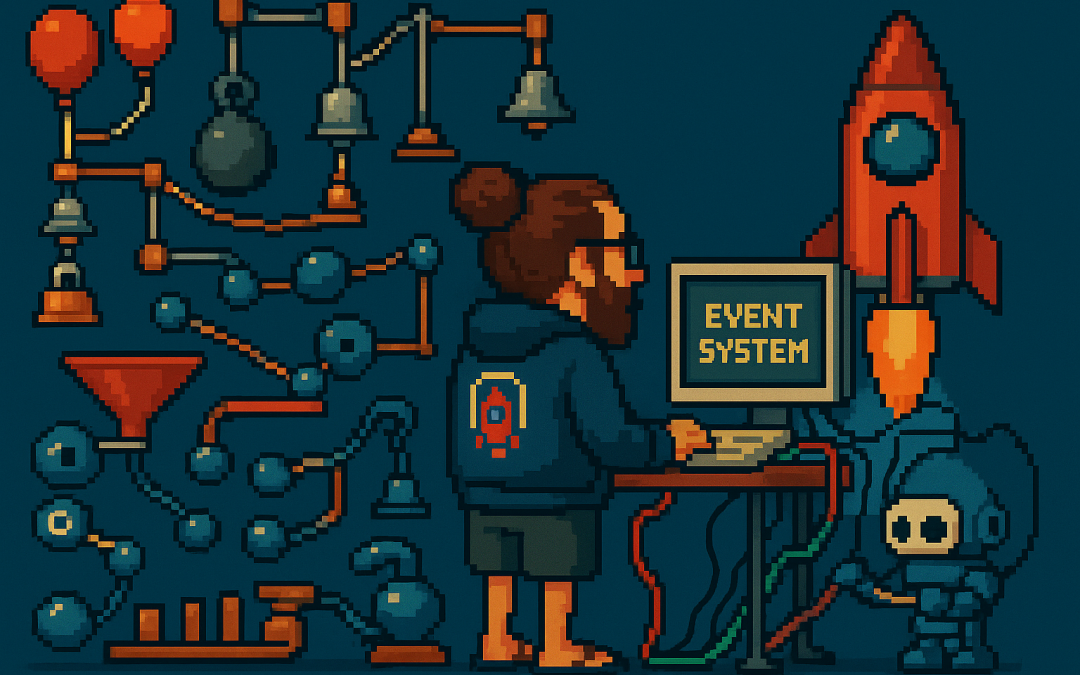
In this article, the topic that we’re going to see is the event system of Oqtane.For example, usually in most systems you want to hook up something when the application starts.
In XAF from Developer Express, which is my specialty (I mean, that’s the framework I really know well),
you have the DB Updater, which you can use to set up some initial data.
In Oqtane, you have the Module Manager, but there are also other types of events that you might need —
for example, when the user is created or when the user signs in for the first time.
So again, using the method that I explained in my previous article — the “OK, I have a doubt” method —
I basically let the guide of Copilot hike over my installation folder or even the Oqtane source code itself, and try to figure out how to do it.
That’s how I ended up using event subscribers.
In one of my prototypes, what I needed to do was detect when the user is created and then create some records in a different system
using that user’s information. So I’ll show an example of that type of subscriber, and I’ll actually share the
Oqtane Event Handling Guide here, which explains how you can hook up to system events.
I’m sure there are more events available, but this is what I’ve found so far and what I’ve tested.
I guess I’ll make a video about all these articles at some point, but right now, I’m kind of vibing with other systems.
Whenever I get blocked, I write something about my research with Oqtane.
Oqtane Event Handling Guide
Comprehensive guide to capturing and responding to system events in Oqtane
This guide explains how to handle events in Oqtane, particularly focusing on user authentication events (login, logout, creation)
and other system events. Learn to build modules that respond to framework events and create custom event-driven functionality.
Version: 1.0.0
Last Updated: October 3, 2025
Oqtane Version: 6.0+
Framework: .NET 9.0
1. Overview of Oqtane Event System
Oqtane uses a centralized event system based on the SyncManager that broadcasts events throughout the application when entities change.
This enables loose coupling between components and allows modules to respond to framework events without tight integration.
Key Components
- SyncManager — Central event hub that broadcasts entity changes
- SyncEvent — Event data containing entity information and action type
- IEventSubscriber — Interface for objects that want to receive events
- EventDistributorHostedService — Background service that distributes events to subscribers
Entity Changes → SyncManager → EventDistributorHostedService → IEventSubscriber Implementations
                     ↓
               SyncEvent Created → Distributed to All Event Subscribers
2. Event Types and Actions
SyncEvent Model
public class SyncEvent : EventArgs
{
    public int TenantId { get; set; }
    public int SiteId { get; set; }
    public string EntityName { get; set; }
    public int EntityId { get; set; }
    public string Action { get; set; }
    public DateTime ModifiedOn { get; set; }
}
Available Actions
public class SyncEventActions
{
    public const string Refresh = "Refresh";
    public const string Reload = "Reload";
    public const string Create = "Create";
    public const string Update = "Update";
    public const string Delete = "Delete";
}
Common Entity Names
public class EntityNames
{
    public const string User = "User";
    public const string Site = "Site";
    public const string Page = "Page";
    public const string Module = "Module";
    public const string File = "File";
    public const string Folder = "Folder";
    public const string Notification = "Notification";
}
3. Creating Event Subscribers
To handle events, implement IEventSubscriber and filter for the entities and actions you care about.
Subscribers are automatically discovered by Oqtane and injected with dependencies.
public class UserActivityEventSubscriber : IEventSubscriber
{
    private readonly ILogger<UserActivityEventSubscriber> _logger;

    public UserActivityEventSubscriber(ILogger<UserActivityEventSubscriber> logger)
    {
        _logger = logger;
    }

    public void EntityChanged(SyncEvent syncEvent)
    {
        if (syncEvent.EntityName != EntityNames.User)
            return;

        switch (syncEvent.Action)
        {
            case SyncEventActions.Create:
                _logger.LogInformation("User created: {UserId}", syncEvent.EntityId);
                break;
            case "Login":
                _logger.LogInformation("User logged in: {UserId}", syncEvent.EntityId);
                break;
        }
    }
}
4. User Authentication Events
Login, logout, and registration trigger SyncEvent notifications that you can capture to send notifications,
track user activity, or integrate with external systems.
public class LoginActivityTracker : IEventSubscriber
{
    private readonly ILogger<LoginActivityTracker> _logger;

    public LoginActivityTracker(ILogger<LoginActivityTracker> logger)
    {
        _logger = logger;
    }

    public void EntityChanged(SyncEvent syncEvent)
    {
        if (syncEvent.EntityName == EntityNames.User && syncEvent.Action == "Login")
        {
            _logger.LogInformation("User {UserId} logged in at {Time}", syncEvent.EntityId, syncEvent.ModifiedOn);
        }
    }
}
5. System Entity Events
Besides user events, you can track changes in entities like Pages, Files, and Modules.
public class PageAuditTracker : IEventSubscriber
{
    private readonly ILogger<PageAuditTracker> _logger;

    public PageAuditTracker(ILogger<PageAuditTracker> logger)
    {
        _logger = logger;
    }

    public void EntityChanged(SyncEvent syncEvent)
    {
        if (syncEvent.EntityName == EntityNames.Page && syncEvent.Action == SyncEventActions.Create)
        {
            _logger.LogInformation("Page created: {PageId}", syncEvent.EntityId);
        }
    }
}
6. Custom Module Events
You can create custom events in your own modules using ISyncManager.
public class BlogManager
{
    private readonly ISyncManager _syncManager;

    public BlogManager(ISyncManager syncManager)
    {
        _syncManager = syncManager;
    }

    public void PublishBlog(int blogId)
    {
        _syncManager.AddSyncEvent(
            new Alias { TenantId = 1, SiteId = 1 },
            "Blog",
            blogId,
            "Published"
        );
    }
}
7. Best Practices
- Filter early — Always check the entity and action before processing.
- Handle exceptions — Never throw unhandled exceptions inside
EntityChanged.
- Log properly — Use structured logging with context placeholders.
- Keep it simple — Extract complex logic to testable services.
public void EntityChanged(SyncEvent syncEvent)
{
    try
    {
        if (syncEvent.EntityName == EntityNames.User && syncEvent.Action == "Login")
        {
            _logger.LogInformation("User {UserId} logged in", syncEvent.EntityId);
        }
    }
    catch (Exception ex)
    {
        _logger.LogError(ex, "Error processing event {Action}", syncEvent.Action);
    }
}
8. Summary
Oqtane’s event system provides a clean, decoupled way to respond to system changes.
It’s perfect for audit logs, notifications, custom workflows, and integrations.
- Automatic discovery of subscribers
- Centralized event distribution
- Supports custom and system events
- Integrates naturally with dependency injection
by Joche Ojeda | Oct 16, 2025 | Oqtane
OK, I’ve been wanting to write this article for a few days now, but I’ve been vibing a lot — writing tons of prototypes and working on my Oqtane research. This morning I got blocked by GitHub Copilot because I hit the rate limit, so I can’t use it for a few hours. I figured that’s a sign to take a break and write some articles instead.
Actually, I’m not really “writing” — I’m using the Windows dictation feature (Windows key + H). So right now, I’m just having coffee and talking to my computer. I’m still in El Salvador with my family, and it’s like 5:00 AM here. My mom probably thinks I’ve gone crazy because I’ve been talking to my computer a lot lately. Even when I’m coding, I use dictation instead of typing, because sometimes it’s just easier to express yourself when you talk. When you type, you tend to shorten things, but when you talk, you can go on forever, right?
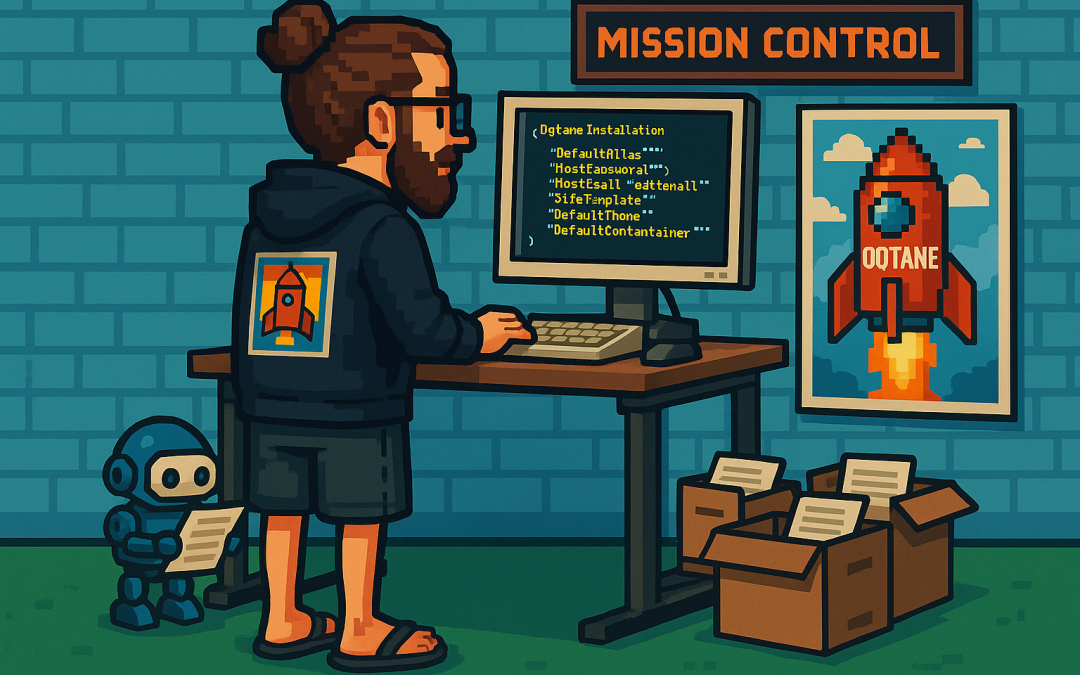
Anyway, this article is about Oqtane, specifically something that’s been super useful for me — how to set up a silent installation. Usually, when you download the Oqtane source or use the templates to create a new project or solution, and then run the server project, you’ll see the setup wizard first. That’s where you configure the database, email, host password, default theme, and all that.
Since I’ve been doing tons of prototypes, I’ve seen that setup screen thousands of times per day. So I downloaded the Oqtane source and started digging through it — using Copilot to generate guides whenever I got stuck. Honestly, the best way to learn is always by looking at the source code. I learned that the hard way years ago with XAF from DevExpress — there was no documentation back then, so I had to figure everything out manually and even assemble the projects myself because they weren’t in one solution. With Oqtane, it’s way simpler: everything’s in one place, just a few main projects.
Now, when I run into a problem, I just open the source code and tell Copilot, “OK, this is what I want to do. Help me figure it out.” Sometimes it goes completely wrong (as all AI tools do), but sometimes it nails it and produces a really good guide.
So the guide below was generated with Copilot, and it’s been super useful. I’ve been using it a lot lately, and I think it’ll save you a ton of time if you’re doing automated deployment with Oqtane.
I don’t want to take more of your time, so here it goes — I hope it helps you as much as it helped me.
Oqtane Installation Configuration Guide
This guide explains the configuration options available in the appsettings.json file under the Installation section for automated installation and default site settings.
Overview
The Installation section in appsettings.json controls the automated installation process and default settings for new sites in Oqtane. These settings are particularly useful for:
- Automated installations – Deploy Oqtane without manual configuration
- Development environments – Quickly spin up new instances
- Multi-tenant deployments – Standardize new site creation
- CI/CD pipelines – Automate deployment processes
Configuration Structure
{
  "Installation": {
    "DefaultAlias": "",
    "HostPassword": "",
    "HostEmail": "",
    "SiteTemplate": "",
    "DefaultTheme": "",
    "DefaultContainer": ""
  }
}
| Key |
Purpose |
Required |
DefaultAlias |
Initial site URL(s) |
✅ |
HostPassword |
Super admin password |
✅ |
HostEmail |
Super admin email |
✅ |
SiteTemplate |
Initial site structure |
Optional |
DefaultTheme |
Site appearance |
Optional |
DefaultContainer |
Module wrapper style |
Optional |
SiteTemplate
A Site Template defines the initial structure and content of a new site, including pages, modules, folders, and navigation.
"SiteTemplate": "Oqtane.Infrastructure.SiteTemplates.DefaultSiteTemplate, Oqtane.Server"
Default options:
- DefaultSiteTemplate – Home, Privacy, example content
- EmptySiteTemplate – Minimal, clean slate
- AdminSiteTemplate – Internal use
If empty, Oqtane uses the default template automatically.
DefaultTheme
A Theme controls the visual appearance and layout of your site (page structure, navigation, header/footer, and styling).
"DefaultTheme": "Oqtane.Themes.OqtaneTheme.Default, Oqtane.Client"
Built-in themes:
- Oqtane Theme (default) – clean and responsive
- Blazor Theme – Blazor-branded styling
- Bootswatch variants – Cerulean, Cosmo, Darkly, Flatly, Lux, etc.
- Corporate Theme – business layout
If left blank, it defaults to the Oqtane Theme.
DefaultContainer
A Container is the wrapper around each module, controlling how titles, buttons, and borders look.
"DefaultContainer": "Oqtane.Themes.OqtaneTheme.Container, Oqtane.Client"
Common containers:
- OqtaneTheme.Container – standard and responsive
- AdminContainer – management modules
- Theme-specific containers – match the chosen theme
Defaults automatically if left empty.
Example Configurations
Minimal Configuration
{
  "Installation": {
    "DefaultAlias": "localhost",
    "HostPassword": "YourSecurePassword123!",
    "HostEmail": "admin@example.com"
  }
}
Custom Theme and Container
{
  "Installation": {
    "DefaultAlias": "localhost",
    "HostPassword": "YourSecurePassword123!",
    "HostEmail": "admin@example.com",
    "SiteTemplate": "Oqtane.Infrastructure.SiteTemplates.DefaultSiteTemplate, Oqtane.Server",
    "DefaultTheme": "Oqtane.Theme.Bootswatch.Flatly.Default, Oqtane.Theme.Bootswatch.Oqtane",
    "DefaultContainer": "Oqtane.Theme.Bootswatch.Flatly.Container, Oqtane.Theme.Bootswatch.Oqtane"
  }
}
Troubleshooting
- Settings ignored during installation: Ensure all required fields are filled (
DefaultAlias, HostPassword, HostEmail).
- Theme not found: Check assembly reference and type name.
- Container displays incorrectly: Use a container matching your theme.
- Site template creates no pages: Ensure your template returns valid page definitions.
Logs can be found in Logs/oqtane-log-YYYYMMDD.txt.
Best Practices
- Match your theme and container.
- Leave defaults empty unless customization is needed.
- Test in development first.
- Document any custom templates or themes.
- Use environment-specific appsettings (e.g.
appsettings.Development.json).
Summary
The Installation configuration in appsettings.json lets you fully automate your Oqtane setup.
- SiteTemplate: defines structure
- DefaultTheme: defines appearance
- DefaultContainer: defines module layout
Empty values use defaults, and you can override them for automation, branding, or custom scenarios.

by Joche Ojeda | Mar 2, 2025 | PowerShell, WebServers, Windows Os
In one of our meetings with Javier, we were discussing how many servers we have in the office. In the end, it turned out that we have a lot of servers, both Windows and Linux. So we decided to take a look and see what is running on each of the servers. A lot of those servers are actually test servers used to test deployments or to show something to a customer. A few of them were just full of examples or basically nothing, so I decided to format them and rebuild the installation.
I decided to start with the Windows server, so this post is going to be about the tools that I use to set up the Windows 2016 server.
There were a few tasks that I needed to accomplish that I usually do using the UI, and most of them are a pain in the ****. There is no other way to describe it, so I decided to create scripts instead so I can replicate it easily between servers.
Disable Internet Explorer Enhanced Security
The first task that I do when I set up a Windows Server is to disable Internet Explorer Enhanced Security. If you have used that type of security before, basically it means that you need to allow or whitelist every URL in the page that you’re browsing and the related pages in the page that you’re browsing. So it’s like 100 clicks per page. To remove the enhanced security, you need to go to the Windows features and turn it off there and then restart. So I created a script that does that for me. In one click, I can just disable the security so I can use Internet Explorer to actually download something newer like Microsoft Edge.
Disable internet explorer Enhanced Security
Set Up Web Server Role
The next step after disabling the enhanced security is to set up the Web Server role in Windows Server. This doesn’t come out of the box; you have to actually add the role to the server. For that, I will use another script, and the script will also install Web Deploy, which is the functionality that allows you to do remote deploying into an IIS server.
Setup Web Server Role
Fix Web Deploy Permissions (Optional)
Now here is an extra step. This step is optional. For some reason, in some of the servers, even though you have a clean installation, there will be a problem setting up the Web Deploy functionality. It’s a permission problem basically. So there is a script to fix that. You have to run the first script that installs the Web Server and the remote Web Deploy functionality. This is optional; you should use it only in case your Web Deploy doesn’t work.
Fix web deploy permissions
Set Up SQL Server Express
The next step for setting up the server is to set up SQL Server Express, and I have a script for that. I will paste it here, but for some reason, the script always fails in the way that you download and try to deploy it on the server. What happens is that the process always gets busy and the files get locked. So I will have to come back to that one later, but I will post the script here just to remember it.
SqlServer Express install
Enable Remote SQL Server Access (Optional)
OK, the next script is also optional. In our test servers, we usually allow remote access to the SQL Server database because we need to either restore a backup or create a database. For this, we need to do two things: open the firewall port for the database and also enable TCP connection from the outside. So here is a script for that too.
Enable Remote SQL Server Access
So that will be it for this post. Let me know which script you would like to have to automate your server setup.