
by Joche Ojeda | Aug 4, 2025 | Linux, Ubuntu, WSL
Email functionality is a critical component of most modern applications, from user authentication and password resets to notifications and marketing campaigns. However, testing email features during development can be challenging—you don’t want to accidentally send test emails to real users, and setting up a complete email server for testing is often overkill. This is where MailHog comes to the rescue.
What is MailHog?
MailHog is an open-source email testing tool designed specifically for development and testing environments. Think of it as a “fake” SMTP server that captures emails sent by your application instead of delivering them to real recipients. It provides a clean web interface where you can view, inspect, and manage all captured emails in real-time.
Built with Go and completely free, MailHog has become an indispensable tool for developers who need to test email functionality without the complexity and risks associated with real email delivery.
Why MailHog is Perfect for .NET Development
As a .NET developer, you’ve likely encountered scenarios where you need to test:
- User registration and email verification
- Password reset workflows
- Account activation processes
- Notification systems
- Email templates and formatting
MailHog seamlessly integrates with .NET applications using the standard SMTP libraries you’re already familiar with. Whether you’re using System.Net.Mail.SmtpClient or other SMTP libraries, MailHog works transparently as a drop-in replacement for your production SMTP server.
Key Features That Make MailHog Stand Out
SMTP Server Compliance
- Full RFC5321 ESMTP server implementation
- Support for SMTP AUTH (RFC4954) and PIPELINING (RFC2920)
- Works with any SMTP client library
Developer-Friendly Interface
- Clean web UI to view messages in plain text, HTML, or raw source
- Real-time updates using EventSource technology
- Support for RFC2047 encoded headers
- Multipart MIME support with downloadable individual parts
Testing and Development Features
- Chaos Monkey: Built-in failure testing to simulate email delivery issues
- Message Release: Forward captured emails to real SMTP servers when needed
- HTTP API: Programmatically list, retrieve, and delete messages (APIv1 and APIv2)
- Authentication: HTTP basic authentication for UI and API security
Storage Options
- In-memory storage: Lightweight and fast for development
- MongoDB persistence: For scenarios requiring message persistence
- File-based storage: Simple file system storage option
Deployment Benefits
- Lightweight and portable: Single binary with no dependencies
- No installation required: Download and run
- Cross-platform: Works on Windows, macOS, and Linux
Installing MailHog on WSL2
Setting up MailHog on Windows Subsystem for Linux (WSL2) is straightforward and provides excellent performance for .NET development workflows.
Option 1: Automated Installation with Script
If you don’t want to manually install MailHog, you can use my automated installation script for WSL:
# Download and run the installation script
curl -sSL https://raw.githubusercontent.com/egarim/MyWslScripts/master/install_mailhog.sh | bash
This script will automatically download MailHog, set it up, and configure it as a service. You can find the script at: https://github.com/egarim/MyWslScripts/blob/master/install_mailhog.sh
Option 2: Manual Installation
Step 1: Download MailHog
# Create a directory for MailHog
mkdir ~/mailhog
cd ~/mailhog

# Download the latest Linux binary
wget https://github.com/mailhog/MailHog/releases/download/v1.0.1/MailHog_linux_amd64

# Make it executable
chmod +x MailHog_linux_amd64

# Optional: Create a symlink for easier access
sudo ln -s ~/mailhog/MailHog_linux_amd64 /usr/local/bin/mailhog
Step 2: Start MailHog
# Start MailHog (runs on ports 1025 for SMTP and 8025 for web UI)
./MailHog_linux_amd64

# Or if you created the symlink:
mailhog
Step 3: Verify Installation
Open your browser and navigate to http://localhost:8025. You should see the MailHog web interface ready to capture emails.
Step 4: Configure as a Service (Optional)
For persistent use, create a systemd service:
# Create service file
sudo nano /etc/systemd/system/mailhog.service
Add the following content:
[Unit]
Description=MailHog Email Web Service
After=network.target

[Service]
Type=simple
User=your-username
ExecStart=/home/your-username/mailhog/MailHog_linux_amd64
Restart=always

[Install]
WantedBy=multi-user.target
Enable and start the service:
sudo systemctl enable mailhog
sudo systemctl start mailhog
Integrating MailHog with .NET Applications
Configuration in appsettings.json
{
  "EmailSettings": {
    "SmtpServer": "localhost",
    "SmtpPort": 1025,
    "FromEmail": "noreply@yourapp.com",
    "FromName": "Your Application"
  }
}
Using with System.Net.Mail
public class EmailService
{
    private readonly IConfiguration _configuration;

    public EmailService(IConfiguration configuration)
    {
        _configuration = configuration;
    }

    public async Task SendEmailAsync(string to, string subject, string body)
    {
        var smtpClient = new SmtpClient(_configuration["EmailSettings:SmtpServer"])
        {
            Port = int.Parse(_configuration["EmailSettings:SmtpPort"]),
            EnableSsl = false, // MailHog doesn't require SSL
            UseDefaultCredentials = true
        };

        var mailMessage = new MailMessage
        {
            From = new MailAddress(_configuration["EmailSettings:FromEmail"],
                                 _configuration["EmailSettings:FromName"]),
            Subject = subject,
            Body = body,
            IsBodyHtml = true
        };

        mailMessage.To.Add(to);

        await smtpClient.SendMailAsync(mailMessage);
    }
}
Real-World Testing Scenarios
Password Reset Testing
[Fact]
public async Task PasswordReset_ShouldSendEmail()
{
    // Arrange
    var userEmail = "test@example.com";
    var resetToken = Guid.NewGuid().ToString();

    // Act
    await _authService.SendPasswordResetEmailAsync(userEmail, resetToken);

    // Assert - Check MailHog API for sent email
    var httpClient = new HttpClient();
    var response = await httpClient.GetAsync("http://localhost:8025/api/v2/messages");
    var messages = JsonSerializer.Deserialize<MailHogResponse>(await response.Content.ReadAsStringAsync());

    Assert.Single(messages.Items);
    Assert.Contains(resetToken, messages.Items[0].Content.Body);
}
Email Template Verification
With MailHog’s web interface, you can:
- Preview HTML email templates exactly as recipients would see them
- Test responsive design across different screen sizes
- Verify that images and styling render correctly
- Check for broken links or formatting issues
Advanced MailHog Usage
Environment-Specific Configuration
Use different MailHog instances for different environments:
# Development environment
mailhog -smtp-bind-addr 127.0.0.1:1025 -ui-bind-addr 127.0.0.1:8025

# Testing environment
mailhog -smtp-bind-addr 127.0.0.1:1026 -ui-bind-addr 127.0.0.1:8026
API Integration for Automated Tests
public class MailHogClient
{
    private readonly HttpClient _httpClient;

    public MailHogClient()
    {
        _httpClient = new HttpClient { BaseAddress = new Uri("http://localhost:8025/") };
    }

    public async Task<IEnumerable<Email>> GetEmailsAsync()
    {
        var response = await _httpClient.GetAsync("api/v2/messages");
        var content = await response.Content.ReadAsStringAsync();
        var mailHogResponse = JsonSerializer.Deserialize<MailHogResponse>(content);
        return mailHogResponse.Items;
    }

    public async Task DeleteAllEmailsAsync()
    {
        await _httpClient.DeleteAsync("api/v1/messages");
    }
}
Why I Use MailHog Daily
As someone who works extensively with .NET applications requiring email functionality, MailHog has become an essential part of my development toolkit. Here’s why:
Reliability: No more worrying about test emails reaching real users or bouncing back from invalid addresses.
Speed: Instant email capture and viewing without network delays or external dependencies.
Debugging: The ability to inspect raw email headers and content makes troubleshooting email issues much easier.
Team Collaboration: Developers can share MailHog URLs to demonstrate email functionality during code reviews or testing sessions.
CI/CD Integration: MailHog works perfectly in Docker containers and automated testing pipelines.
Conclusion
MailHog represents the perfect balance of simplicity and functionality for email testing in .NET development. Its open-source nature, zero-configuration setup, and comprehensive feature set make it an invaluable tool for any developer working with email functionality.
Whether you’re building a simple contact form or a complex multi-tenant application with sophisticated email workflows, MailHog provides the testing infrastructure you need without the complexity of traditional email servers.
Give MailHog a try in your next .NET project—you’ll wonder how you ever developed email features without it.
Resources:
by Joche Ojeda | May 12, 2025 | C#, SivarErp
Welcome back to our ERP development series! In previous days, we’ve covered the foundational architecture, database design, and core entity structures for our accounting system. Today, we’re tackling an essential but often overlooked aspect of any enterprise software: data import and export capabilities.
Why is this important? Because no enterprise system exists in isolation. Companies need to move data between systems, migrate from legacy software, or simply handle batch data operations. In this article, we’ll build robust import/export services for the Chart of Accounts, demonstrating principles you can apply to any part of your ERP system.
The Importance of Data Exchange
Before diving into the code, let’s understand why dedicated import/export functionality matters:
- Data Migration – When companies adopt your ERP, they need to transfer existing data
- System Integration – ERPs need to exchange data with other business systems
- Batch Processing – Accountants often prepare data in spreadsheets before importing
- Backup & Transfer – Provides a simple way to backup or transfer configurations
- User Familiarity – Many users are comfortable working with CSV files
CSV (Comma-Separated Values) is our format of choice because it’s universally supported and easily edited in spreadsheet applications like Excel, which most business users are familiar with.
Our Implementation Approach
For our Chart of Accounts module, we’ll create:
- A service interface defining import/export operations
- A concrete implementation handling CSV parsing/generation
- Unit tests verifying all functionality
Our goal is to maintain clean separation of concerns, robust error handling, and clear validation rules.
Defining the Interface
First, we define a clear contract for our import/export service:
/// <summary>
/// Interface for chart of accounts import/export operations
/// </summary>
public interface IAccountImportExportService
{
    /// <summary>
    /// Imports accounts from a CSV file
    /// </summary>
    /// <param name="csvContent">Content of the CSV file as a string</param>
    /// <param name="userName">User performing the operation</param>
    /// <returns>Collection of imported accounts and any validation errors</returns>
    Task<(IEnumerable<IAccount> ImportedAccounts, IEnumerable<string> Errors)> ImportFromCsvAsync(string csvContent, string userName);

    /// <summary>
    /// Exports accounts to a CSV format
    /// </summary>
    /// <param name="accounts">Accounts to export</param>
    /// <returns>CSV content as a string</returns>
    Task<string> ExportToCsvAsync(IEnumerable<IAccount> accounts);
}
Notice how we use C# tuples to return both the imported accounts and any validation errors from the import operation. This gives callers full insight into the operation’s results.
Implementing CSV Import
The import method is the more complex of the two, requiring:
- Parsing and validating the CSV structure
- Converting CSV data to domain objects
- Validating the created objects
- Reporting any errors along the way
Here’s our implementation approach:
public async Task<(IEnumerable<IAccount> ImportedAccounts, IEnumerable<string> Errors)> ImportFromCsvAsync(string csvContent, string userName)
{
    List<AccountDto> importedAccounts = new List<AccountDto>();
    List<string> errors = new List<string>();

    if (string.IsNullOrEmpty(csvContent))
    {
        errors.Add("CSV content is empty");
        return (importedAccounts, errors);
    }

    try
    {
        // Split the CSV into lines
        string[] lines = csvContent.Split(new[] { "\r\n", "\r", "\n" }, StringSplitOptions.RemoveEmptyEntries);

        if (lines.Length <= 1)
        {
            errors.Add("CSV file contains no data rows");
            return (importedAccounts, errors);
        }

        // Assume first line is header
        string[] headers = ParseCsvLine(lines[0]);

        // Validate headers
        if (!ValidateHeaders(headers, errors))
        {
            return (importedAccounts, errors);
        }

        // Process data rows
        for (int i = 1; i < lines.Length; i++)
        {
            string[] fields = ParseCsvLine(lines[i]);

            if (fields.Length != headers.Length)
            {
                errors.Add($"Line {i + 1}: Column count mismatch. Expected {headers.Length}, got {fields.Length}");
                continue;
            }

            var account = CreateAccountFromCsvFields(headers, fields);

            // Validate account
            if (!_accountValidator.ValidateAccount(account))
            {
                errors.Add($"Line {i + 1}: Account validation failed for account {account.AccountName}");
                continue;
            }

            // Set audit information
            _auditService.SetCreationAudit(account, userName);

            importedAccounts.Add(account);
        }

        return (importedAccounts, errors);
    }
    catch (Exception ex)
    {
        errors.Add($"Error importing CSV: {ex.Message}");
        return (importedAccounts, errors);
    }
}
Key aspects of this implementation:
- Early validation – We quickly detect and report basic issues like empty input
- Row-by-row processing – Each line is processed independently, allowing partial success
- Detailed error reporting – We collect specific errors with line numbers
- Domain validation – We apply business rules from
AccountValidator
- Audit trail – We set audit fields for each imported account
The ParseCsvLine method handles the complexities of CSV parsing, including quoted fields that may contain commas:
private string[] ParseCsvLine(string line)
{
    List<string> fields = new List<string>();
    bool inQuotes = false;
    int startIndex = 0;

    for (int i = 0; i < line.Length; i++)
    {
        if (line[i] == '"')
        {
            inQuotes = !inQuotes;
        }
        else if (line[i] == ',' && !inQuotes)
        {
            fields.Add(line.Substring(startIndex, i - startIndex).Trim().TrimStart('"').TrimEnd('"'));
            startIndex = i + 1;
        }
    }

    // Add the last field
    fields.Add(line.Substring(startIndex).Trim().TrimStart('"').TrimEnd('"'));

    return fields.ToArray();
}
Implementing CSV Export
The export method is simpler, converting domain objects to CSV format:
public Task<string> ExportToCsvAsync(IEnumerable<IAccount> accounts)
{
    if (accounts == null || !accounts.Any())
    {
        return Task.FromResult(GetCsvHeader());
    }

    StringBuilder csvBuilder = new StringBuilder();

    // Add header
    csvBuilder.AppendLine(GetCsvHeader());

    // Add data rows
    foreach (var account in accounts)
    {
        csvBuilder.AppendLine(GetCsvRow(account));
    }

    return Task.FromResult(csvBuilder.ToString());
}
We take special care to handle edge cases like null or empty collections, making the API robust against improper usage.
Testing the Implementation
Our test suite verifies both the happy paths and various error conditions:
- Import validation – Tests for empty content, missing headers, etc.
- Export formatting – Tests for proper CSV generation, handling of special characters
- Round-trip integrity – Tests exporting and re-importing preserves data integrity
For example, here’s a round-trip test to verify data integrity:
[Test]
public async Task RoundTrip_ExportThenImport_PreservesAccounts()
{
    // Arrange
    var originalAccounts = new List<IAccount>
    {
        new AccountDto
        {
            Id = Guid.NewGuid(),
            AccountName = "Cash",
            OfficialCode = "11000",
            AccountType = AccountType.Asset,
            // other properties...
        },
        new AccountDto
        {
            Id = Guid.NewGuid(),
            AccountName = "Accounts Receivable",
            OfficialCode = "12000",
            AccountType = AccountType.Asset,
            // other properties...
        }
    };

    // Act
    string csv = await _importExportService.ExportToCsvAsync(originalAccounts);
    var (importedAccounts, errors) = await _importExportService.ImportFromCsvAsync(csv, "Test User");

    // Assert
    Assert.That(errors, Is.Empty);
    Assert.That(importedAccounts.Count(), Is.EqualTo(originalAccounts.Count));

    // Check first account
    var firstOriginal = originalAccounts[0];
    var firstImported = importedAccounts.First();
    Assert.That(firstImported.AccountName, Is.EqualTo(firstOriginal.AccountName));
    Assert.That(firstImported.OfficialCode, Is.EqualTo(firstOriginal.OfficialCode));
    Assert.That(firstImported.AccountType, Is.EqualTo(firstOriginal.AccountType));

    // Check second account similarly...
}
Integration with the Broader System
This service isn’t meant to be used in isolation. In a complete ERP system, you’d typically:
- Add a controller to expose these operations via API endpoints
- Create UI components for file upload/download
- Implement progress reporting for larger imports
- Add transaction support to make imports atomic
- Include validation rules specific to your business domain
Design Patterns and Best Practices
Our implementation exemplifies several important patterns:
- Interface Segregation – The service has a focused, cohesive purpose
- Dependency Injection – We inject the
IAuditService rather than creating it
- Early Validation – We validate input before processing
- Detailed Error Reporting – We collect and return specific errors
- Defensive Programming – We handle edge cases and exceptions gracefully
Future Extensions
This pattern can be extended to other parts of your ERP system:
- Customer/Vendor Data – Import/export contact information
- Inventory Items – Handle product catalog updates
- Journal Entries – Process batch financial transactions
- Reports – Export financial data for external analysis
Conclusion
Data import/export capabilities are a critical component of any enterprise system. They bridge the gap between systems, facilitate migration, and support batch operations. By implementing these services with careful error handling and validation, we’ve added significant value to our ERP system.
In the next article, we’ll explore building financial reporting services to generate balance sheets, income statements, and other critical financial reports from our accounting data.
Stay tuned, and happy coding!
About Us
YouTube
https://www.youtube.com/c/JocheOjedaXAFXAMARINC
Our sites
Let’s discuss your XAF
This call/zoom will give you the opportunity to define the roadblocks in your current XAF solution. We can talk about performance, deployment or custom implementations. Together we will review you pain points and leave you with recommendations to get your app back in track
https://calendly.com/bitframeworks/bitframeworks-free-xaf-support-hour
Our free A.I courses on Udemy
by Joche Ojeda | Dec 1, 2024 | Blazor
My journey with Microsoft Semantic Kernel marked the beginning of a new adventure: stepping out of my comfort zone as a backend developer to create applications with user interfaces, rather than just building apps for unit and integration testing.
I naturally chose Blazor as my UI framework, and I’ll be sharing my frontend development experiences here. Sometimes it can be frustratingly difficult to accomplish seemingly simple tasks (like centering a div!), but AI assistants like GitHub Copilot have been incredibly helpful in reducing those pain points.
One of my recent challenges involved programmatically including JavaScript and CSS in Blazor applications. I prefer an automated approach rather than manually adding tags to HTML. Back in the .NET 5 era, I wrote an article about using tag helpers for this purpose, which you can find here
However, I recently discovered that my original approach no longer works. I’ve been developing several prototypes using the new DevExpress Chat component, and many of these prototypes include custom components that require JavaScript and CSS. Despite my attempts, I couldn’t get these components to work with the tag helpers, and the reason wasn’t immediately obvious. During the Thanksgiving break, I decided to investigate this issue, and I’d like to share what I found.
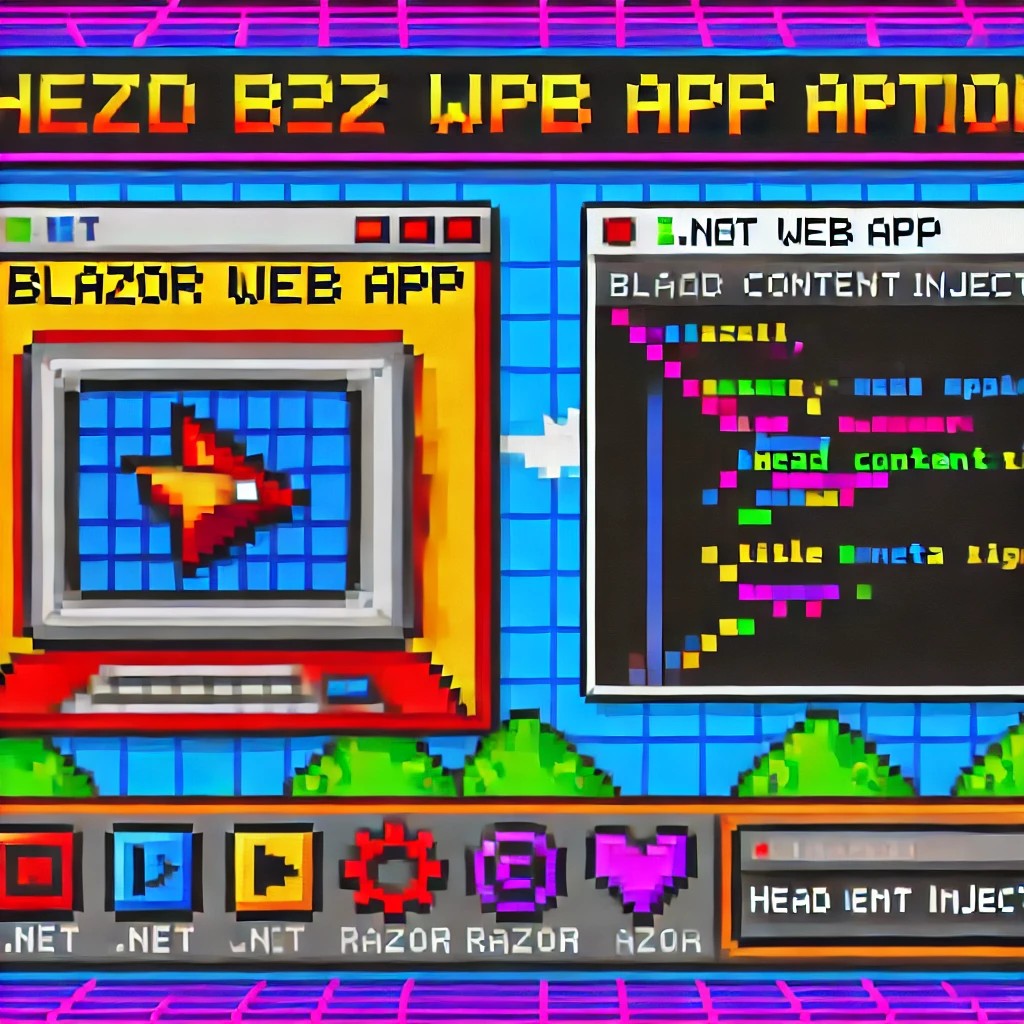
With the release of .NET 8, Blazor introduced a new web app template that unifies Blazor Server and WebAssembly into a single project structure. This change affects how we inject content into the document’s head section, particularly when working with Tag Helpers or components.
Understanding the Changes
In previous versions of Blazor, we typically worked with _Host.cshtml for server-side rendering, where traditional ASP.NET Core Tag Helpers could target the <head> element directly. The new .NET 8 Blazor Web App template uses App.razor as the root component and introduces the <HeadOutlet> component for managing head content.
Approach 1: Adapting Tag Helpers
If you’re migrating existing Tag Helpers or creating new ones for head content injection, you’ll need to modify them to target HeadOutlet instead of the head element:
using Microsoft.AspNetCore.Razor.TagHelpers;

namespace YourNamespace
{
    [HtmlTargetElement("HeadOutlet")]
    public class CustomScriptTagHelper : TagHelper
    {
        public override void Process(TagHelperContext context, TagHelperOutput output)
        {
            output.PostContent.AppendHtml(
                "<script src=\"_content/YourLibrary/js/script.js\"></script>"
            );
        }
    }
}
Remember to register your Tag Helper in _Imports.razor:
@addTagHelper *, YourLibrary
Approach 2: Using Blazor Components (Recommended)
While adapting Tag Helpers works, Blazor offers a more idiomatic approach using components and the HeadContent component. This approach aligns better with Blazor’s component-based architecture:
@namespace YourNamespace
@implements IComponentRenderMode

<HeadContent>
    <script src="_content/YourLibrary/js/script.js"></script>
</HeadContent>
To use this component in your App.razor:
<head>
    <!-- Other head elements -->
    <HeadOutlet @rendermode="RenderModeForPage" />
    <YourScriptComponent @rendermode="RenderModeForPage" />
</head>
Benefits of the Component Approach
- Better Integration: Components work seamlessly with Blazor’s rendering model
- Render Mode Support: Easy to control rendering based on the current render mode (Interactive Server, WebAssembly, or Auto)
- Dynamic Content: Can leverage Blazor’s full component lifecycle and state management
- Type Safety: Provides compile-time checking and better tooling support
Best Practices
- Prefer the component-based approach for new development
- Use Tag Helpers only when migrating existing code or when you need specific ASP.NET Core pipeline integration
- Always specify the
@rendermode attribute to ensure proper rendering in different scenarios
- Place custom head content components after HeadOutlet to ensure proper ordering
Conclusion
While both approaches work in .NET 8 Blazor Web Apps, the component-based approach using HeadContent provides a more natural fit with Blazor’s architecture and offers better maintainability and flexibility. When building new applications, consider using components unless you have a specific need for Tag Helper functionality.

by Joche Ojeda | Oct 8, 2024 | A.I, Blazor, Semantic Kernel
Are you excited to bring powerful AI chat completions to your web application? I sure am! In this post, we’ll walk through how to integrate the DevExpress Chat component with the Semantic Kernel using OpenAI. This combination can make your app more interactive and intelligent, and it’s surprisingly simple to set up. Let’s dive in!
Step 1: Adding NuGet Packages
First, let’s ensure we have all the necessary packages. Open your DevExpress.AI.Samples.Blazor.csproj file and add the following NuGet references:
 <ItemGroup>
<PackageReference Include="Microsoft.KernelMemory.Abstractions" Version="0.78.241007.1" />
<PackageReference Include="Microsoft.KernelMemory.Core" Version="0.78.241007.1" />
<PackageReference Include="Microsoft.SemanticKernel" Version="1.21.1" />
</ItemGroup>
This will bring in the core components of Semantic Kernel to power your chat completions.
Step 2: Setting Up Your Kernel in Program.cs
Next, we’ll configure the Semantic Kernel and OpenAI integration. Add the following code in your Program.cs to create the kernel and set up the chat completion service:
    //Create your OpenAI client
    string OpenAiKey = Environment.GetEnvironmentVariable("OpenAiTestKey");
    var client = new OpenAIClient(new System.ClientModel.ApiKeyCredential(OpenAiKey));

    //Adding semantic kernel
    var KernelBuilder = Kernel.CreateBuilder();
    KernelBuilder.AddOpenAIChatCompletion("gpt-4o", client);
    var sk = KernelBuilder.Build();
    var ChatService = sk.GetRequiredService<IChatCompletionService>();
    builder.Services.AddSingleton<IChatCompletionService>(ChatService);
This step is crucial because it connects your app to OpenAI via the Semantic Kernel and sets up the chat completion service that will drive the AI responses in your chat.
Step 3: Creating the Chat Component
Now that we’ve got our services ready, it’s time to set up the chat component. We’ll define the chat interface in our Razor page. Here’s how you can do that:
Razor Section:
    @page "/sk"
    @using DevExpress.AIIntegration.Blazor.Chat
    @using AIIntegration.Services.Chat;
    @using Microsoft.SemanticKernel.ChatCompletion
    @using System.Diagnostics
    @using System.Text.Json
    @using System.Text


    @inject IChatCompletionService chatCompletionsService;
    @inject IJSRuntime JSRuntime;
This UI will render a clean chat interface using DevExpress’s DxAIChat component, which is connected to our Semantic Kernel chat completion service.
Code Section:
Now, let’s handle the interaction logic. Here’s the code that powers the chat backend:
    @code {

        ChatHistory ChatHistory = new ChatHistory();

        async Task MessageSent(MessageSentEventArgs args)
        {
            // Add the user's message to the chat history
            ChatHistory.AddUserMessage(args.Content);

            // Get a response from the chat completion service
            var Result = await chatCompletionsService.GetChatMessageContentAsync(ChatHistory);

            // Extract the response content
            string MessageContent = Result.InnerContent.ToString();
            Debug.WriteLine("Message from chat completion service:" + MessageContent);

            // Add the assistant's message to the history
            ChatHistory.AddAssistantMessage(MessageContent);

            // Send the response to the UI
            var message = new Message(MessageRole.Assistant, MessageContent);
            args.SendMessage(message);
        }
    }
With this in place, every time the user sends a message, the chat completion service will process the conversation history and generate a response from OpenAI. The result is then displayed in the chat window.
Step 4: Run Your Project
Before running the project, ensure that the correct environment variable for the OpenAI key is set (OpenAiTestKey). This key is necessary for the integration to communicate with OpenAI’s API.
Now, you’re ready to test! Simply run your project and navigate to https://localhost:58108/sk. Voilà! You’ll see a beautiful, AI-powered chat interface waiting for your input. ?
Conclusion
And that’s it! You’ve successfully integrated the DevExpress Chat component with the Semantic Kernel for AI-powered chat completions. Now, you can take your user interaction to the next level with intelligent, context-aware responses. The possibilities are endless with this integration—whether you’re building a customer support chatbot, a productivity assistant, or something entirely new.
Let me know how your integration goes, and feel free to share what cool things you build with this!
here is the full implementation GitHub