
by Joche Ojeda | Jan 15, 2026 | DLLs, netframework
Most .NET developers eventually face it.
A project that targets .NET Framework 4.7.2, uses video and audio components, depends on vendor SDKs, and mixes managed code, native DLLs, and legacy decisions.
In other words: a brownfield project.
This is the kind of system that still runs real businesses, even if it doesn’t fit neatly into modern slides about containers and self-contained deployments.
And it’s also where many developers discover — usually the hard way — that deployment is not just copying the Release folder and hoping for the best.
The Myth: “Just Copy the EXE”
I’ve seen this mindset for years:
“It works on my machine. Just copy the EXE and the DLLs to the client.”
Sometimes it works. Often it doesn’t.
And when it fails, it fails in the most frustrating ways:
- Silent crashes
- Missing assembly errors
- COM exceptions that appear only on client machines
- Video or audio features that break minutes after startup
The real issue isn’t the DLL.
The real issue is that most developers don’t understand how .NET Framework actually resolves assemblies.
How I Learned This the Hard Way (XPO + Pervasive, 2006)
The first time I truly understood this was around 2006, while writing a custom XPO provider for Pervasive 7.
At the time, the setup was fairly typical:
- A .NET Framework application
- Using DevExpress XPO
- Talking to Pervasive SQL
- The Pervasive .NET provider lived under Program Files
- It was not registered in the GAC
On my development machine, everything worked.
On another machine? File not found. Or worse: a crash when XPO tried to initialize the provider.
The “fix” everyone used back then was almost ritual:
“Copy the Pervasive provider DLL into the same folder as the EXE.”
And suddenly… it worked.
That was my first real encounter with assembly probing — even though I didn’t know the name yet.
How Assembly Resolution Really Works in .NET Framework
.NET Framework does not scan your disk.
It does not care that a DLL exists under Program Files.
It follows a very strict resolution order.
1. Already Loaded Assemblies
If the assembly is already loaded in the current AppDomain, the CLR reuses it.
Simple.
2. Application Base Directory
Next, the CLR looks in the directory where the EXE lives.
This single rule explains years of “just copy the DLL next to the EXE” folklore.
In the Pervasive case, copying the provider locally worked because it entered the application base probing path.
3. Private Probing Paths
This is where things get interesting.
In app.config, you can extend the probing logic:
<runtime>
  <assemblyBinding xmlns="urn:schemas-microsoft-com:asm.v1">
    <probing privatePath="lib;providers;drivers" />
  </assemblyBinding>
</runtime>
This tells the runtime:
“If you don’t find the assembly in the EXE folder, also look in these subfolders.”
Important details many developers miss:
- Paths are relative to the EXE
- No recursive search
- Every folder must be explicitly listed
4. Global Assembly Cache (GAC)
Only after probing the application paths does the CLR look in the GAC, and only if:
- The assembly is strong-named
- The reference includes that strong name
Two common misconceptions:
- A DLL being “installed on the system” does not matter
- Non–strong-named assemblies are never loaded from the GAC
5. AssemblyResolve: The Last-Chance Hook
If the CLR cannot find an assembly using any of the rules above, it fires:
AppDomain.CurrentDomain.AssemblyResolve
This happens at runtime, exactly when the assembly is needed.
That’s why:
- The app may start fine
- The crash happens later
- Video or database features fail “randomly”
Why Video and Audio Projects Amplify the Pain
Projects that deal with video codecs, audio pipelines, hardware acceleration, and vendor SDKs are especially vulnerable because:
- Assemblies load late
- Managed code pulls native DLLs
- Bitness matters (x86 vs x64)
- Licensing logic often lives outside managed code
The failure doesn’t happen at startup. It happens when the feature is first used.
The Final Step: Building a Real Installer
Eventually, I stopped pretending that copying files was enough.
I built a proper installer.
Even though today I often use the Visual Studio Installer Projects extension, for this legacy application I went with a WiX-based installer. Not because it was fashionable — but because it forced me to be explicit.
An installer asks uncomfortable questions:
- Which assemblies belong in the GAC?
- Which must live next to the EXE?
- Which native DLLs must be deployed together?
- Which dependencies only worked because Visual Studio copied them silently?
I had to inspect every file I was adding and make a conscious decision:
- Shared, strong-named → GAC
- App-local or version-sensitive → EXE folder
- Native dependencies → exact placement matters
The installer didn’t magically fix the application.
It revealed the truth about it.
The Real Lesson of Brownfield Work
Legacy projects don’t fail because they’re old.
They fail because nobody understands them anymore.
Once you understand assembly probing, GAC rules, runtime loading, and deployment boundaries, brownfield systems stop being mysterious.
They become predictable.
What’s Next: COM (Yes, That COM)
This application doesn’t stop at managed assemblies.
It also depends heavily on COM components.
The next article will focus entirely on that world: what COM components really are, why they survived for decades, and how to work with them safely as a .NET developer.
If assembly probing was the first reality check, COM is the one that separates “it runs on my machine” from “this can be deployed.”
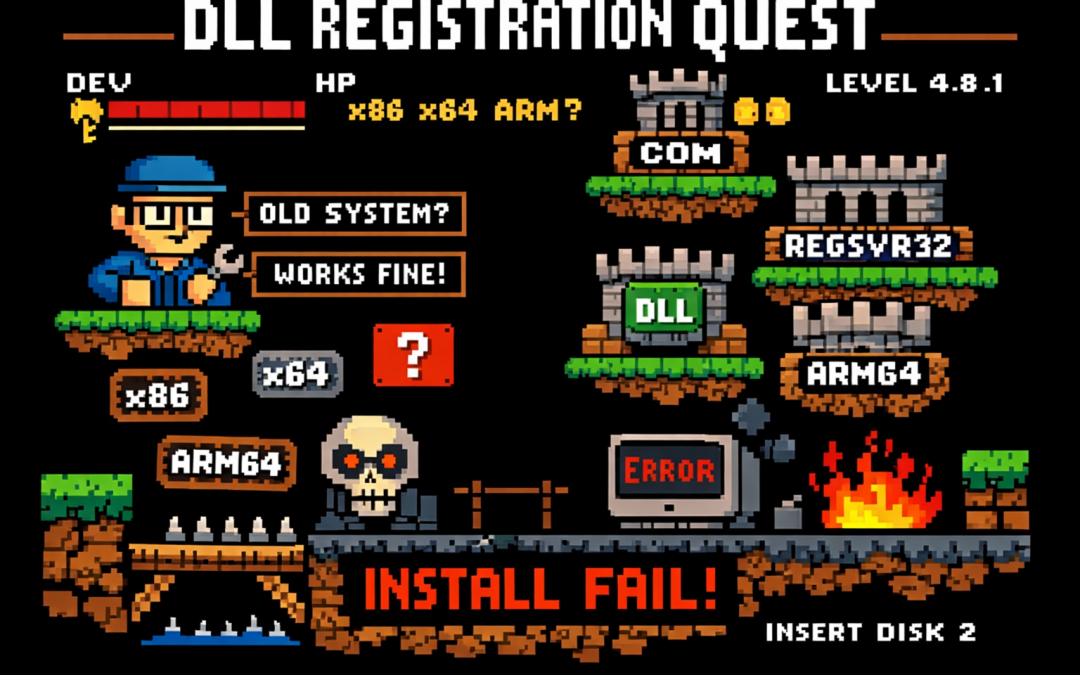
by Joche Ojeda | Jan 8, 2026 | netframework
If you’ve ever worked on a traditional .NET Framework application — the kind that predates .NET Core and .NET 5+ — this story may feel painfully familiar.
I’m talking about classic .NET Framework 4.x applications (4.0, 4.5, 4.5.1, 4.5.2, 4.6, 4.6.1, 4.6.2, 4.7, 4.7.1, 4.7.2, 4.8, and the final release 4.8.1). These systems often live long, productive lives… and accumulate interesting technical debt along the way.
This particular system is written in C# and relies heavily on COM components to render video, audio, and PDF content. Under the hood, many of these components are based on technologies like DirectShow filters, ActiveX controls, or other native COM DLLs.
And that’s where the story begins.
The Setup: COM, DirectShow, and Registration
Unlike managed .NET assemblies, COM components don’t just live quietly next to your executable. They need to be registered in the system registry so Windows knows:
- What CLSID they expose
- Which DLL implements that CLSID
- Whether it’s 32-bit or 64-bit
- How it should be activated
For DirectShow-based components (very common for video/audio playback in legacy apps), registration is usually done manually during development using regsvr32.
Example:
regsvr32 MyVideoFilter.dll
To unregister:
regsvr32 /u MyVideoFilter.dll
Important detail that bites a lot of people:
- 32-bit DLLs must be registered using:
C:\Windows\SysWOW64\regsvr32.exe My32BitFilter.dll
- 64-bit DLLs must be registered using:
C:\Windows\System32\regsvr32.exe My64BitFilter.dll
Yes — the folder names are historically confusing.
Development Works… Until It Doesn’t
So here’s the usual development flow:
- You register all required COM DLLs on your development machine
- Visual Studio runs the app
- Video plays, audio works, PDFs render
- Everyone is happy
Then comes the next step.
“Let’s build an installer.”
The Installer Paradox
This is where the real battle story begins.
Your application installer (MSI, InstallShield, WiX, Inno Setup — pick your poison) now needs to:
- Copy the COM DLLs
- Register them during installation
- Unregister them during uninstall
This seems reasonable… until you test it.
The Loop From Hell
Here’s what happens in practice:
- You install your app for testing
- The installer registers its own copies of the COM DLLs
- Your development environment was using different copies (maybe newer, maybe local builds)
- Suddenly:
- Your source build stops working
- Visual Studio debugging breaks
- Another app on your machine mysteriously fails
Then you:
- Uninstall the app
- The installer unregisters the DLLs
- Now nothing works anymore
So you re-register the DLLs manually for development…
…and the cycle repeats.
The Battle Story: It Only Worked… Until It Didn’t
For a long time, this system appeared to work just fine.
Video played. Audio rendered. PDFs opened. No obvious errors.
What we didn’t realize at first was a dangerous hidden assumption:
The system only worked on machines where a previous version had already been installed.
Those older installations had left COM DLLs registered in the system — quietly, globally, and invisibly.
So when we deployed a new version without removing the old one:
- Everything looked fine
- No one suspected missing registrations
- The system passed casual testing
The illusion broke the moment we tried a clean installation.
On a fresh machine — no previous version, no leftover registry entries — the application suddenly failed:
- Components didn’t initialize
- Media rendering silently broke
- COM activation errors appeared only in Event Viewer
The installer claimed it was registering the DLLs.
In reality, it wasn’t doing it correctly — or at least not in the way the application actually needed.
That’s when we realized we were standing on years of accidental state.
Why This Happens
The core problem is simple but brutal:
COM registration is global and mutable.
There is:
- One registry
- One CLSID mapping
- One “active” DLL per COM component
Your development environment, your installed application, and your installer are all fighting over the same global state.
.NET Framework itself isn’t the villain here — it’s just sitting on top of an old Windows integration model that predates modern isolation concepts.
A New Player Enters: ARM64
Just when we thought the problem space was limited to x86 vs x64, another variable entered the scene.
One of the development machines was ARM64.
Modern Windows on ARM adds a new layer of complexity:
- ARM64 native processes
- x64 emulation
- x86 emulation on top of ARM64
From the outside, everything looks like it’s running on x64.
Under the hood, it’s not that simple.
Why This Makes COM Registration Worse
COM registration is architecture-specific:
- x86 DLLs register under one view of the registry
- x64 DLLs register under another
- ARM64 introduces yet another execution context
On Windows ARM:
System32 contains ARM64 binariesSysWOW64 contains x86 binaries- x64 binaries often run through emulation layers
So now the questions multiply:
- Which
regsvr32 did the installer call?
- Was it ARM64, x64, or x86?
- Did the app run natively, or under emulation?
- Did the COM DLL match the process architecture?
The result is a system where:
- Some things work on Intel machines
- Some things work on ARM machines
- Some things only work if another version was installed first
At this point, debugging stops being logical and starts being archaeological.
Why This Is So Common in .NET Framework 4.x Apps
Many enterprise and media-heavy applications built on:
- .NET Framework 4.0–4.8.1
- WinForms or WPF
- DirectShow or ActiveX components
were designed in an era where:
- Global COM registration was normal
- Side-by-side isolation was rare
- “Just register the DLL” was accepted practice
These systems work, but they’re fragile — especially on developer machines.
Where the Article Is Going Next
In the rest of this article series, we’ll look at:
- Why install-time registration is often a mistake
- How to isolate development vs runtime environments
- Techniques like:
- Dedicated dev VMs
- Registration-free COM (where possible)
- App-local COM deployment
- Clear ownership rules for installers
- How to survive (and maintain) legacy .NET Framework systems without losing your sanity
If you’ve ever broken your own development environment just by testing your installer — you’re not alone.
This is the cost of living at the intersection of managed code and unmanaged history.

by Joche Ojeda | Mar 12, 2025 | dotnet, http, netcore, netframework, network, WebServers
Last week, I was diving into Uno Platform to understand its UI paradigms. What particularly caught my attention is Uno’s ability to render a webapp using WebAssembly (WASM). Having worked with WASM apps before, I’m all too familiar with the challenges of connecting to data sources and handling persistence within these applications.
My Previous WASM Struggles
About a year ago, I faced a significant challenge: connecting a desktop WebAssembly app to an old WCF webservice. Despite having the CORS settings correctly configured (or so I thought), I simply couldn’t establish a connection from the WASM app to the server. I spent days troubleshooting both the WCF service and another ASMX service, but both attempts failed. Eventually, I had to resort to webserver proxies to achieve my goal.
This experience left me somewhat traumatized by the mere mention of “connecting WASM with an API.” However, the time came to face this challenge again during my weekend experiments.
A Pleasant Surprise with Uno Platform
This weekend, I wanted to connect a XAF REST API to an Uno Platform client. To my surprise, it turned out to be incredibly straightforward. I successfully performed this procedure twice: once with a XAF REST API and once with the API included in the Uno app template. The ease of this integration was a refreshing change from my previous struggles.
Understanding CORS and Why It Matters for WASM Apps
To understand why my previous attempts failed and my recent ones succeeded, it’s important to grasp what CORS is and why it’s crucial for WebAssembly applications.
What is CORS?
CORS (Cross-Origin Resource Sharing) is a security feature implemented by web browsers that restricts web pages from making requests to a domain different from the one that served the original web page. It’s an HTTP-header based mechanism that allows a server to indicate which origins (domains, schemes, or ports) other than its own are permitted to load resources.
The Same-Origin Policy
Browsers enforce a security restriction called the “same-origin policy” which prevents a website from one origin from requesting resources from another origin. An origin consists of:
- Protocol (HTTP, HTTPS)
- Domain name
- Port number
For example, if your website is hosted at https://myapp.com, it cannot make AJAX requests to https://myapi.com without the server explicitly allowing it through CORS.
Why CORS is Required for Blazor WebAssembly
Blazor WebAssembly (which uses similar principles to Uno Platform’s WASM implementation) is fundamentally different from Blazor Server in how it operates:
- Separate Deployment: Blazor WebAssembly apps are fully downloaded to the client’s browser and run entirely in the browser using WebAssembly. They’re typically hosted on a different server or domain than your API.
- Client-Side Execution: Since all code runs in the browser, when your Blazor WebAssembly app makes HTTP requests to your API, they’re treated as cross-origin requests if the API is hosted on a different domain, port, or protocol.
- Browser Security: Modern browsers block these cross-origin requests by default unless the server (your API) explicitly permits them via CORS headers.
Implementing CORS in Startup.cs
The solution to these CORS issues lies in properly configuring your server. In your Startup.cs file, you can configure CORS as follows:
public void ConfigureServices(IServiceCollection services) {
    services.AddCors(options => {
        options.AddPolicy("AllowBlazorApp",
            builder => {
                builder.WithOrigins("https://localhost:5000") // Replace with your Blazor app's URL
                       .AllowAnyHeader()
                       .AllowAnyMethod();
            });
    });

    // Other service configurations...
}

public void Configure(IApplicationBuilder app, IWebHostEnvironment env) {
    // Other middleware configurations...

    app.UseCors("AllowBlazorApp");

    // Other middleware configurations...
}
Conclusion
My journey with connecting WebAssembly applications to APIs has had its ups and downs. What once seemed like an insurmountable challenge has now become much more manageable, especially with platforms like Uno that simplify the process. Understanding CORS and implementing it correctly is crucial for successful WASM-to-API communication.
If you’re working with WebAssembly applications and facing similar challenges, I hope my experience helps you avoid some of the pitfalls I encountered along the way.
About Us
YouTube
https://www.youtube.com/c/JocheOjedaXAFXAMARINC
Our sites
Let’s discuss your XAF
https://www.udemy.com/course/microsoft-ai-extensions/
Our free A.I courses on Udemy

by Joche Ojeda | Apr 24, 2024 | C#, netframework
A Beginner’s Guide to System.Security.SecurityRules and SecuritySafeCritical in C#
Introduction
In the .NET Framework, security is a critical concern. Two attributes, System.Security.SecurityRules and SecuritySafeCritical, play a significant role in enforcing Code Access Security (CAS).
System.Security.SecurityRules
The System.Security.SecurityRules attribute specifies the set of security rules that the common language runtime should enforce for an assembly. It has two levels: Level1 and Level2.
Level1
Level1 uses the .NET Framework version 2.0 transparency rules. Here are the key rules for Level1:
- Public security-critical types and members are treated as security-safe-critical outside the assembly.
- Security-critical types and members must perform a link demand for full trust to enforce security-critical behavior when they are accessed by external callers.
- Level1 rules should be used only for compatibility, such as for .NET Framework 2.0 assemblies.
[assembly: System.Security.SecurityRules(System.Security.SecurityRuleSet.Level1)]
public class MyClass
{
    // Your code here
}
SecuritySafeCritical
The SecuritySafeCritical attribute identifies types or members as security-critical and safely accessible by transparent code. Code marked with SecuritySafeCritical must undergo a rigorous security audit to ensure that it can be used safely in a secure execution environment. It must validate the permissions of callers to determine whether they have authority to access protected resources used by the code.
[System.Security.SecuritySafeCritical]
public void MyMethod()
{
    // Your code here
}
Relationship between System.Security.SecurityRules and SecuritySafeCritical
The System.Security.SecurityRules and SecuritySafeCritical attributes work together to enforce security in .NET Framework. An assembly marked with SecurityRules(SecurityRuleSet.Level1) uses the .NET Framework version 2.0 transparency rules, where public security-critical types and members are treated as security-safe-critical outside the assembly.
The concept of trusted Code
Trusted code refers to code that has been granted certain permissions and is considered safe to execute. It’s a combination of techniques, policies, and procedures for which there is no plausible scenario in which a document retrieved from or reproduced by the system could differ substantially from the document that is originally stored. In other words, trusted code certifies that electronically stored information (ESI) is an authentic copy of the original document or information.
Use Cases and Examples
Consider a scenario where you have a method that performs a critical operation, such as accessing a protected resource. You want to ensure that this method can only be called by trusted code. You can mark this method as SecuritySafeCritical to enforce this.
[System.Security.SecuritySafeCritical]
public void AccessProtectedResource()
{
    // Code to access protected resource
}
In this case, the AccessProtectedResource method can only be called by code that has been granted the necessary permissions. This helps to prevent unauthorized access to the protected resource.
Conclusion
Understanding the System.Security.SecurityRules and SecuritySafeCritical attributes is crucial when developing secure .NET applications. By using these attributes correctly, you can enforce robust security rules and protect your application from potential threats. Always remember, with great power comes great responsibility!
I hope this article helps you understand these concepts better. Happy coding! ?

by Joche Ojeda | Mar 7, 2024 | C#, dotnet, netcore, netframework
Understanding AppDomains in .NET Framework and .NET 5 to 8
AppDomains, or Application Domains, have been a fundamental part of isolation and security in the .NET Framework, allowing multiple applications to run under a single process without affecting each other. However, the introduction of .NET Core and its evolution through .NET 5 to 8 has brought significant changes to how isolation and application boundaries are handled. This article will explore the concept of AppDomains in the .NET Framework, their transition and replacement in .NET 5 to 8, and provide code examples to illustrate these differences.
AppDomains in .NET Framework
In the .NET Framework, AppDomains served as an isolation boundary for applications, providing a secure and stable environment for code execution. They enabled developers to load and unload assemblies without affecting the entire application, facilitating application updates, and minimizing downtime.
Creating an AppDomain
using System;

namespace NetFrameworkAppDomains
{
    class Program
    {
        static void Main(string[] args)
        {
            // Create a new application domain
            AppDomain newDomain = AppDomain.CreateDomain("NewAppDomain");

            // Load an assembly into the application domain
            newDomain.ExecuteAssembly("MyAssembly.exe");

            // Unload the application domain
            AppDomain.Unload(newDomain);
        }
    }
}
AppDomains in .NET 5 to 8
With the shift to .NET Core and its successors, the concept of AppDomains was deprecated, reflecting the platform’s move towards cross-platform compatibility and microservices architecture. Instead of AppDomains, .NET 5 to 8 emphasizes on assembly loading contexts for isolation and the use of containers (like Docker) for application separation.
AssemblyLoadContext in .NET 5 to 8
using System;
using System.Reflection;
using System.Runtime.Loader;

namespace NetCoreAssemblyLoading
{
    class Program
    {
        static void Main(string[] args)
        {
            // Create a new AssemblyLoadContext
            var loadContext = new AssemblyLoadContext("MyLoadContext", true);

            // Load an assembly into the context
            Assembly assembly = loadContext.LoadFromAssemblyPath("MyAssembly.dll");

            // Execute a method from the assembly (example method)
            MethodInfo methodInfo = assembly.GetType("MyNamespace.MyClass").GetMethod("MyMethod");
            methodInfo.Invoke(null, null);

            // Unload the AssemblyLoadContext
            loadContext.Unload();
        }
    }
}
Differences and Considerations
- Isolation Level: AppDomains provided process-level isolation without needing multiple processes. In contrast,
AssemblyLoadContext provides a lighter-weight mechanism for loading assemblies but doesn’t offer the same isolation level. For higher isolation, .NET 5 to 8 applications are encouraged to use containers or separate processes.
- Compatibility: AppDomains are specific to the .NET Framework and are not supported in .NET Core and its successors. Applications migrating to .NET 5 to 8 need to adapt their architecture to use
AssemblyLoadContext or explore alternative isolation mechanisms like containers.
- Performance: The move away from AppDomains to more granular assembly loading and containers reflects a shift towards microservices and cloud-native applications, where performance, scalability, and cross-platform compatibility are prioritized.
Conclusion
While the transition from AppDomains to AssemblyLoadContext and container-based isolation marks a significant shift in application architecture, it aligns with the modern development practices and requirements of .NET applications. Understanding these differences is crucial for developers migrating from the .NET Framework to .NET 5 to