OK — it’s time for today’s Oqtane blog post!
Yesterday, I wrote about changing the runtime mode in Oqtane and how that allows you to switch between
Blazor Server and Blazor WebAssembly functionality.
Today, I decided to explore how multi-tenancy works — specifically, how Oqtane manages multiple sites within the same
installation.
Originally, I wanted to cover the entire administrative panel and all of its modules in one post, but that would’ve been too big.
So, I’m breaking it down into smaller topics. This post focuses only on site functionality and how
multi-tenancy works from the administrative side — basically, how to set up tenants in Oqtane.
Setting Up a Multi-Tenant Oqtane Installation
To make these experiments easy to replicate, I decided to use SQLite as my database.
I created a new .NET Oqtane application using the official templates and added it to a
GitHub repository.
Here’s what I did:
- Set up the host configuration directly in
appsettings.json. - Ran the app, went to the admin panel, and created two additional sites.
You can see the screenshots below showing the settings for each site.
At first, it was a bit confusing — I thought I could simply use different ports for each site (like 8081,
8082, etc.), but that’s not how Oqtane works. Everything runs in the same process, so all tenants
share the same port.
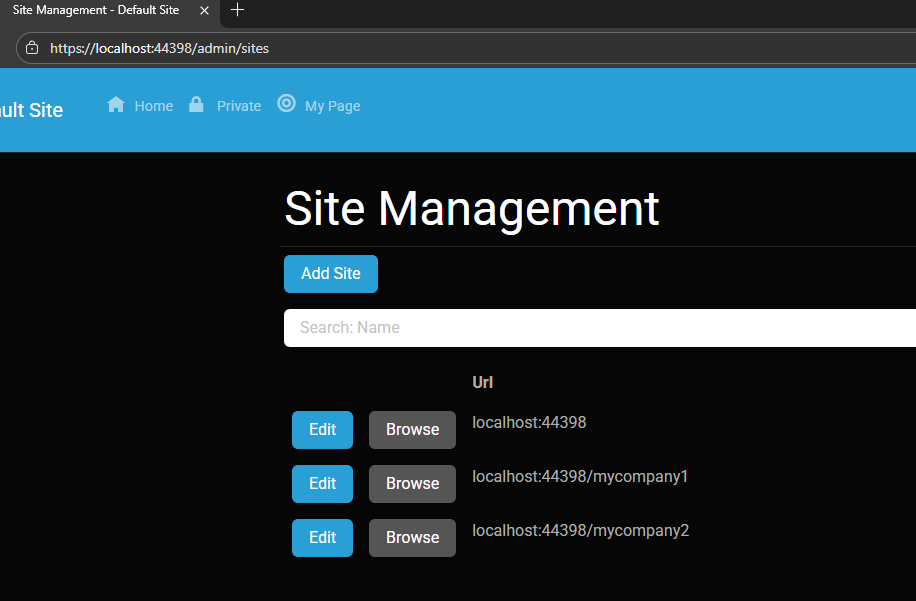
Instead of changing ports, you configure different URL paths or folders. For example:
http://localhost:8080/→ the main hosthttp://localhost:8080/mycompany1→ first tenanthttp://localhost:8080/mycompany2→ second tenant
Site Managment
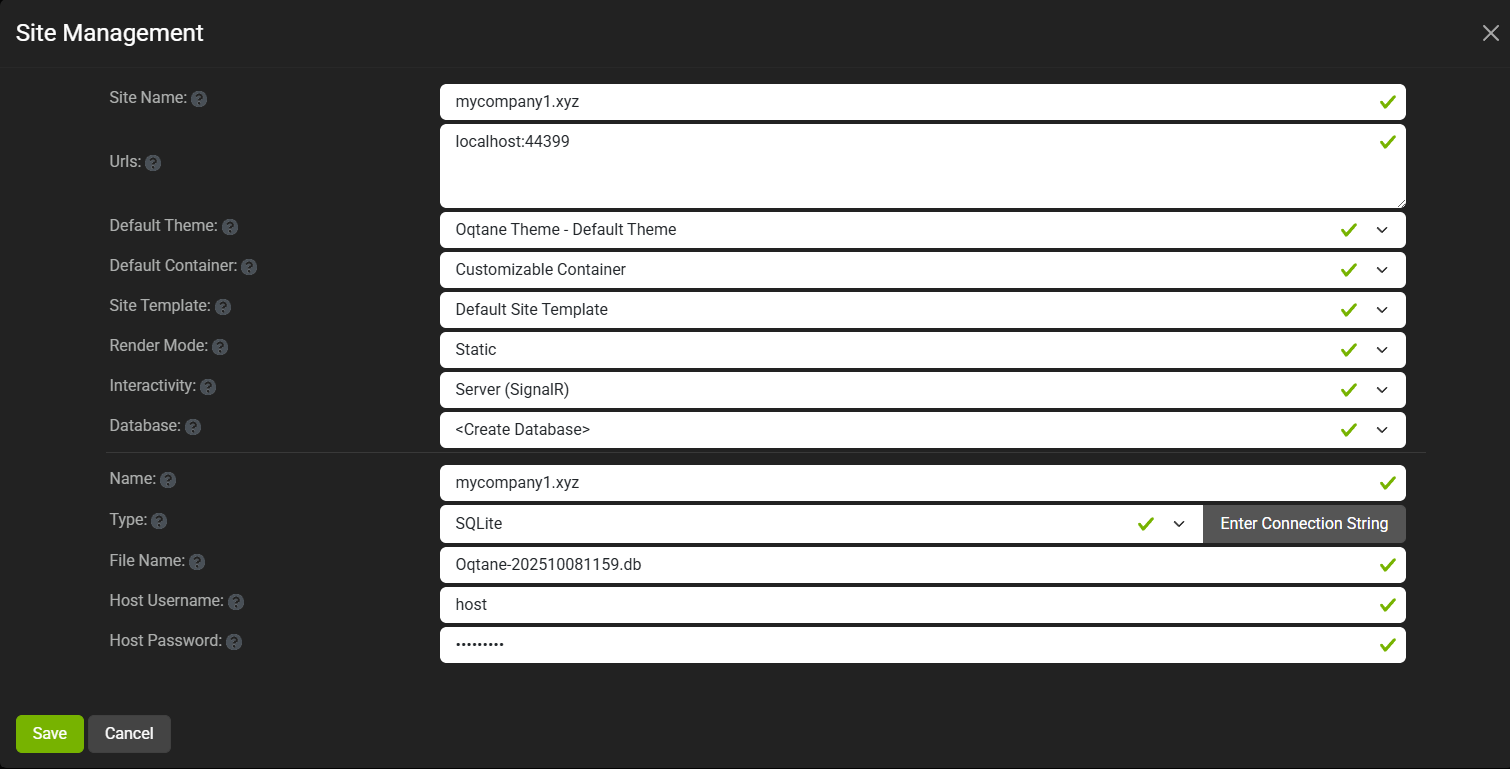
Site MyCompany1
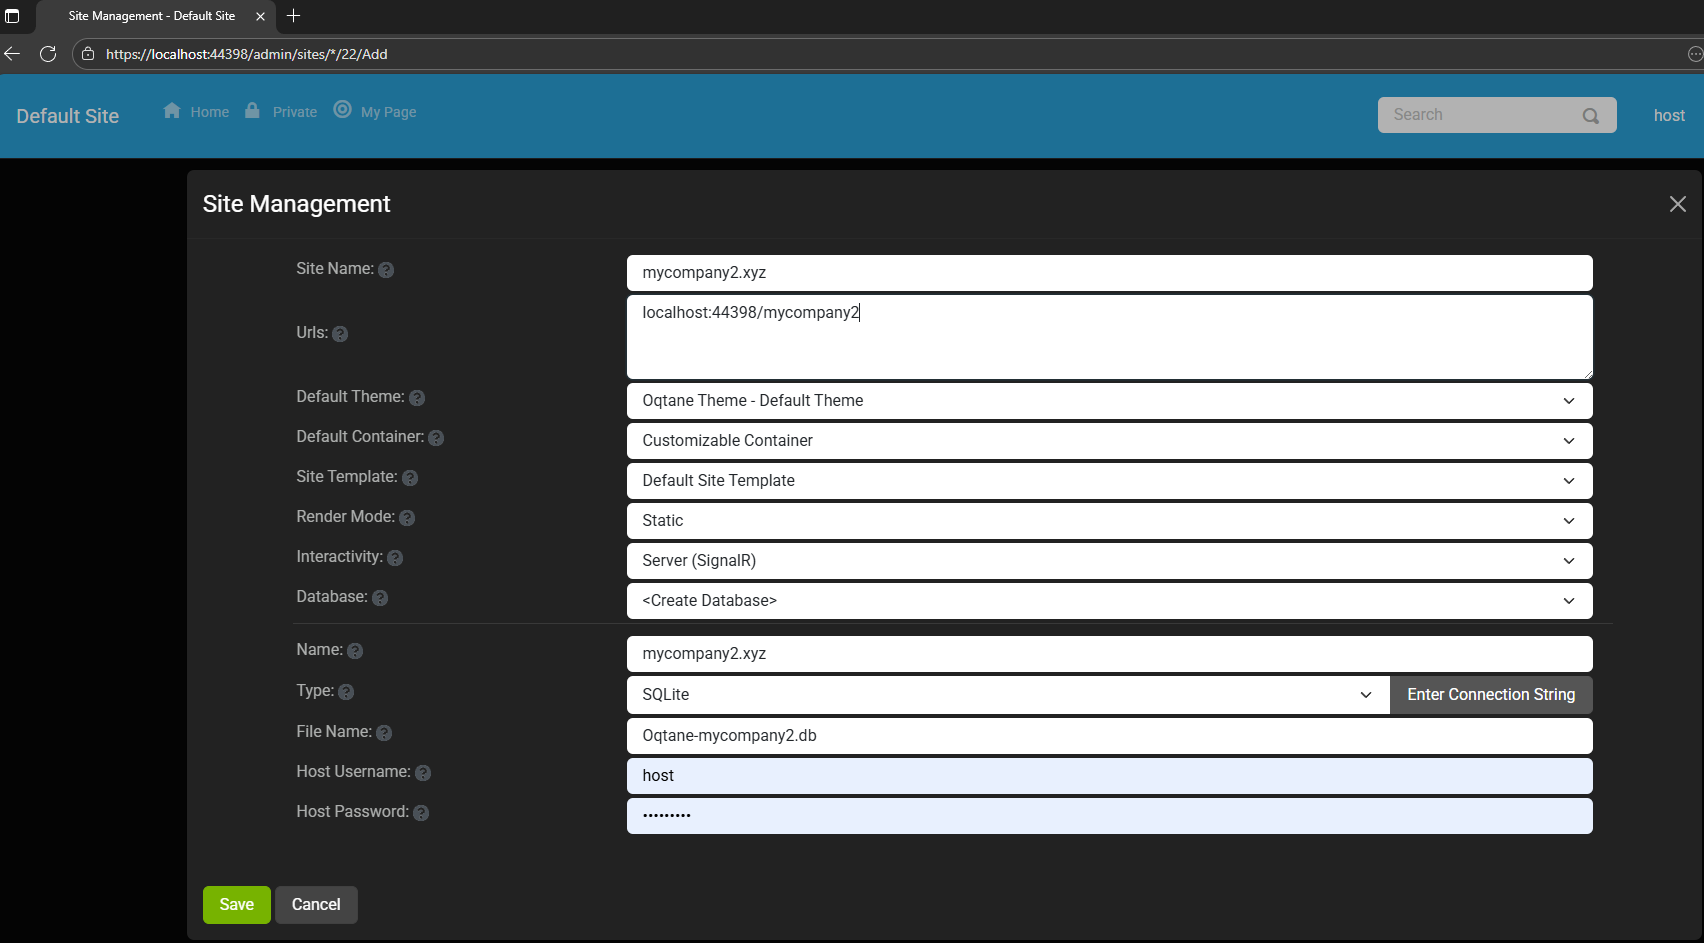
Site MyCompany2
Each tenant can:
- Use a separate database or share the same one as the host
- Have its own theme
- Maintain independent site settings
In the short GIF animation I attached to the repository, you can see how each site has its
own unique visual theme — it’s really neat to watch.
When you add a new site, its connection string is also stored automatically in the application settings. So, if you download
the repository and run it locally, you’ll be able to access all the sites and see how the URLs and configurations work.
Here is the repository egarim/OqtaneMultiTenant: an example of how to use multi tenant in oqtane
Why I’m Doing These Posts
These blog entries are like my personal research notes — documenting what I discover while working with Oqtane.
I’m keeping each experiment small and reproducible so I can:
- Share them with others easily
- Download them later and reproduce the same setup, including data and configuration
What’s Next
In the next post, I’ll cover virtual hosting — how to use domain names that forward to specific
URLs or tenants. I’ve already done some research on that, but I don’t want to overload this post with too many topics.
For now, I’ll just attach the screenshots showing the different site configurations and URLs, along with a link to the GitHub
repository so you can try it yourself.
If you have any questions, feel free to reach out! I’ll keep documenting everything as I go.
One of the great things about Oqtane is that it’s open source — you can always dive into the code, or if you’re
stuck, open a GitHub issue. Shaun Walker and the community are incredibly helpful, so don’t hesitate to ask.
Thanks again to the Oqtane team for building such an amazing framework.