
by Joche Ojeda | Mar 13, 2025 | netcore, Uno Platform
For the past two weeks, I’ve been experimenting with the Uno Platform in two ways: creating small prototypes to explore features I’m curious about and downloading example applications from the Uno Gallery. In this article, I’ll explain the first steps you need to take when creating an Uno Platform application, the decisions you’ll face, and what I’ve found useful so far in my journey.
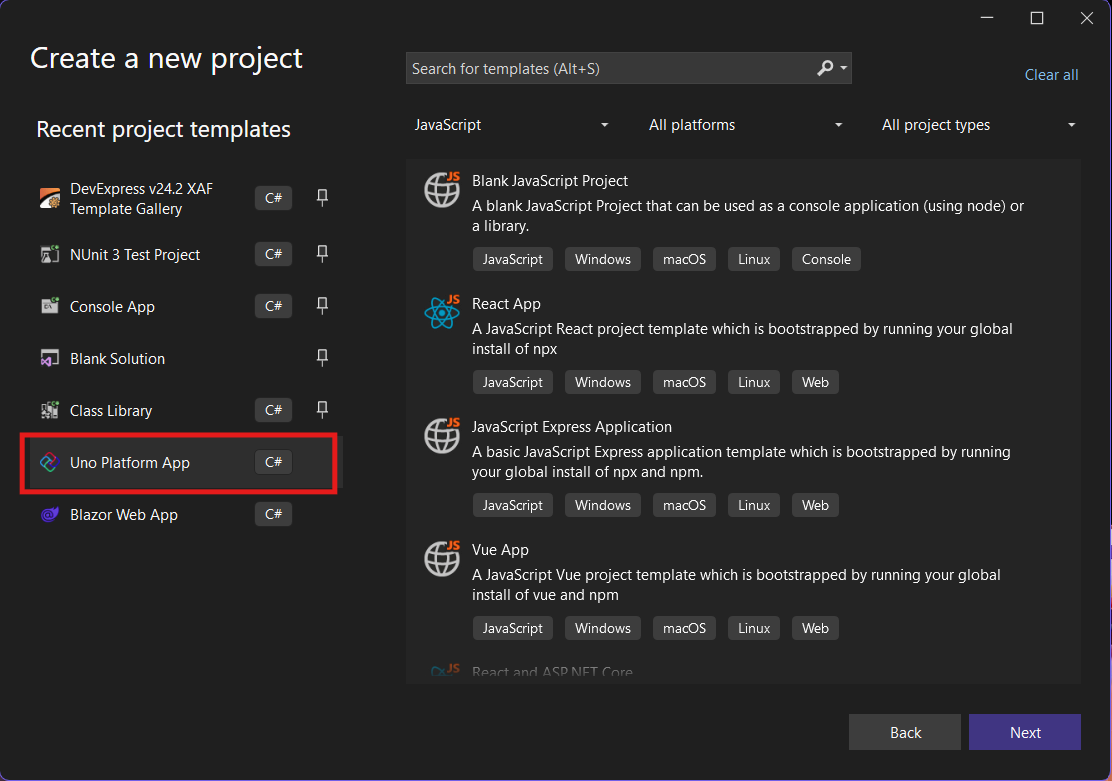
Step 1: Create a New Project
I’m using Visual Studio 2022, though the extensions and templates work well with previous versions too. I have both studio versions installed, and Uno Platform works well in both.
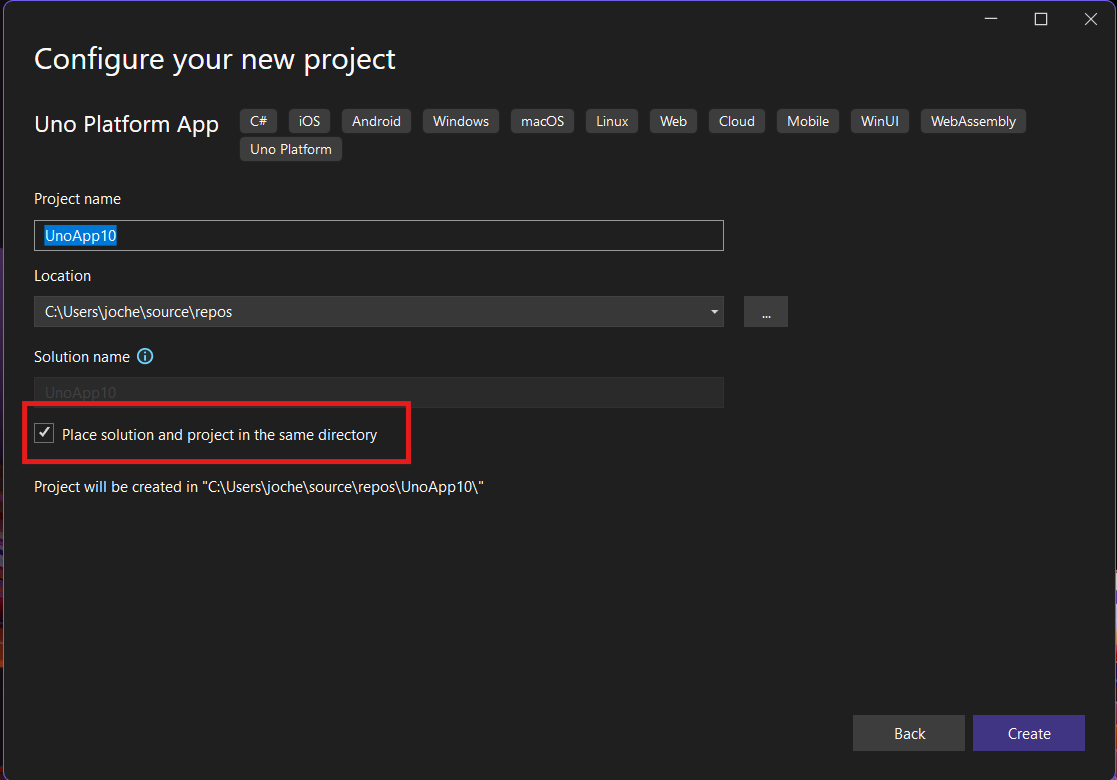
Step 2: Project Setup
After naming your project, it’s important to select “Place solution and project in the same directory” because of the solution layout requirements. You need the directory properties file to move forward. I’ll talk more about the solution structure in a future post, but for now, know that without checking this option, you won’t be able to proceed properly.
Step 3: The Configuration Wizard
The Uno Platform team has created a comprehensive wizard that guides you through various configuration options. It might seem overwhelming at first, but it’s better to have this guided approach where you can make one decision at a time.
Your first decision is which target framework to use. They recommend .NET 9, which I like, but in my test project, I’m working with .NET 8 because I’m primarily focused on WebAssembly output. Uno offers multi-threading in Web Assembly with .NET 8, which is why I chose it, but for new projects, .NET 9 is likely the better choice.
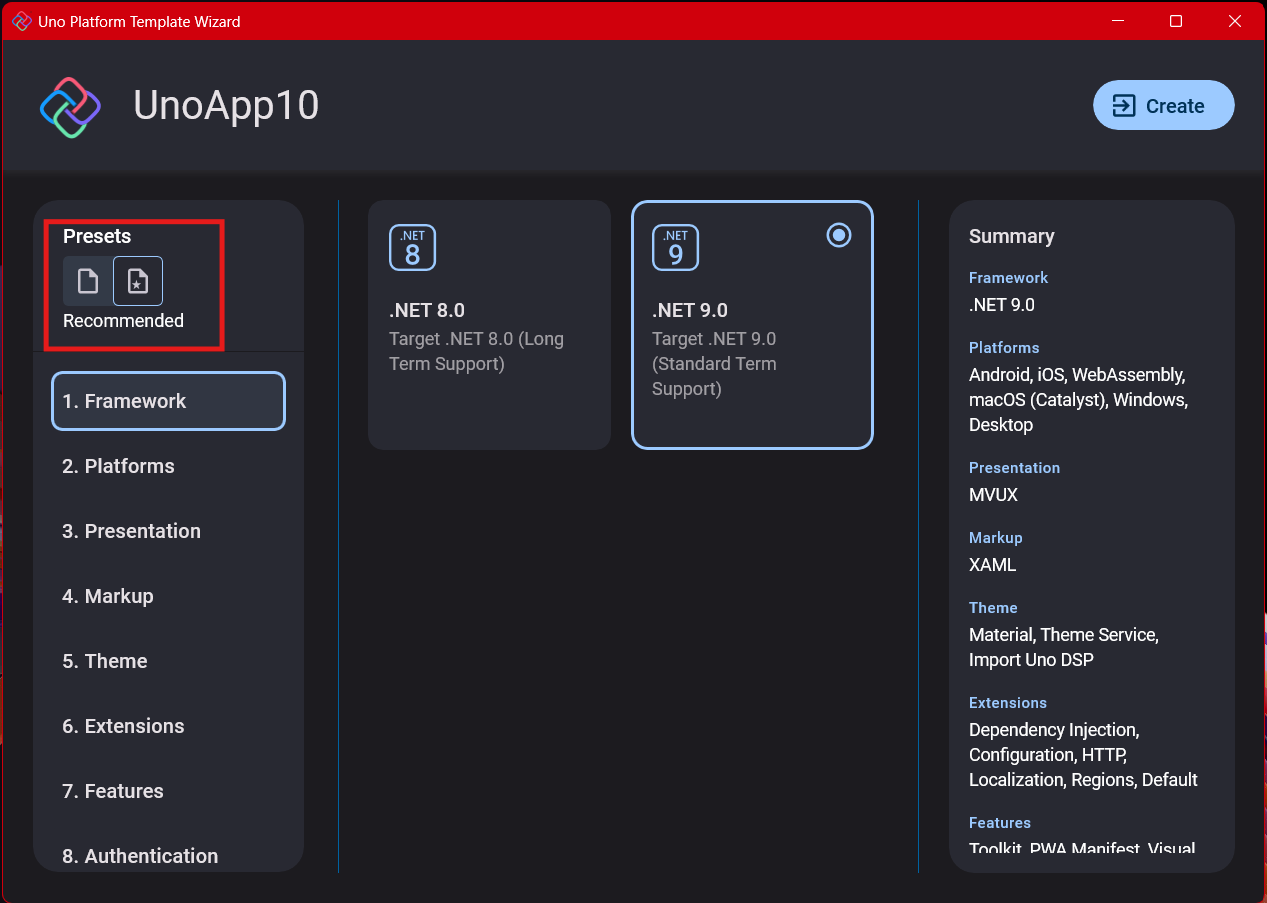
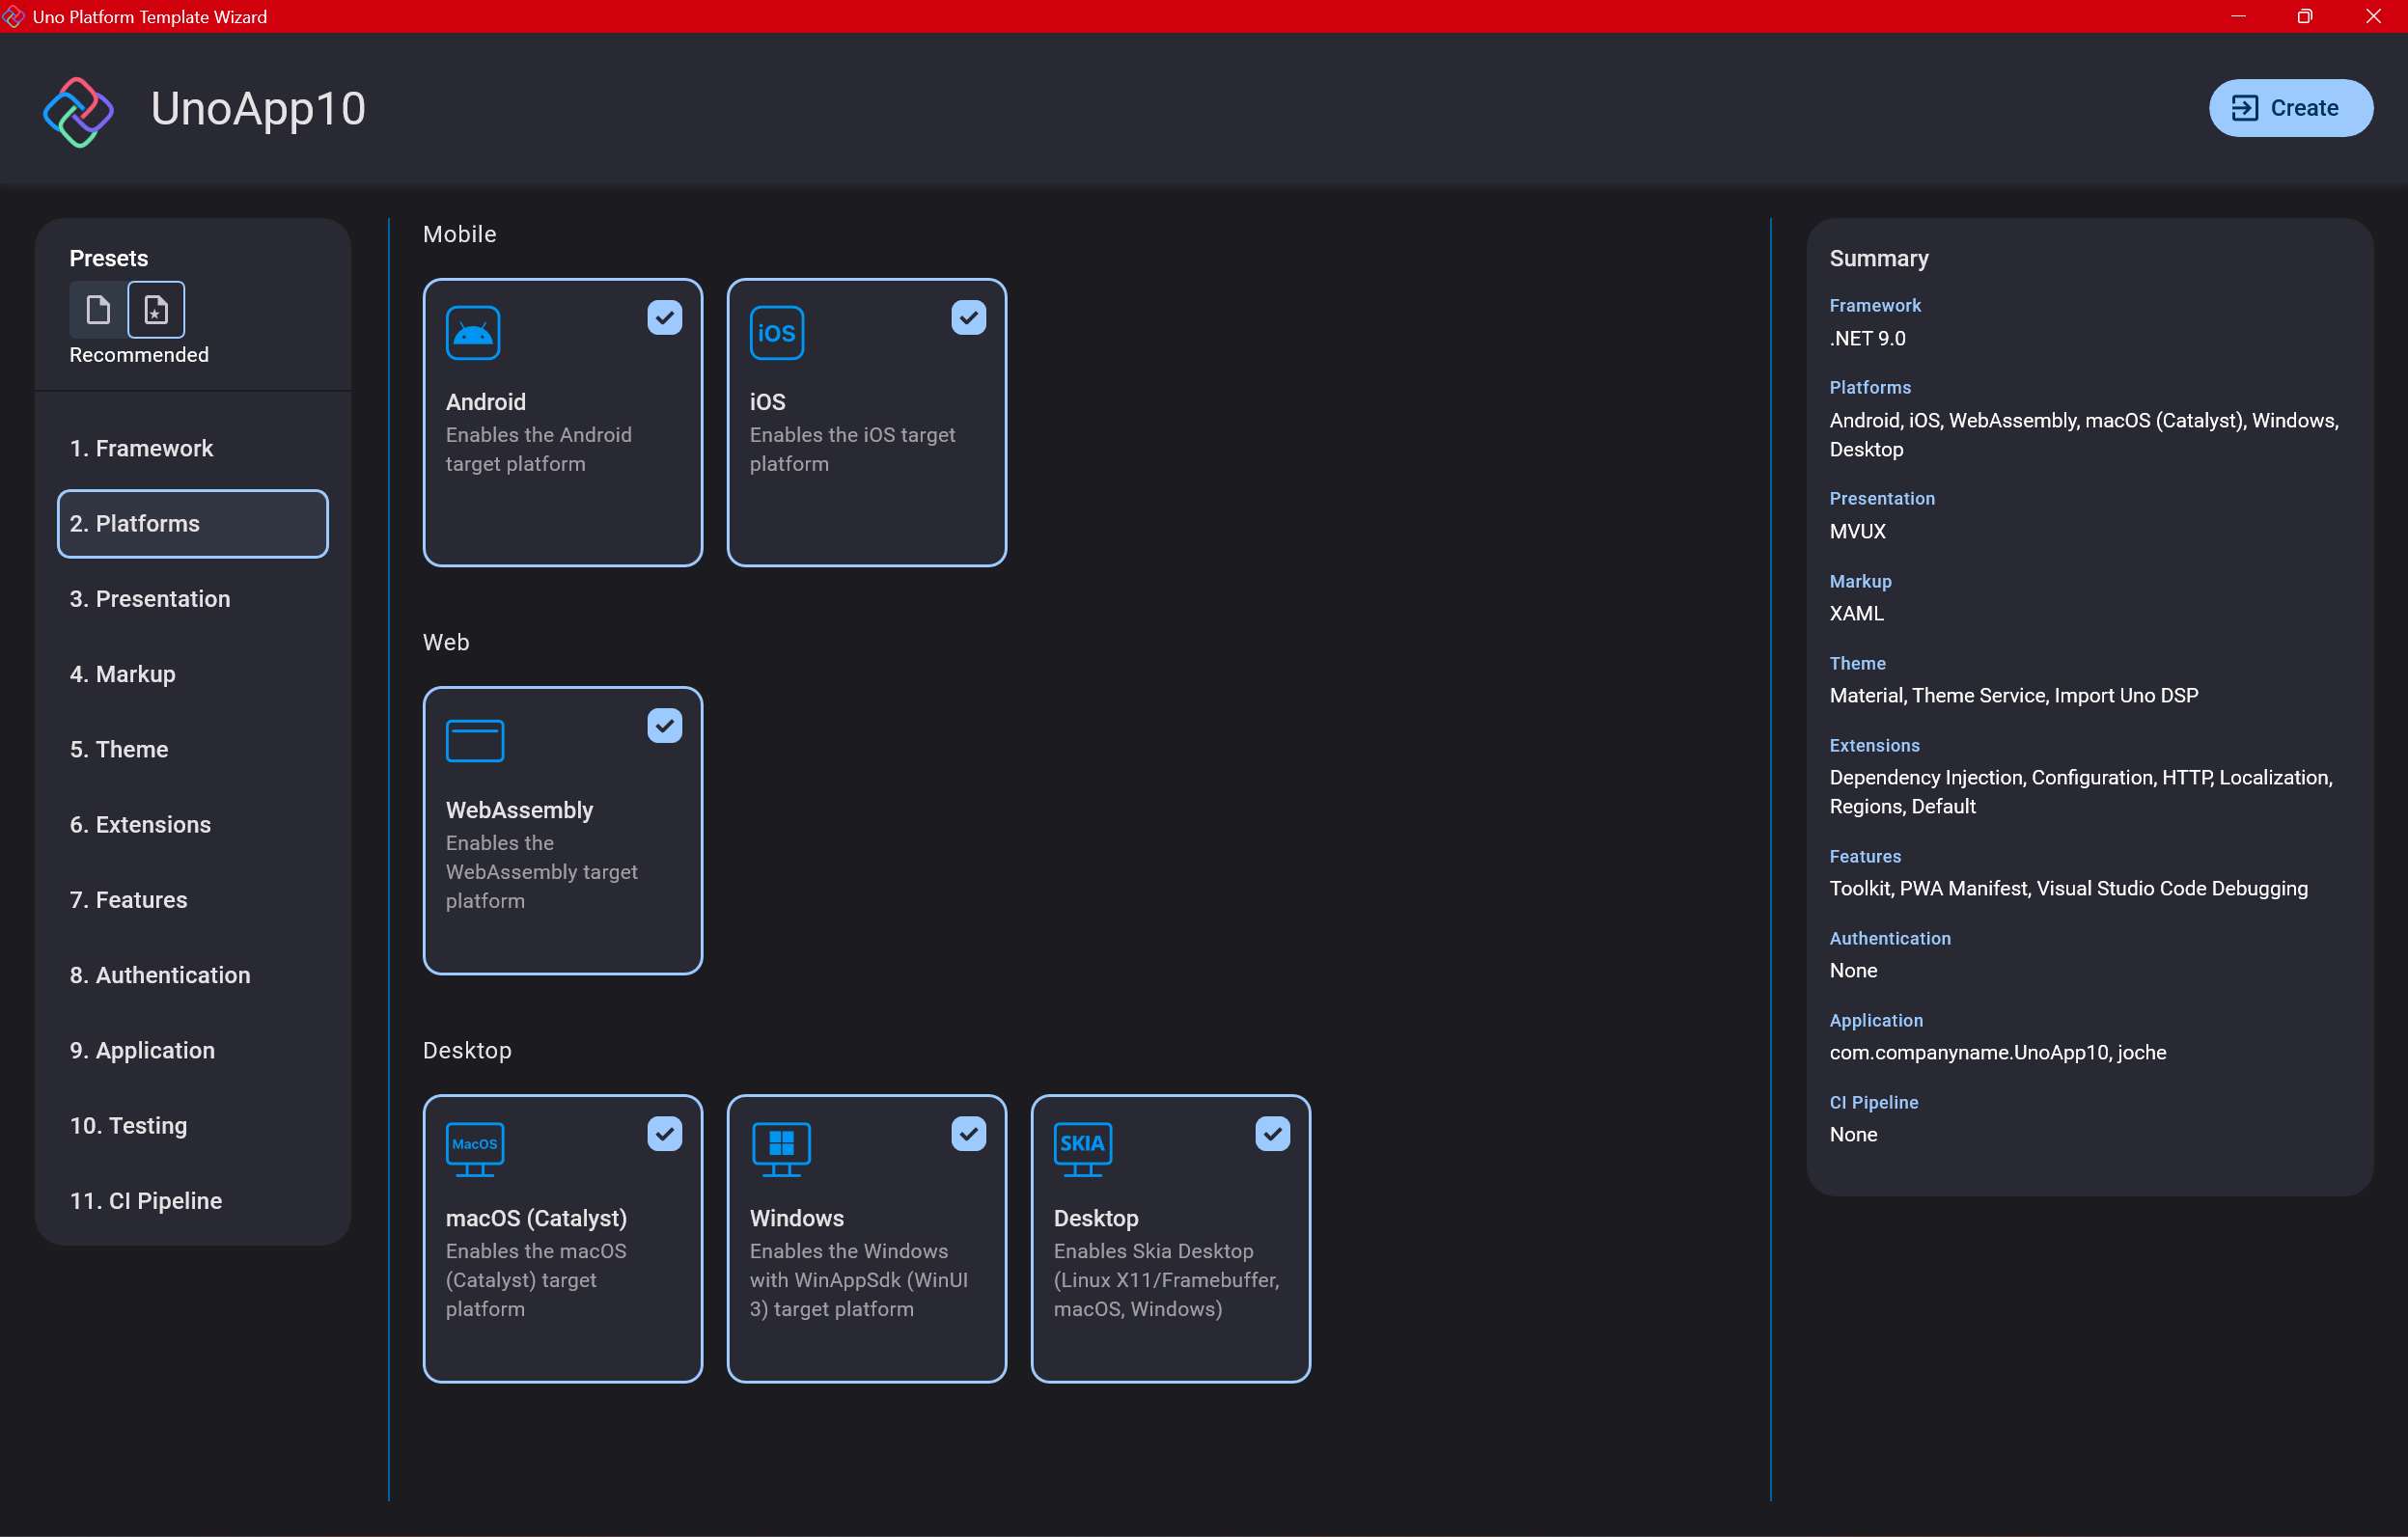
Step 4: Target Platforms
Next, you need to select which platforms you want to target. I always select all of them because the most beautiful aspect of the Uno Platform is true multi-targeting with a single codebase.
In the past (during the Xamarin era), you needed multiple projects with a complex directory structure. With Uno, it’s actually a single unified project, creating a clean solution layout. So while you can select just WebAssembly if that’s your only focus, I think you get the most out of Uno by multi-targeting.
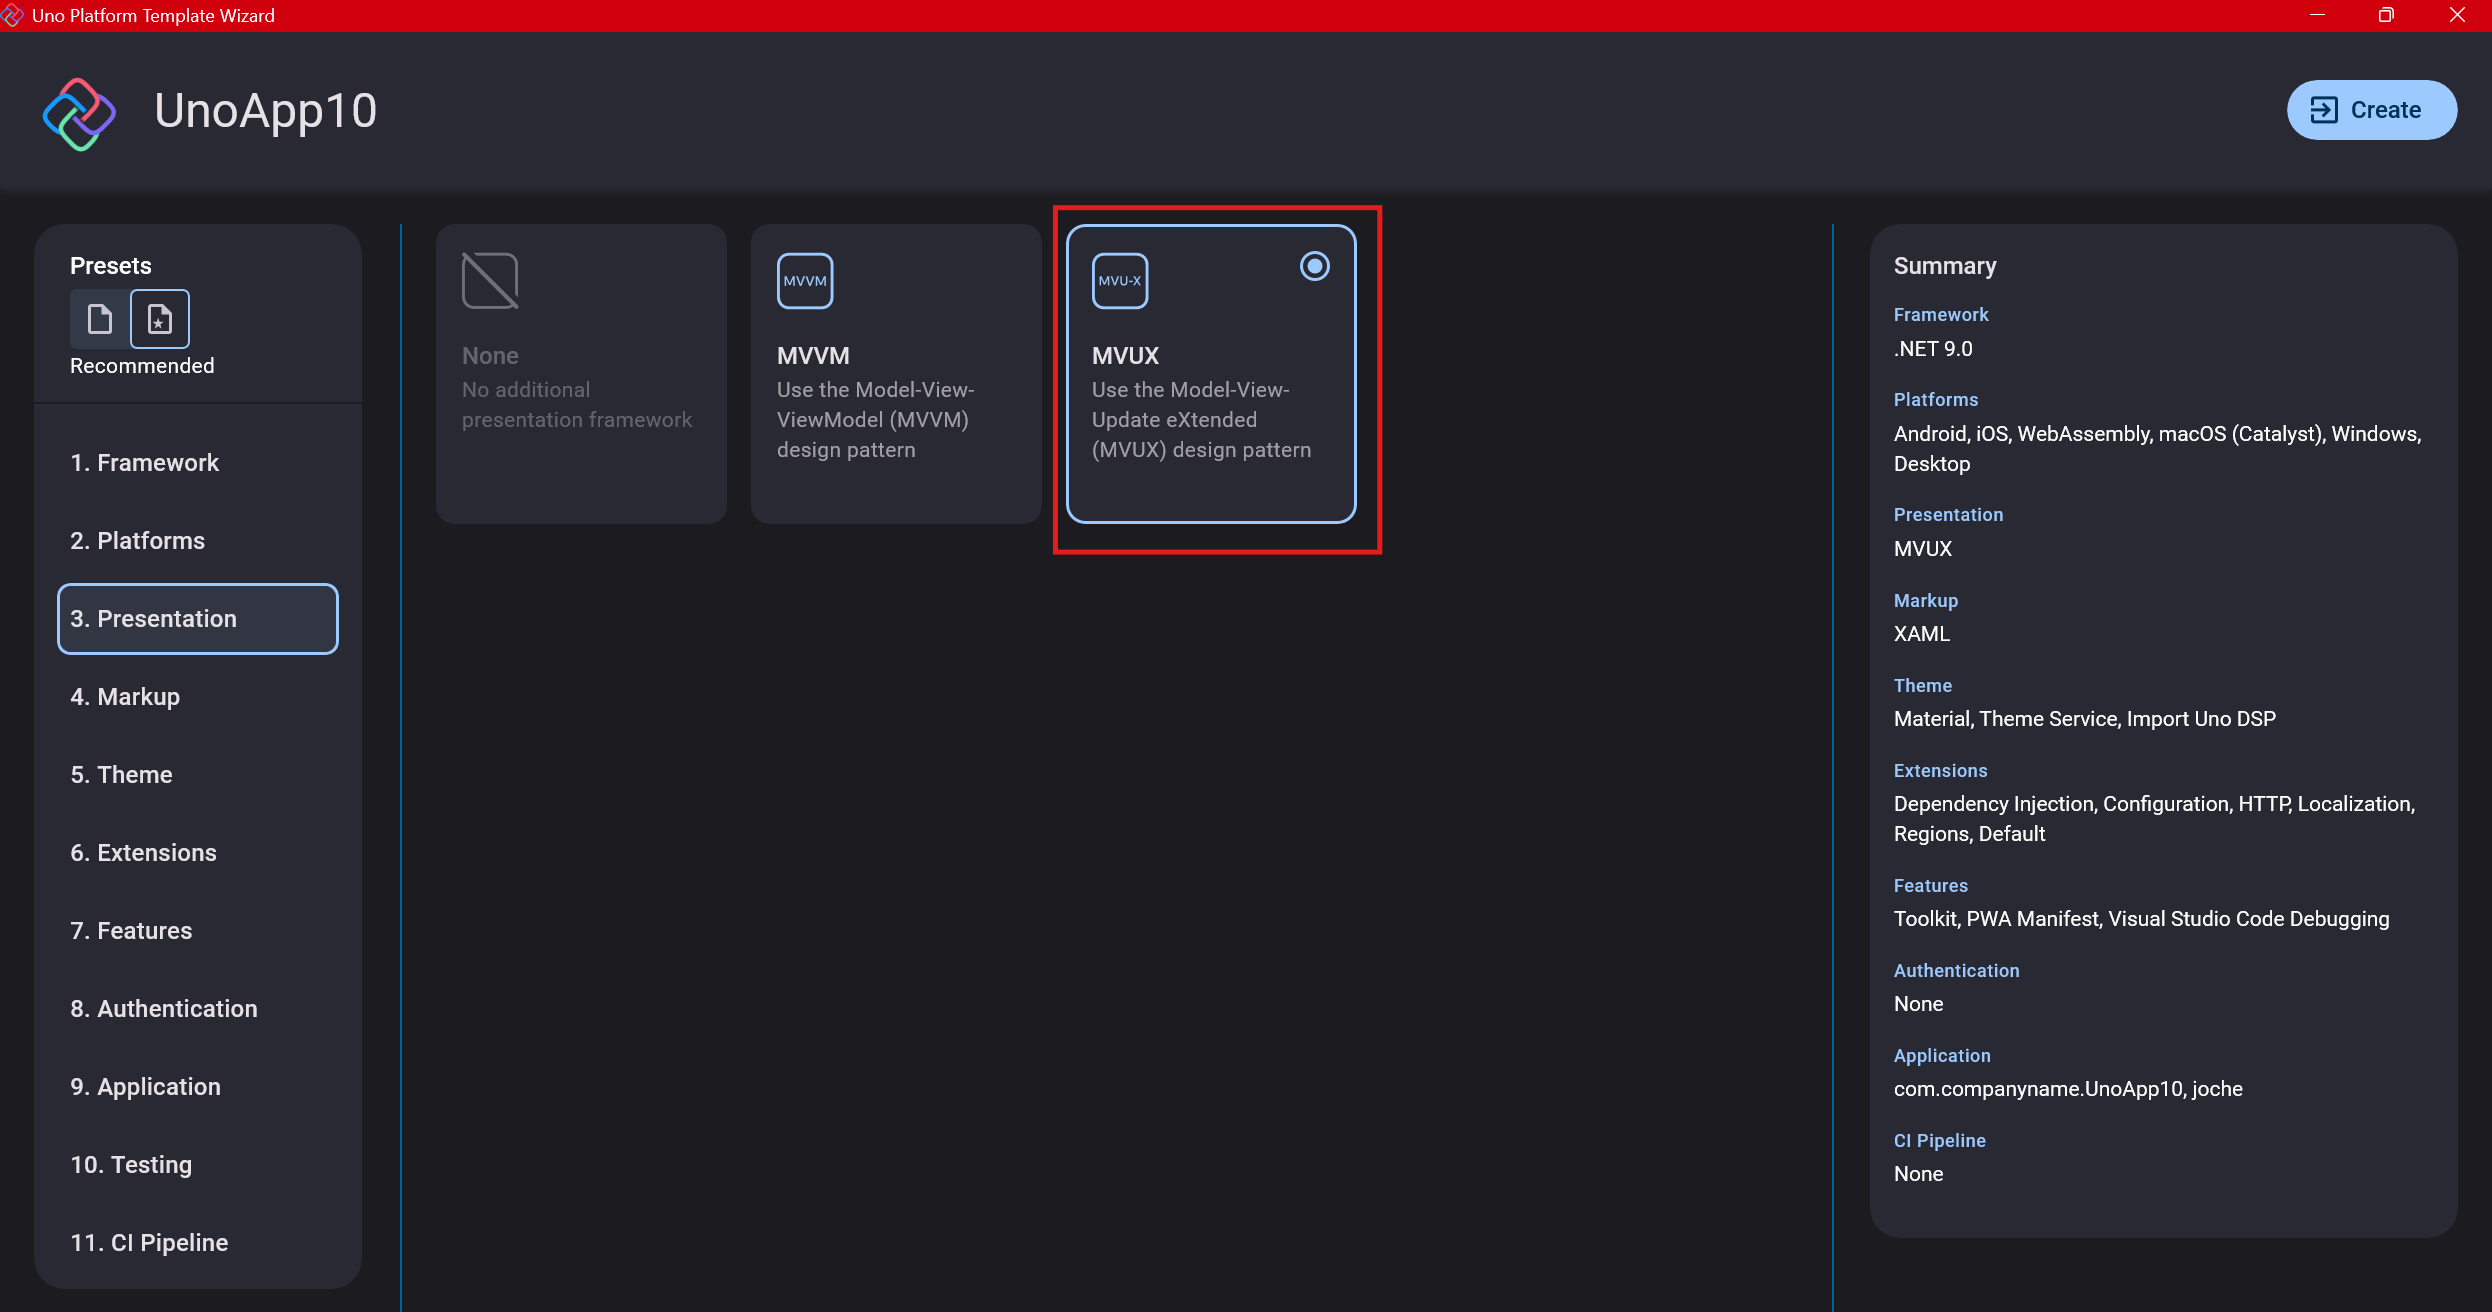
Step 5: Presentation Pattern
The next question is which presentation pattern you want to use. I would suggest MVUX, though I still have some doubts as I haven’t tried MVVM with Uno yet. MVVM is the more common pattern that most programmers understand, while MVUX is the new approach.
One challenge is that when you check the official Uno sample repository, the examples come in every presentation pattern flavor. Sometimes you’ll find a solution for your task in one pattern but not another, so you may need to translate between them. You’ll likely find more examples using MVVM.
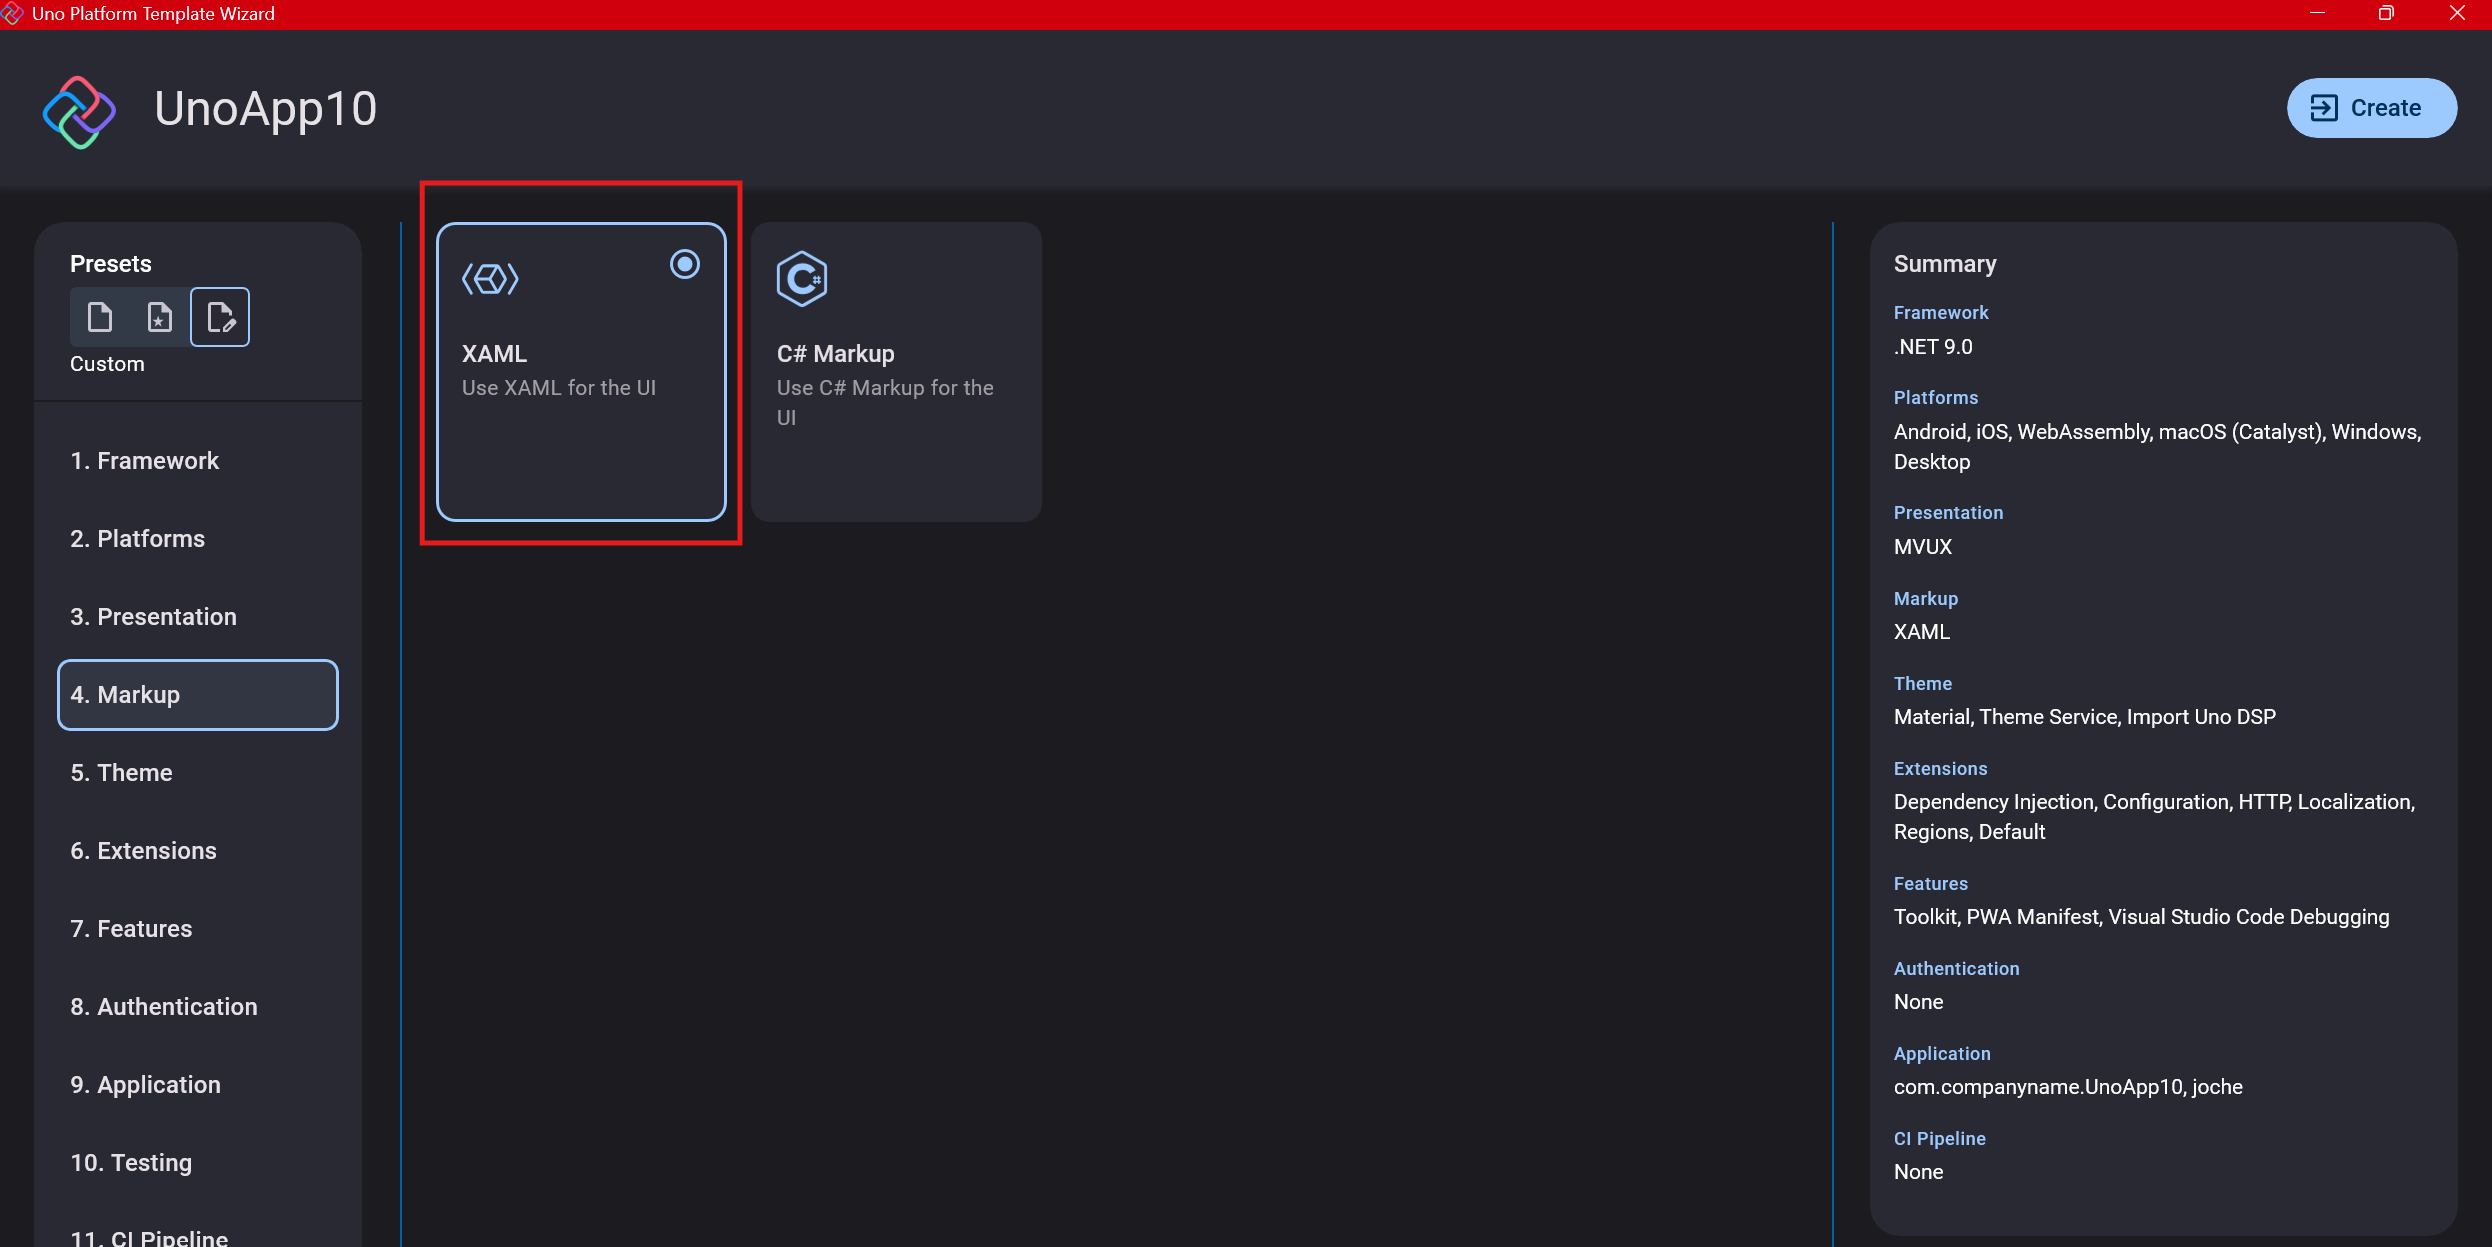
Step 6: Markup Language
For markup, I recommend selecting XAML. In my first project, I tried using C# markup, which worked well until I reached some roadblocks I couldn’t overcome. I didn’t want to get stuck trying to solve one specific layout issue, so I switched. For beginners, I suggest starting with XAML.
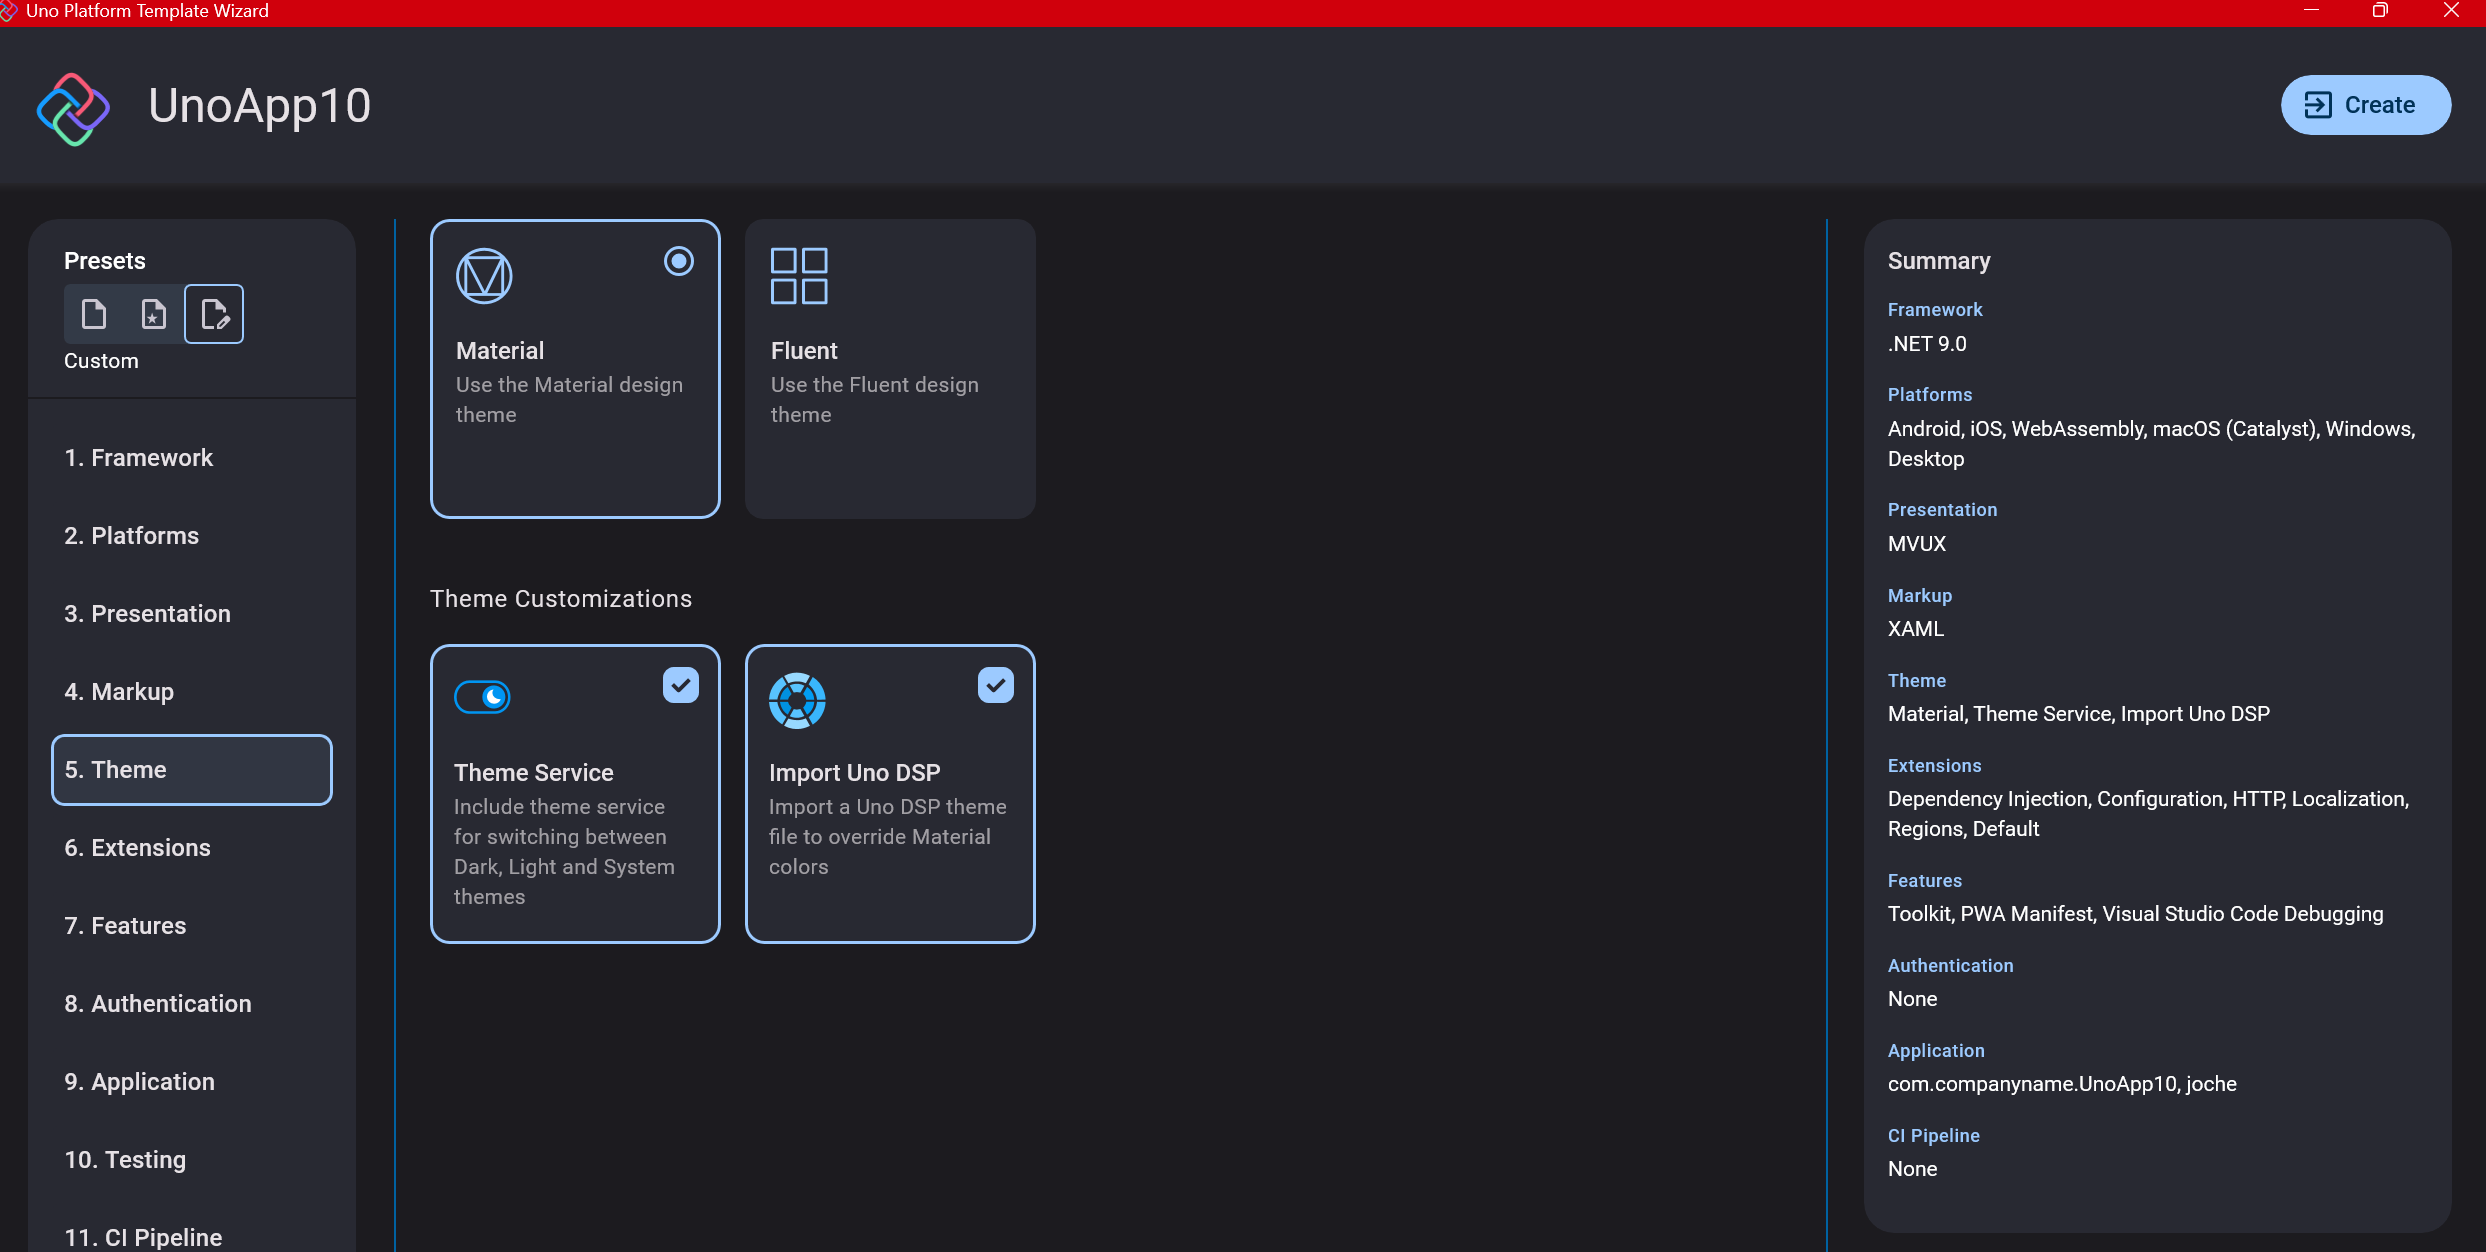
Step 7: Theming
For theming, you’ll need to select a UI theme. I don’t have a strong preference here and typically stick with the defaults: using Material Design, the theme service, and importing Uno DSP.
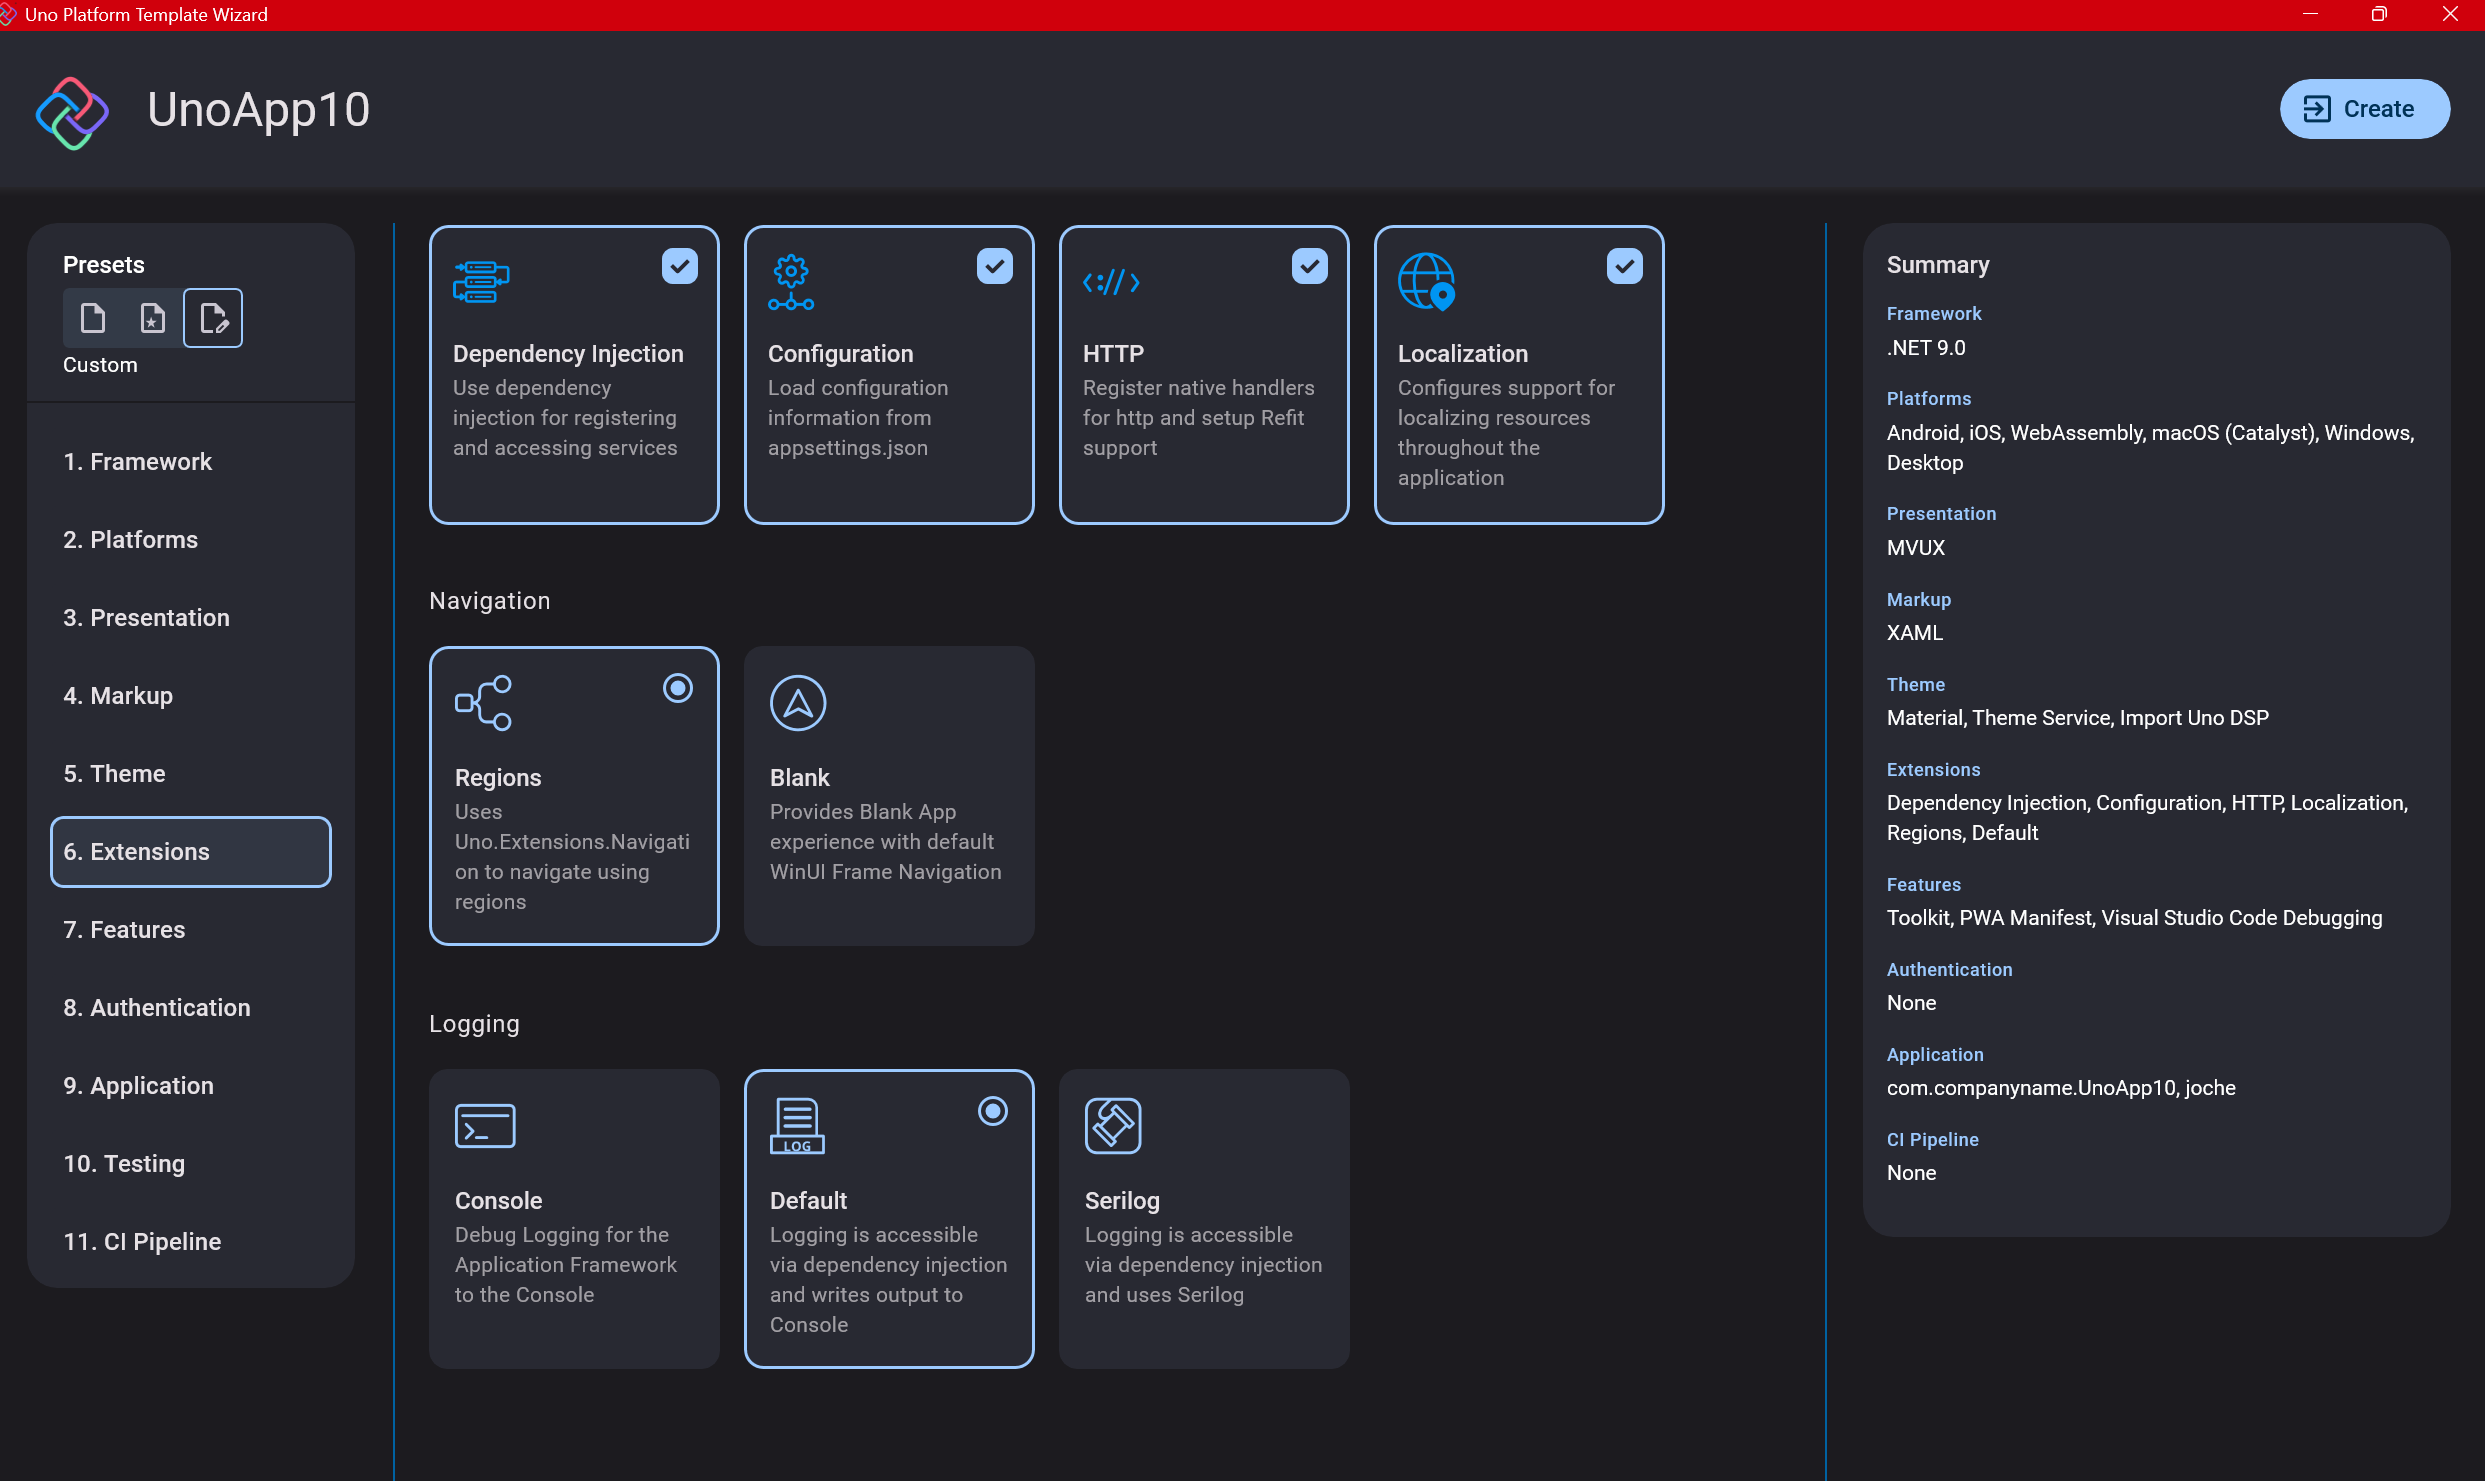
Step 8: Extensions
When selecting extensions to include, I recommend choosing almost all of them as they’re useful for modern application development. The only thing you might want to customize is the logging type (Console, Debug, or Serilog), depending on your previous experience. Generally, most applications will benefit from all the extensions offered.
Step 9: Features
Next, you’ll select which features to include in your application. For my tests, I include everything except the MAUI embedding and the media element. Most features can be useful, and I’ll show in a future post how to set them up when discussing the solution structure.

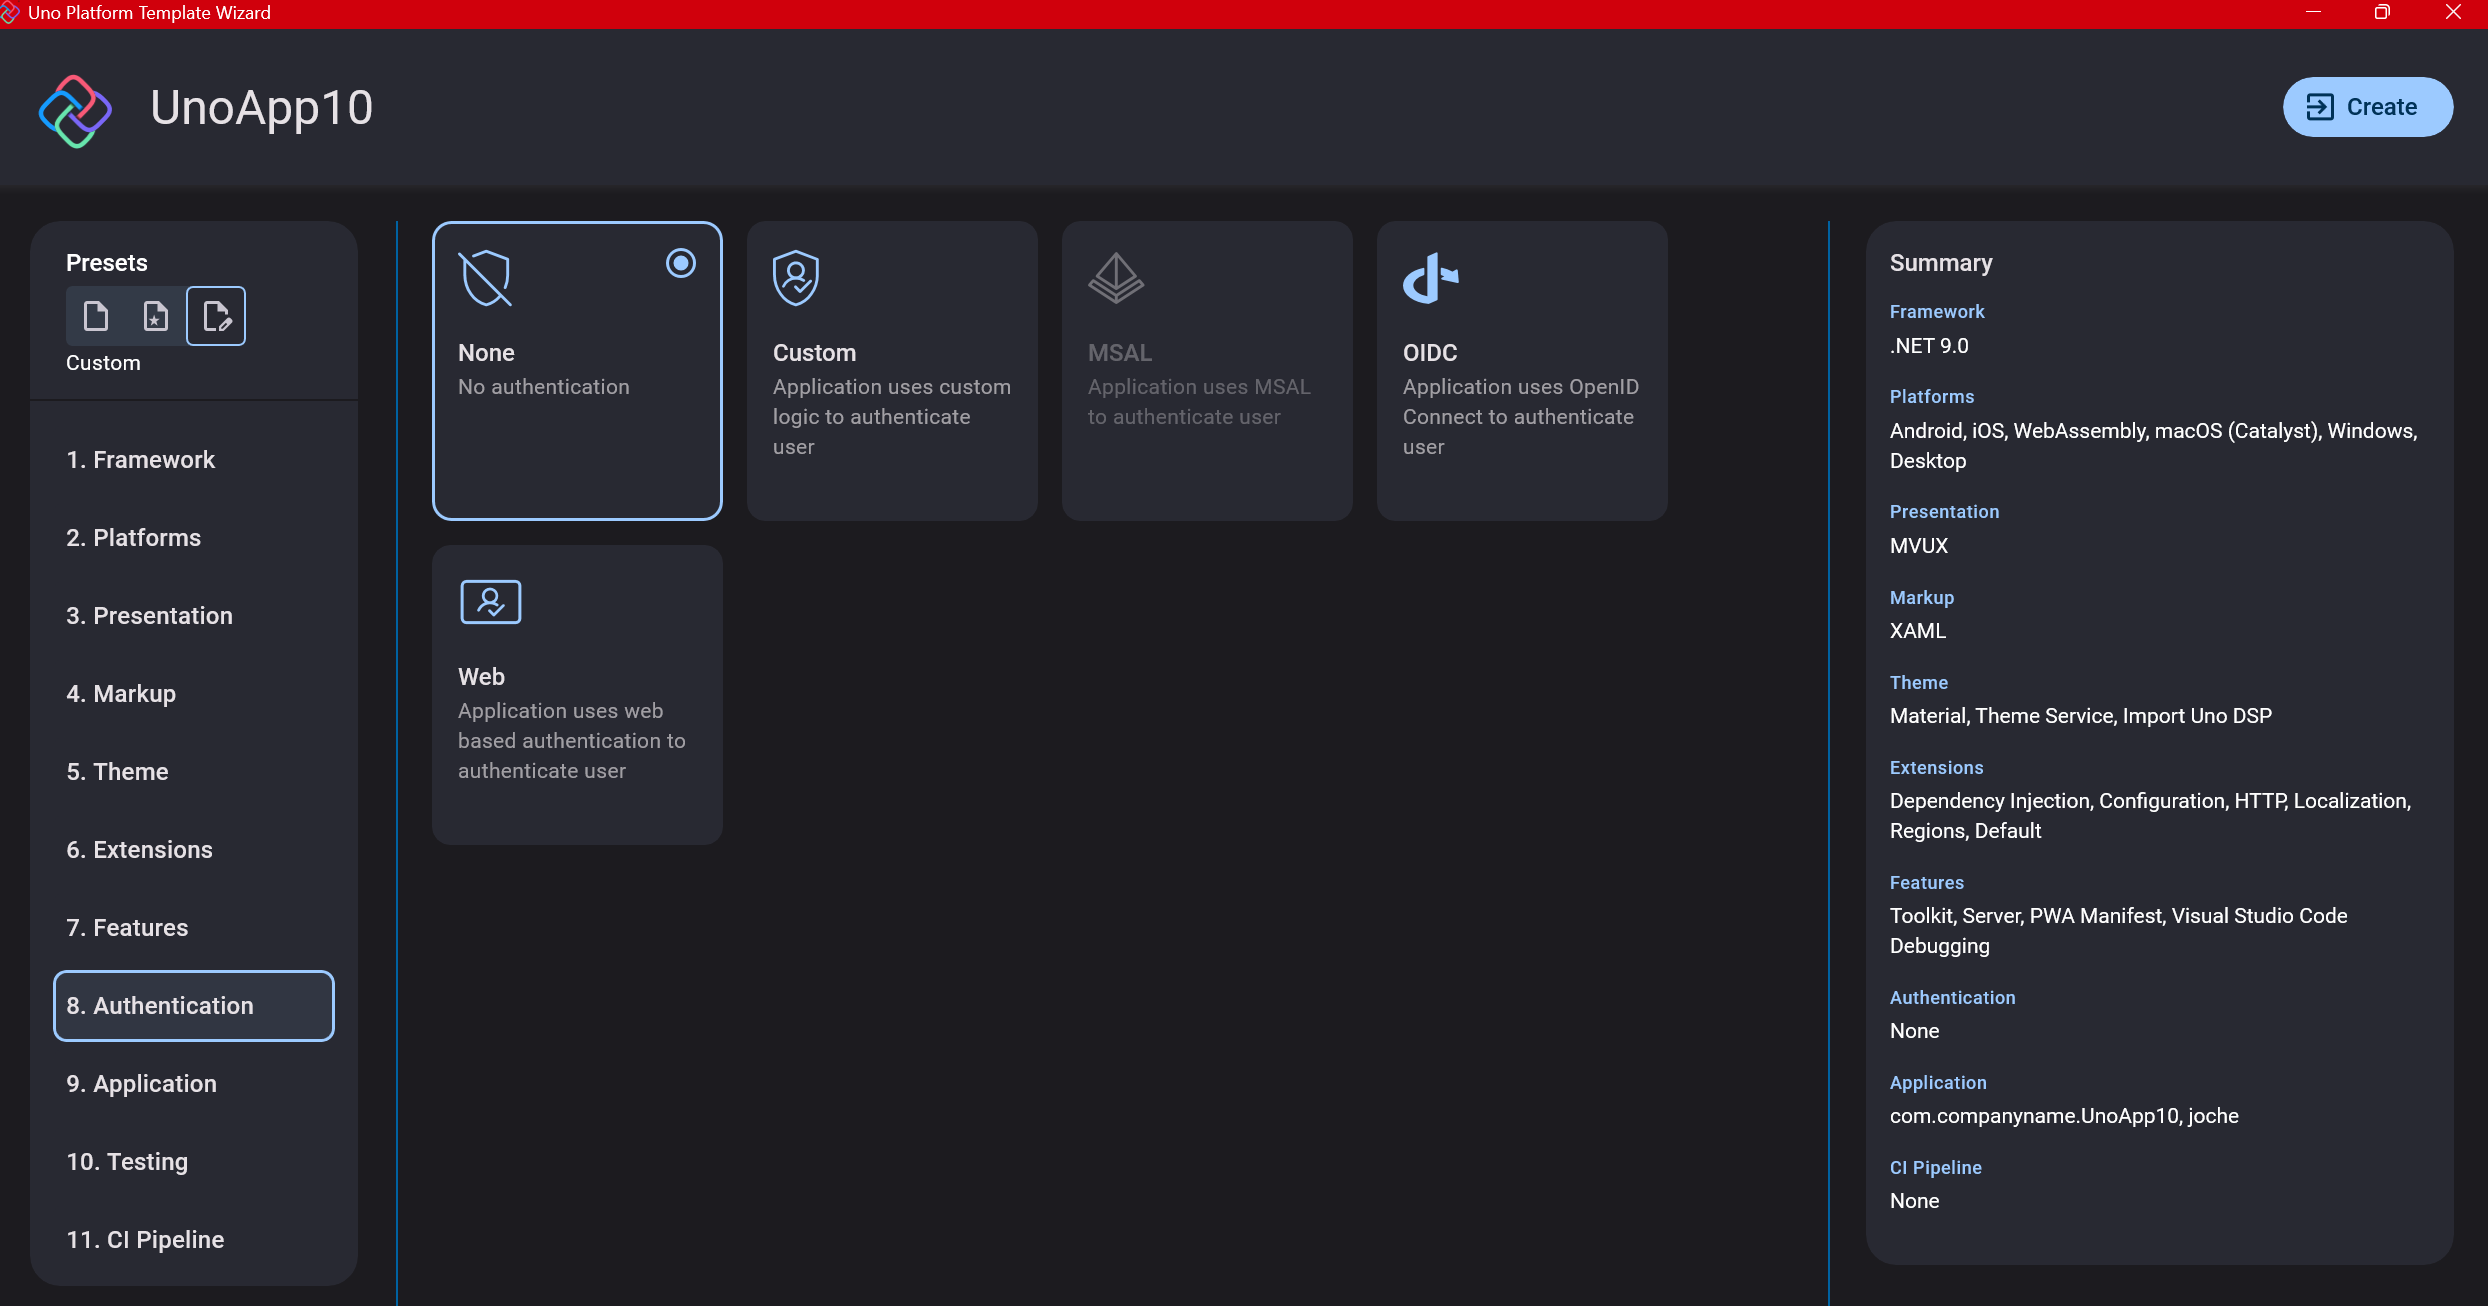
Step 10: Authentication
You can select “None” for authentication if you’re building test projects, but I chose “Custom” because I wanted to see how it works. In my case, I’m authenticating against DevExpress XAF REST API, but I’m also interested in connecting my test project to Azure B2C.
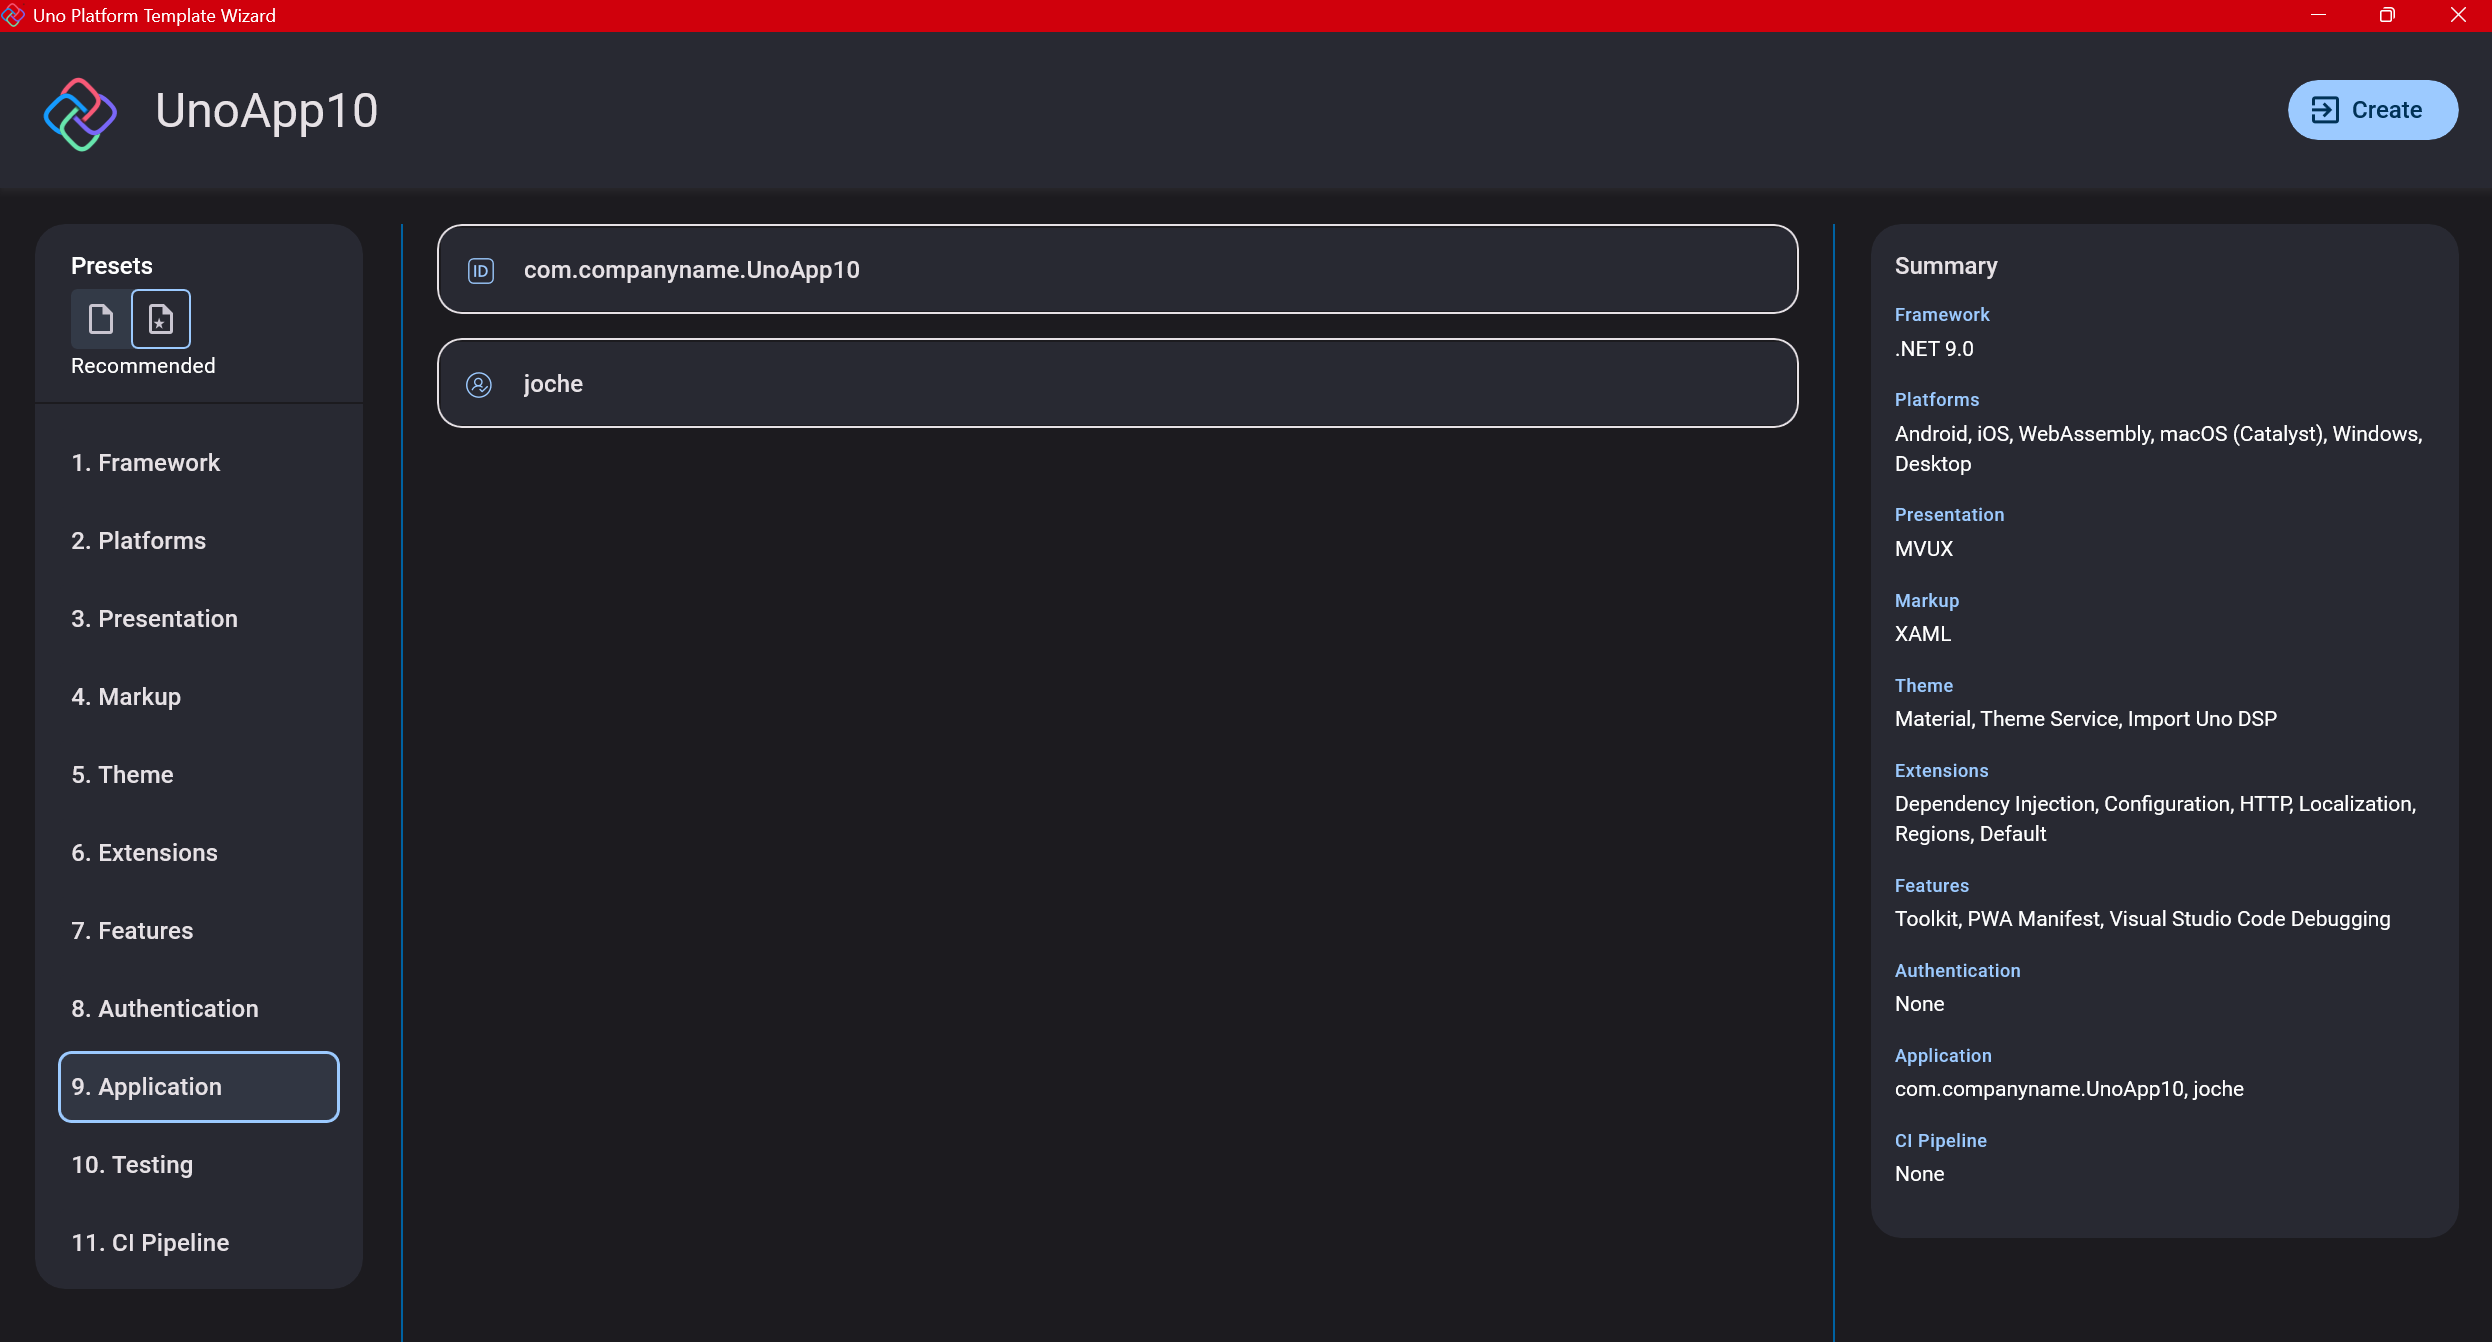
Step 11: Application ID
Next, you’ll need to provide an application ID. While I haven’t fully explored the purpose of this ID yet, I believe it’s needed when publishing applications to app stores like Google Play and the Apple App Store.
Step 12: Testing
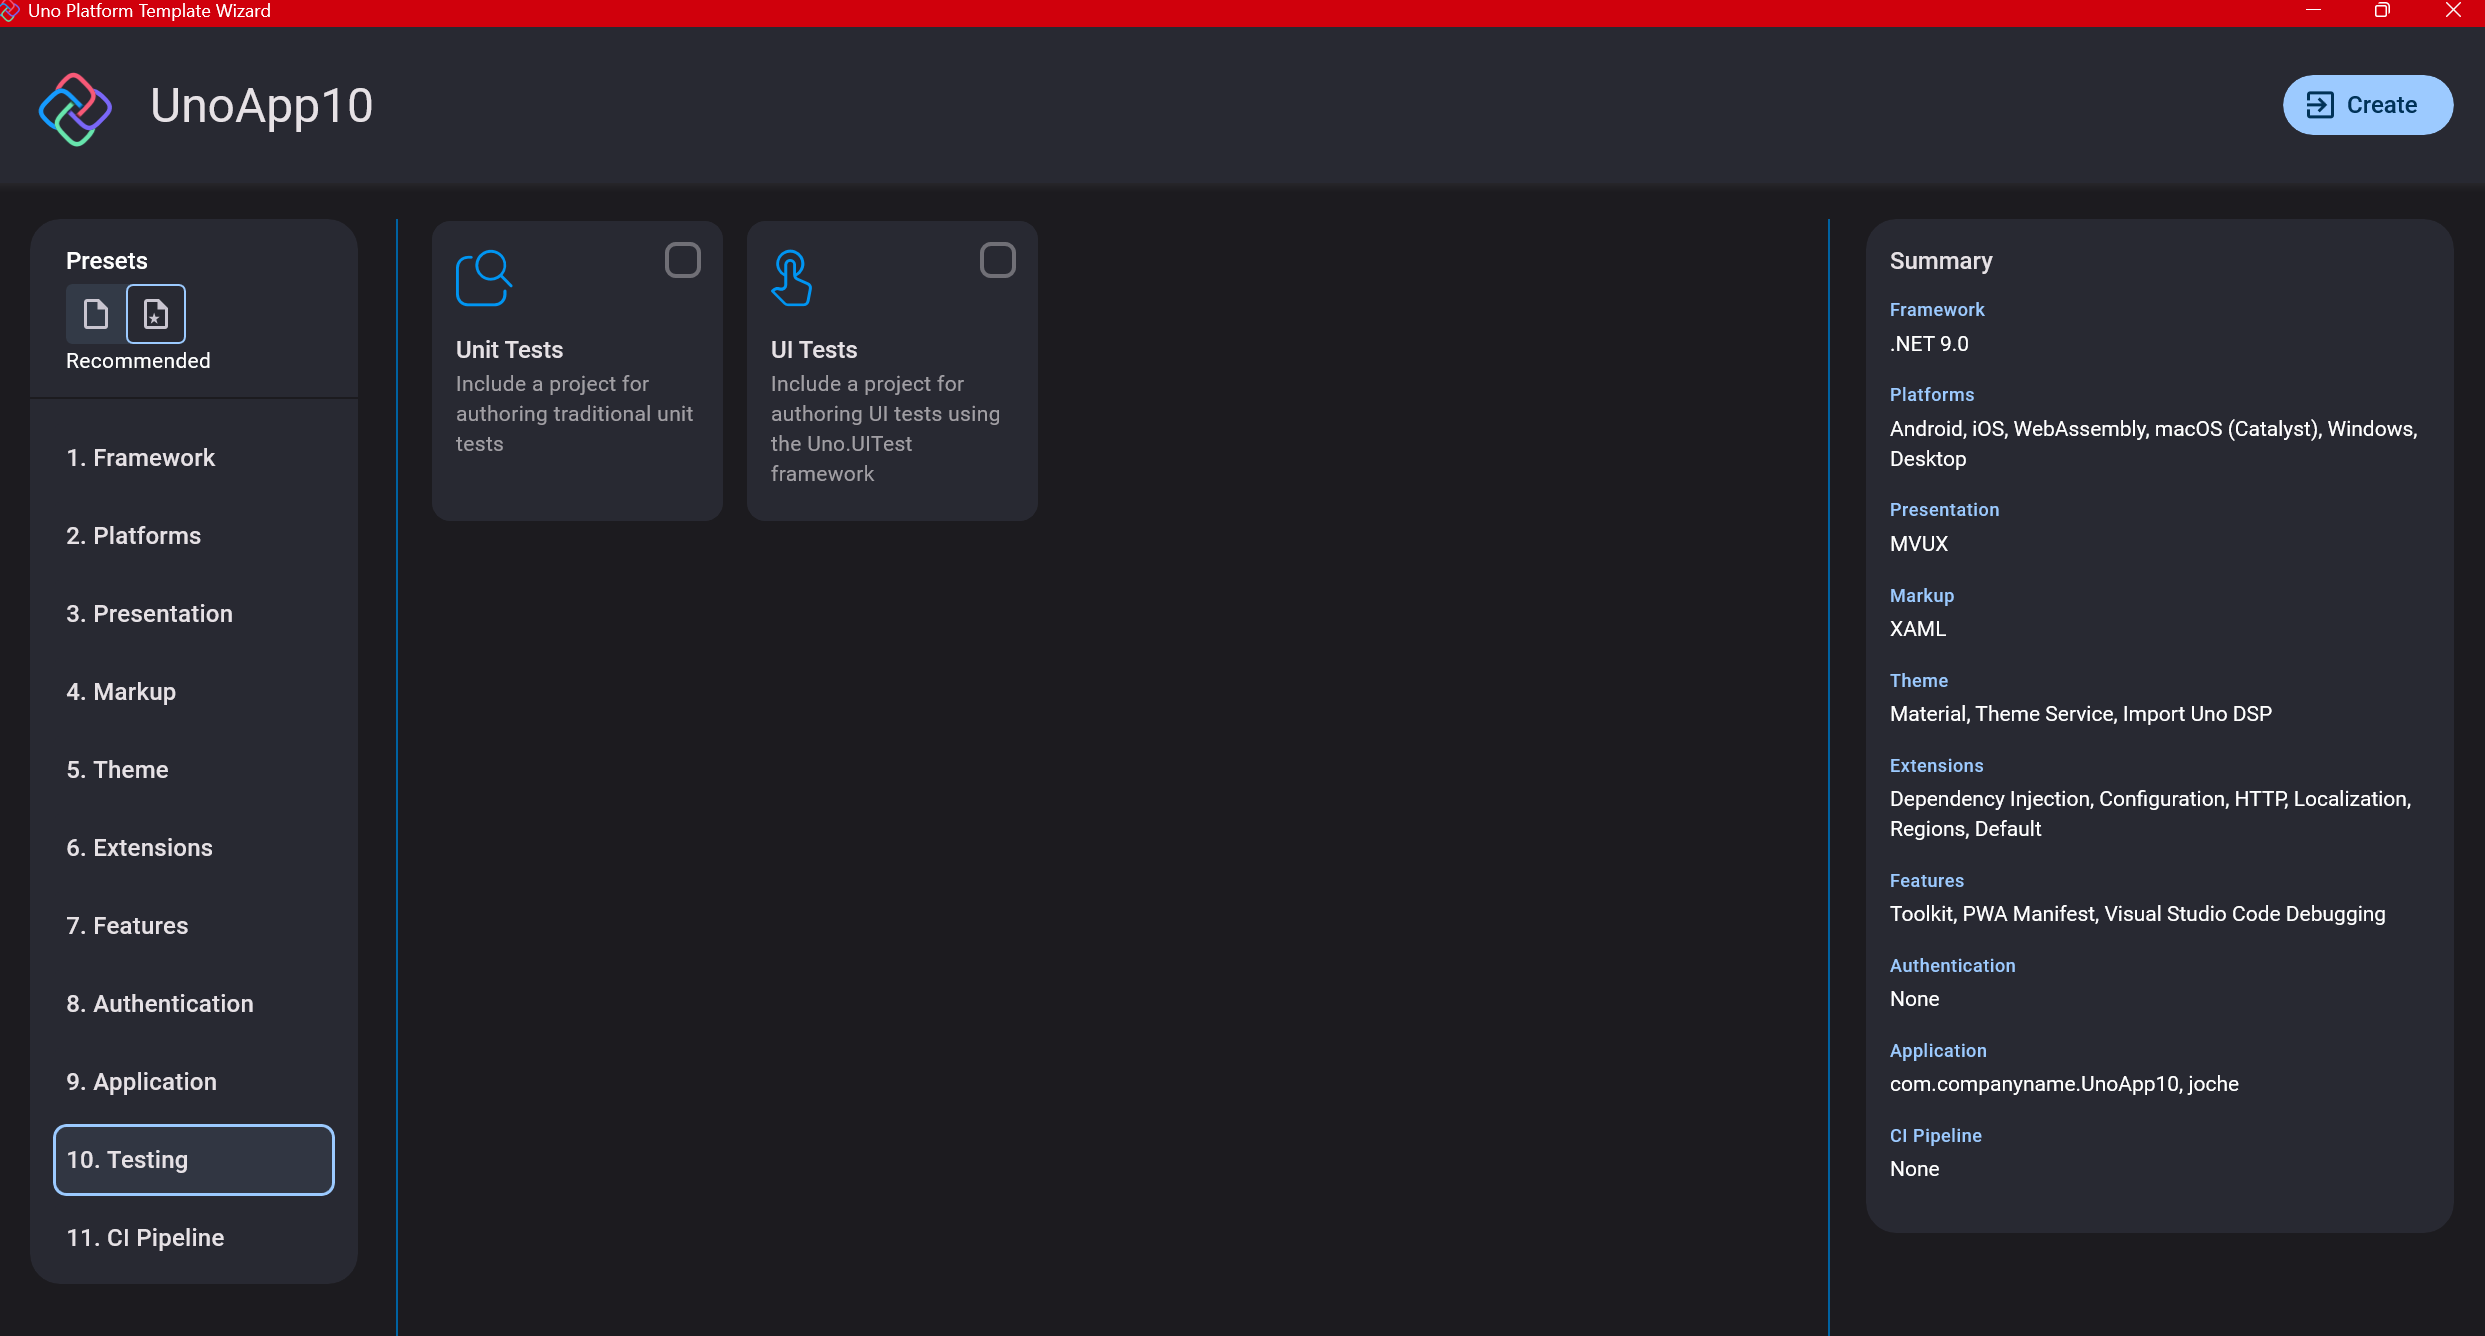
I’m a big fan of testing, particularly integration tests. While unit tests are essential when developing components, for business applications, integration tests that verify the flow are often sufficient.
Uno also offers UI testing capabilities, which I haven’t tried yet but am looking forward to exploring. In platform UI development, there aren’t many choices for UI testing, so having something built-in is fantastic.
Testing might seem like a waste of time initially, but once you have tests in place, you’ll save time in the future. With each iteration or new release, you can run all your tests to ensure everything works correctly. The time invested in creating tests upfront pays off during maintenance and updates.
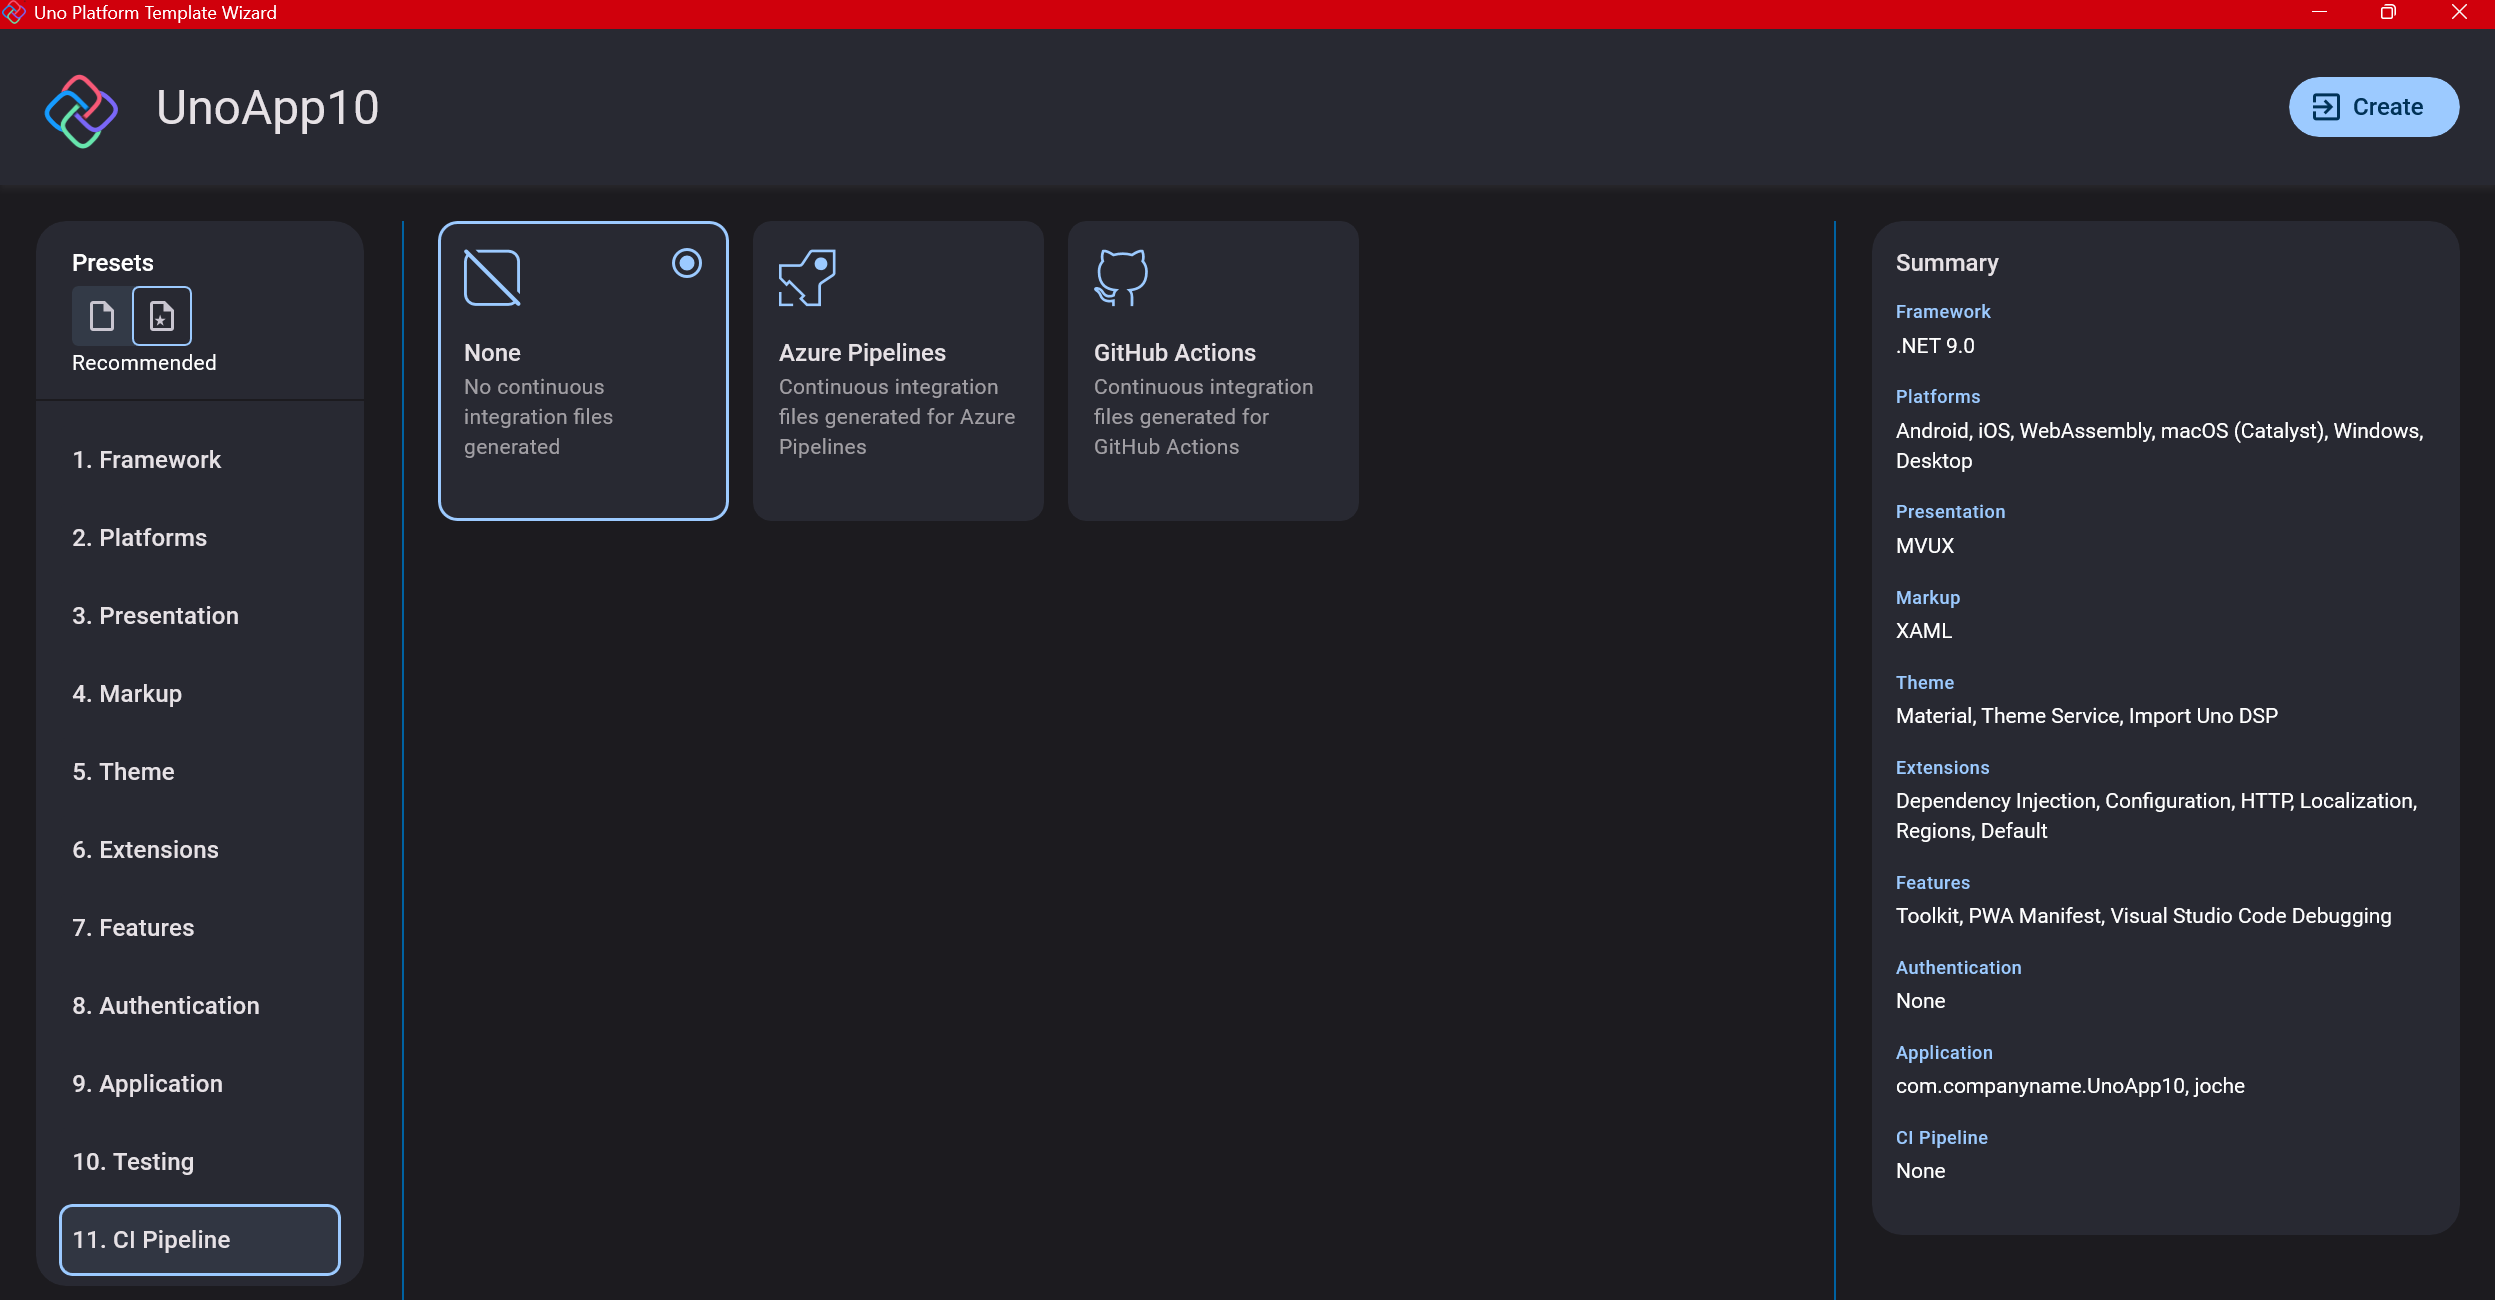
Step 13: CI Pipelines
The final step is about CI pipelines. If you’re building a test application, you don’t need to select anything. For production applications, you can choose Azure Pipelines or GitHub Actions based on your preferences. In my case, I’m not involved with CI pipeline configuration at my workplace, so I have limited experience in this area.
Conclusion
If you’ve made it this far, congratulations! You should now have a shiny new Uno Platform application in your IDE.
This post only covers the initial setup choices when creating a new Uno application. Your development path will differ based on the selections you’ve made, which can significantly impact how you write your code. Choose wisely and experiment with different combinations to see what works best for your needs.
During my learning journey with the Uno Platform, I’ve tried various settings—some worked well, others didn’t, but most will function if you understand what you’re doing. I’m still learning and taking a hands-on approach, relying on trial and error, occasional documentation checks, and GitHub Copilot assistance.
Thanks for reading and see you in the next post!
About Us
YouTube
https://www.youtube.com/c/JocheOjedaXAFXAMARINC
Our sites
Let’s discuss your XAF
https://www.udemy.com/course/microsoft-ai-extensions/
Our free A.I courses on Udemy

by Joche Ojeda | Feb 24, 2025 | Linux, Postgres, SyncFrameworkV2, Ubuntu, WSL
After a problematic Windows update on my Surface computer that prevented me from compiling .NET applications, I spent days trying various fixes without success. Eventually, I had to format my computer and start fresh. This meant setting up everything again – Visual Studio, testing databases, and all the other development tools.To make future setups easier, I created a collection of WSL 2 scripts that automate the installation of tools I frequently use, like PostgreSQL and MySQL for testing purposes. While these scripts contain some practices that wouldn’t be recommended for production (like hardcoded passwords), they’re specifically designed for testing environments. The passwords used are already present in the sync framework source code, so there’s no additional security risk.I decided to share these scripts not as a perfect solution, but as a starting point for others who might need to set up similar testing environments. You can use them as inspiration for your own scripts or modify the default passwords to match your needs.
Note that these are specifically for testing purposes – particularly for working with the sync framework – and the hardcoded credentials should never be used in a production environment.
https://github.com/egarim/MyWslScripts
LDAP Scripts
MyWslScripts/ldap-setup.sh at master · egarim/MyWslScripts
MyWslScripts/add-ldap-user.sh at master · egarim/MyWslScripts
MySQL
MyWslScripts/install_mysql.sh at master · egarim/MyWslScripts
Postgres
MyWslScripts/install_postgres.sh at master · egarim/MyWslScripts
Redis
MyWslScripts/redis-install.sh at master · egarim/MyWslScripts
Let me know if you’d like me to share the actual scripts in a follow-up post!

by Joche Ojeda | May 23, 2024 | CPU
The ARM, x86, and Itanium CPU architectures each have unique characteristics that impact .NET developers. Understanding how these architectures affect your code, along with the importance of using appropriate NuGet packages, is crucial for developing efficient and compatible applications.
ARM Architecture and .NET Development
1. Performance and Optimization:
- Energy Efficiency: ARM processors are known for their power efficiency, benefiting .NET applications on devices like mobile phones and tablets with longer battery life and reduced thermal output.
- Performance: ARM processors may exhibit different performance characteristics compared to x86 processors. Developers need to optimize their code to ensure efficient execution on ARM architecture.
2. Cross-Platform Development:
- .NET Core and .NET 5+: These versions support cross-platform development, allowing code to run on Windows, macOS, and Linux, including ARM-based versions.
- Compatibility: Ensuring .NET applications are compatible with ARM devices may require testing and modifications to address architecture-specific issues.
3. Tooling and Development Environment:
- Visual Studio and Visual Studio Code: Both provide support for ARM development, though there may be differences in features and performance compared to x86 environments.
- Emulators and Physical Devices: Testing on actual ARM hardware or using emulators helps identify performance bottlenecks and compatibility issues.
x86 Architecture and .NET Development
1. Performance and Optimization:
- Processing Power: x86 processors are known for high performance and are widely used in desktops, servers, and high-end gaming.
- Instruction Set Complexity: The complex instruction set of x86 (CISC) allows for efficient execution of certain tasks, which can differ from ARM’s RISC approach.
2. Compatibility:
- Legacy Applications: x86’s extensive history means many enterprise and legacy applications are optimized for this architecture.
- NuGet Packages: Ensuring that NuGet packages target x86 or are architecture-agnostic is crucial for maintaining compatibility and performance.
3. Development Tools:
- Comprehensive Support: x86 development benefits from mature tools and extensive resources available in Visual Studio and other IDEs.
Itanium Architecture and .NET Development
1. Performance and Optimization:
- High-End Computing: Itanium processors were designed for high-end computing tasks, such as large-scale data processing and enterprise servers.
- EPIC Architecture: Itanium uses Explicitly Parallel Instruction Computing (EPIC), which requires different optimization strategies compared to x86 and ARM.
2. Limited Support:
- Niche Market: Itanium has a smaller market presence, primarily in enterprise environments.
- .NET Support: .NET support for Itanium is limited, requiring careful consideration of architecture-specific issues.
CPU Architecture and Code Impact
1. Instruction Sets and Performance:
- Differences: x86 (CISC), ARM (RISC), and Itanium (EPIC) have different instruction sets, affecting code efficiency. Optimizations effective on one architecture might not work well on another.
- Compiler Optimizations: .NET compilers optimize code for specific architectures, but understanding the underlying architecture helps write more efficient code.
2. Multi-Platform Development:
-
- Conditional Compilation: .NET supports conditional compilation for architecture-specific code optimizations.
    #if ARM
    // ARM-specific code
    #elif x86
    // x86-specific code
    #elif Itanium
    // Itanium-specific code
    #endif
- Libraries and Dependencies: Ensure all libraries and dependencies in your .NET project are compatible with the target CPU architecture. Use NuGet packages that are either architecture-agnostic or specifically target your architecture.
3. Debugging and Testing:
- Architecture-Specific Bugs: Bugs may manifest differently across ARM, x86, and Itanium. Rigorous testing on all target architectures is essential.
- Performance Testing: Conduct performance testing on each architecture to identify and resolve any specific issues.
Supported CPU Architectures in .NET
1. .NET Core and .NET 5+:
- x86 and x64: Full support for 32-bit and 64-bit x86 architectures across all major operating systems.
- ARM32 and ARM64: Support for 32-bit and 64-bit ARM architectures, including Windows on ARM, Linux on ARM, and macOS on ARM (Apple Silicon).
- Itanium: Limited support, mainly in specific enterprise scenarios.
2. .NET Framework:
- x86 and x64: Primarily designed for Windows, the .NET Framework supports both 32-bit and 64-bit x86 architectures.
- Limited ARM and Itanium Support: The traditional .NET Framework has limited support for ARM and Itanium, mainly for older devices and specific enterprise applications.
3. .NET MAUI and Xamarin:
- Mobile Development: .NET MAUI (Multi-platform App UI) and Xamarin provide extensive support for ARM architectures, targeting Android and iOS devices which predominantly use ARM processors.
Using NuGet Packages
1. Architecture-Agnostic Packages:
- Compatibility: Use NuGet packages that are agnostic to CPU architecture whenever possible. These packages are designed to work across different architectures without modification.
- Example: Common libraries like Newtonsoft.Json, which work across ARM, x86, and Itanium.
2. Architecture-Specific Packages:
- Performance: For performance-critical applications, use NuGet packages optimized for the target architecture.
- Example: Graphics processing libraries optimized for x86 may need alternatives for ARM or Itanium.
Conclusion
For .NET developers, understanding the impact of ARM, x86, and Itanium architectures is essential for creating efficient, cross-platform applications. The differences in CPU architectures affect performance, compatibility, and optimization strategies. By leveraging cross-platform capabilities of .NET, using appropriate NuGet packages, and testing thoroughly on all target architectures, developers can ensure their applications run smoothly across ARM, x86, and Itanium devices.

by Joche Ojeda | Mar 8, 2024 | Uncategorized
Navigating the Challenges of Event-Based Systems
Event-based systems have emerged as a powerful architectural paradigm, enabling applications to be more scalable, flexible, and decoupled. By orchestrating system behaviors through events, these architectures facilitate the design of responsive, asynchronous systems that can easily adapt to changing requirements and scale. However, the adoption of event-based systems is not without its challenges. From debugging complexities to ensuring data consistency, developers must navigate a series of hurdles to leverage the full potential of event-driven architectures effectively. This article delves into the critical challenges associated with event-based systems and provides insights into addressing them.
Debugging and Testing Complexities
One of the most daunting aspects of event-based systems is the complexity involved in debugging and testing. The asynchronous and decoupled nature of these systems makes it challenging to trace event flows and understand how components interact. Developers must adopt sophisticated tracing and logging mechanisms to visualize event paths and diagnose issues, which can significantly increase the complexity of testing strategies.
Ensuring Event Ordering
Maintaining a correct sequence of event processing is crucial for the integrity of an event-based system. This becomes particularly challenging in distributed environments, where events may originate from multiple sources at different times. Implementing mechanisms to ensure the orderly processing of events, such as timestamp-based ordering or sequence identifiers, is essential to prevent race conditions and maintain system consistency.
Complex Error Handling
Error handling in event-driven architectures requires careful consideration. The loose coupling between components means errors need to be communicated and handled across different parts of the system, often necessitating comprehensive strategies for error detection, logging, and recovery.
Latency and Throughput Challenges
Balancing latency and throughput is a critical concern in event-based systems. While these architectures can scale effectively by adding more consumers, the latency involved in processing and reacting to events can become a bottleneck, especially under high load conditions. Designing systems with efficient event processing mechanisms and scaling strategies is vital to mitigate these concerns.
Mitigating Event Storms
Event storms, where a flood of events overwhelms the system, pose a significant risk to the stability and performance of event-based architectures. Implementing back-pressure mechanisms and rate limiting can help control the flow of events and prevent system overload.
Dependency Management
Although event-based systems promote decoupling, they can also introduce complex, hidden dependencies between components. Managing these dependencies requires a clear understanding of the event flow and interactions within the system to avoid unintended consequences and ensure smooth operation.
Data Consistency and Integrity
Maintaining data consistency across distributed components in response to events is a major challenge. Event-based systems often require strategies such as event sourcing or implementing distributed transactions to ensure that data remains consistent and accurate across the system.
Security Implications
The need to secure event-driven architectures cannot be overstated. Events often carry sensitive data that must be protected, necessitating robust security measures to ensure data confidentiality and integrity as it flows through the system.
Scalability vs. Consistency
Event-based systems face the classic trade-off between scalability and consistency. Achieving high scalability often comes at the cost of reduced consistency guarantees. Finding the right balance based on system requirements is critical to the successful implementation of event-driven architectures.
Tooling and Monitoring
Effective monitoring and management are essential for maintaining the health of an event-based system. However, the lack of visibility into asynchronous event flows and distributed components can make monitoring challenging. Selecting the right set of tools that offer comprehensive insights into the system’s operation is crucial.
Conclusion
While event-based systems offer numerous advantages, successfully implementing them requires overcoming a range of challenges. By understanding and addressing these challenges, developers can build robust, scalable, and efficient event-driven architectures. The key lies in careful planning, adopting best practices, and leveraging appropriate tools and technologies to navigate the complexities of event-based systems. With the right approach, the benefits of event-driven architecture can be fully realized, leading to more responsive and adaptable applications.