
by Joche Ojeda | Jan 22, 2025 | ADO.NET, C#, Data Synchronization, Database, DevExpress, XPO, XPO Database Replication
SyncFramework for XPO is a specialized implementation of our delta encoding synchronization library, designed specifically for DevExpress XPO users. It enables efficient data synchronization by tracking and transmitting only the changes between data versions, optimizing both bandwidth usage and processing time.
What’s New
- Base target framework updated to .NET 8.0
- Added compatibility with .NET 9.0
- Updated DevExpress XPO dependencies to 24.2.3
- Continued support for delta encoding synchronization
- Various performance improvements and bug fixes
Framework Compatibility
- Primary Target: .NET 8.0
- Additional Support: .NET 9.0
Our XPO implementation continues to serve the DevExpress community.
Key Features
- Seamless integration with DevExpress XPO
- Efficient delta-based synchronization
- Support for multiple database providers
- Cross-platform compatibility
- Easy integration with existing XPO and XAF applications
As always, if you own a license, you can compile the source code yourself from our GitHub repository. The framework maintains its commitment to providing reliable data synchronization for XPO applications.
Happy Delta Encoding! ?
by Joche Ojeda | Jan 21, 2025 | ADO.NET, C#, Data Synchronization, EfCore
SyncFramework Update: Now Supporting .NET 9!
SyncFramework is a C# library that simplifies data synchronization using delta encoding technology. Instead of transferring entire datasets, it efficiently synchronizes by tracking and transmitting only the changes between data versions, significantly reducing bandwidth and processing overhead.
What’s New
- All packages now target .NET 9
- BIT.Data.Sync packages updated to support the latest framework
- Entity Framework Core packages upgraded to EF Core 9
- Various minor fixes and improvements
Available Implementations
- SyncFramework for XPO: For DevExpress XPO users
- SyncFramework for Entity Framework Core: For EF Core users
Package Statistics
Our packages have been serving the community well, with steady adoption:
- BIT.Data.Sync: 2,142 downloads
- BIT.Data.Sync.AspNetCore: 1,064 downloads
- BIT.Data.Sync.AspNetCore.Xpo: 521 downloads
- BIT.Data.Sync.EfCore: 1,691 downloads
- BIT.Data.Sync.EfCore.Npgsql: 1,120 downloads
- BIT.Data.Sync.EfCore.Pomelo.MySql: 1,172 downloads
- BIT.Data.Sync.EfCore.Sqlite: 887 downloads
- BIT.Data.Sync.EfCore.SqlServer: 982 downloads
Resources
NuGet Packages
Source Code
As always, you can compile the source code yourself from our GitHub repository. The framework continues to provide reliable data synchronization across different platforms and databases.
Happy Delta Encoding! ?
by Joche Ojeda | Jan 9, 2025 | dotnet
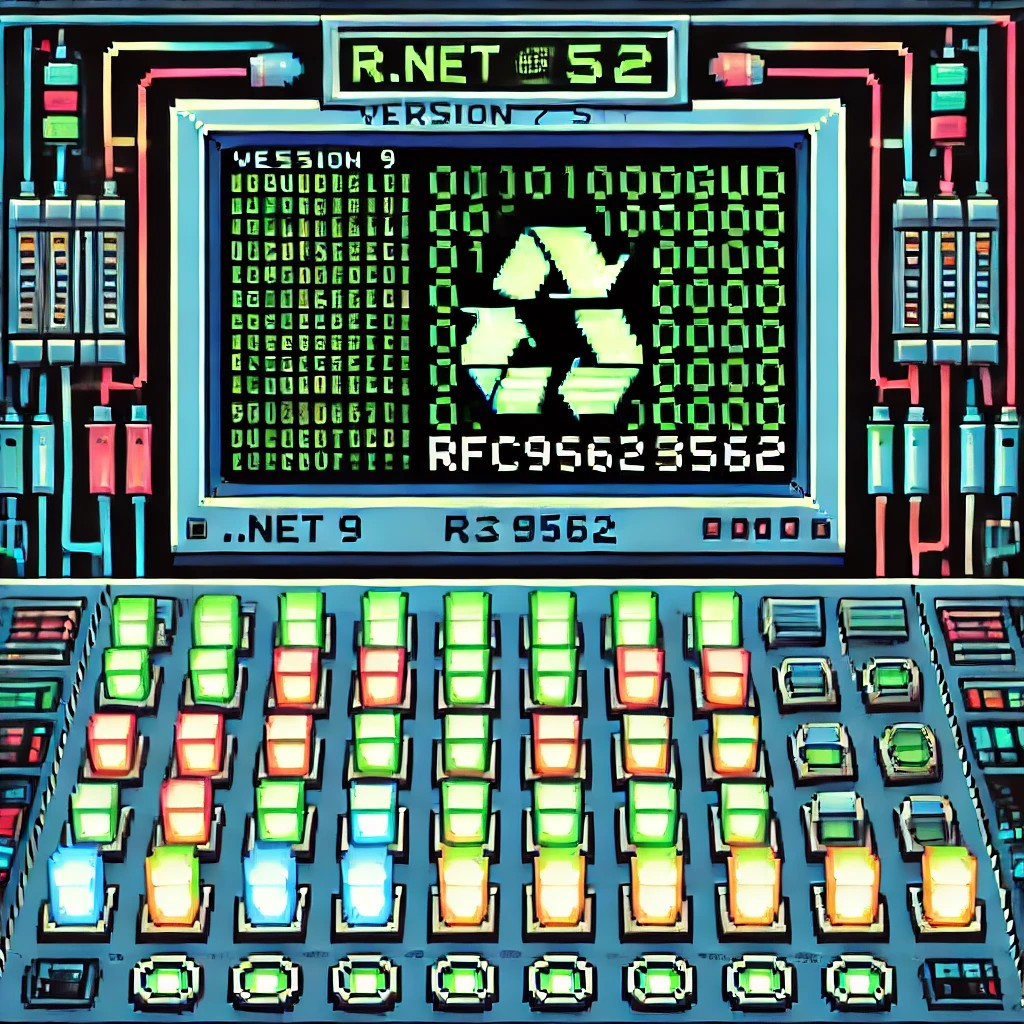
While researching useful features in .NET 9 that could benefit XAF/XPO developers, I discovered something particularly interesting: Version 7 GUIDs (RFC 9562 specification). These new GUIDs offer a crucial feature – they’re sortable.
This discovery brought me back to an issue I encountered two years ago while working on the SyncFramework. We faced a peculiar problem where Deltas were correctly generated but processed in the wrong order in production environments. The occurrences seemed random, and no clear pattern emerged. Initially, I thought using Delta primary keys (GUIDs) to sort the Deltas would ensure they were processed in their generation order. However, this assumption proved incorrect. Through testing, I discovered that GUID generation couldn’t be trusted to be sequential. This issue affected multiple components of the SyncFramework. Whether generating GUIDs in C# or at the database level, there was no guarantee of sequential ordering. Different database engines could sort GUIDs differently. To address this, I implemented a sequence service as a solution.Enter .NET 9 with its Version 7 GUIDs (conforming to RFC 9562 specification). These new GUIDs are genuinely sequential, making them reliable for sorting operations.
To demonstrate this improvement, I created a test solution for XAF with a custom base object. The key implementation occurs in the OnSaving method:
protected override void OnSaving()
{
    base.OnSaving();
    if (!(Session is NestedUnitOfWork) && Session.IsNewObject(this) && oid.Equals(Guid.Empty))
    {
        oid = Guid.CreateVersion7();
    }
}
Notice the use of CreateVersion7() instead of the traditional NewGuid(). For comparison, I also created another domain object using the traditional GUID generation:
protected override void OnSaving()
{
    base.OnSaving();
    if (!(Session is NestedUnitOfWork) && Session.IsNewObject(this) && oid.Equals(Guid.Empty))
    {
        oid = Guid.NewGuid();
    }
}
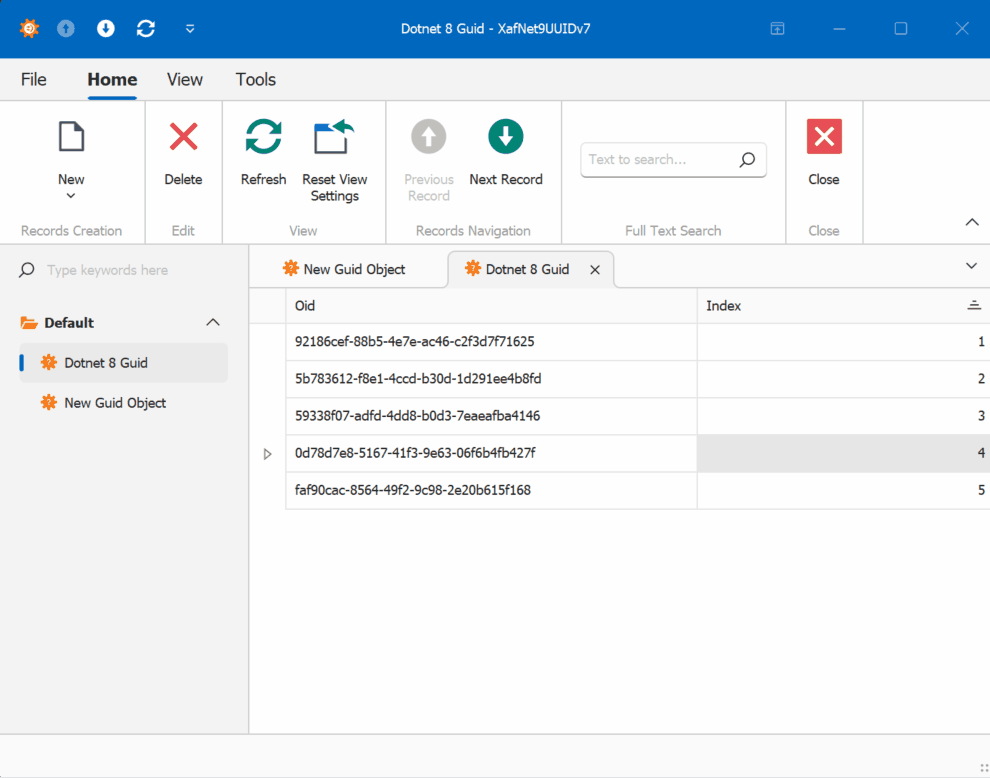
When creating multiple instances of the traditional GUID domain object, you’ll notice that the greater the time interval between instance creation, the less likely the GUIDs will maintain sequential ordering.
GUID Version 7
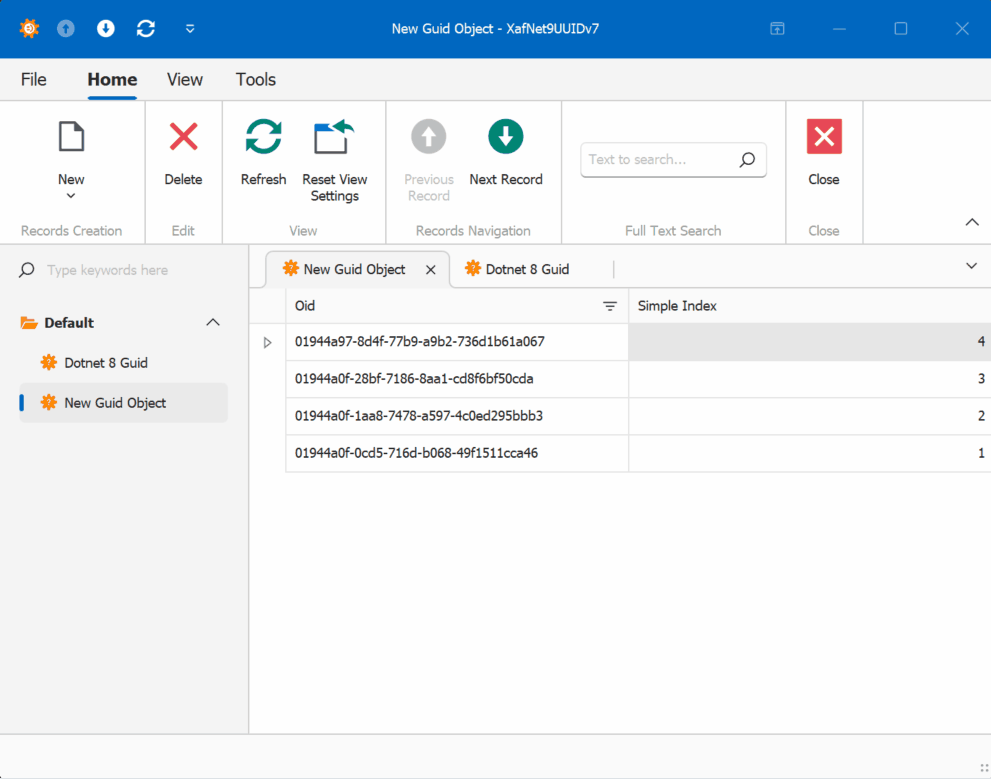
GUID Old Version
This new feature in .NET 9 could significantly simplify scenarios where sequential ordering is crucial, eliminating the need for additional sequence services in many cases. Here is the repo on GitHubHappy coding until next time!
Related article
On my GUID, common problems using GUID identifiers | Joche Ojeda
by Joche Ojeda | Jun 6, 2024 | Data Synchronization
Choosing the Right JSON Serializer for SyncFramework: DataContractJsonSerializer vs Newtonsoft.Json vs System.Text.Json
When building robust and efficient synchronization solutions with SyncFramework, selecting the appropriate JSON serializer is crucial. Serialization directly impacts performance, data integrity, and compatibility, making it essential to understand the differences between the available options: DataContractJsonSerializer, Newtonsoft.Json, and System.Text.Json. This post will guide you through the decision-making process, highlighting key considerations and the implications of using each serializer within the SyncFramework context.
Understanding SyncFramework and Serialization
SyncFramework is designed to synchronize data across various data stores, devices, and applications. Efficient serialization ensures that data is accurately and quickly transmitted between these components. The choice of serializer affects not only performance but also the complexity of the implementation and maintenance of your synchronization logic.
DataContractJsonSerializer
DataContractJsonSerializer is tightly coupled with the DataContract and DataMember attributes, making it a reliable choice for scenarios that require explicit control over serialization:
- Strict Type Adherence: By enforcing strict adherence to data contracts, DataContractJsonSerializer ensures that serialized data conforms to predefined types. This is particularly important in SyncFramework when dealing with complex and strongly-typed data models.
- Data Integrity: The explicit nature of DataContract and DataMember attributes guarantees that only the intended data members are serialized, reducing the risk of data inconsistencies during synchronization.
- Compatibility with WCF: If SyncFramework is used in conjunction with WCF services, DataContractJsonSerializer provides seamless integration, ensuring consistent serialization across services.
When to Use: Opt for DataContractJsonSerializer when working with strongly-typed data models and when strict type fidelity is essential for your synchronization logic.
Newtonsoft.Json (Json.NET)
Newtonsoft.Json is known for its flexibility and ease of use, making it a popular choice for many .NET applications:
- Ease of Integration: Newtonsoft.Json requires no special attributes on classes, allowing for quick integration with existing codebases. This flexibility can significantly speed up development within SyncFramework.
- Advanced Customization: It offers extensive customization options through attributes like JsonProperty and JsonIgnore, and supports complex scenarios with custom converters. This makes it easier to handle diverse data structures and serialization requirements.
- Wide Adoption: As a widely-used library, Newtonsoft.Json benefits from a large community and comprehensive documentation, providing valuable resources during implementation.
When to Use: Choose Newtonsoft.Json for its flexibility and ease of use, especially when working with existing codebases or when advanced customization of the serialization process is required.
System.Text.Json
System.Text.Json is a high-performance JSON serializer introduced in .NET Core 3.0 and .NET 5, providing a modern and efficient alternative:
- High Performance: System.Text.Json is optimized for performance, making it suitable for high-throughput synchronization scenarios in SyncFramework. Its minimal overhead and efficient memory usage can significantly improve synchronization speed.
- Integration with ASP.NET Core: As the default JSON serializer for ASP.NET Core, System.Text.Json offers seamless integration with modern .NET applications, ensuring consistency and reducing setup time.
- Attribute-Based Customization: While offering fewer customization options compared to Newtonsoft.Json, it still supports essential attributes like JsonPropertyName and JsonIgnore, providing a balance between performance and configurability.
When to Use: System.Text.Json is ideal for new applications targeting .NET Core or .NET 5+, where performance is a critical concern and advanced customization is not a primary requirement.
Handling DataContract Requirements
In SyncFramework, certain types may require specific serialization behaviors dictated by DataContract notations. When using Newtonsoft.Json or System.Text.Json, additional steps are necessary to accommodate these requirements:
- Newtonsoft.Json: Use attributes such as JsonProperty to map JSON properties to DataContract members. Custom converters may be needed for complex serialization scenarios.
- System.Text.Json: Employ JsonPropertyName and custom converters to align with DataContract requirements. While less flexible than Newtonsoft.Json, it can still handle most common scenarios with appropriate configuration.
Conclusion
Choosing the right JSON serializer for SyncFramework depends on the specific needs of your synchronization logic. DataContractJsonSerializer is suited for scenarios demanding strict type fidelity and integration with WCF services. Newtonsoft.Json offers unparalleled flexibility and ease of integration, making it ideal for diverse and complex data structures. System.Text.Json provides a high-performance, modern alternative for new .NET applications, balancing performance with essential customization.
By understanding the strengths and limitations of each serializer, you can make an informed decision that ensures efficient, reliable, and maintainable synchronization in your SyncFramework implementation.

by Joche Ojeda | Jun 4, 2024 | Data Synchronization
In the world of software development, exception handling is a critical aspect that can significantly impact the user experience and the robustness of the application. When it comes to client-server architectures, such as the SyncFramework, the way exceptions are handled can make a big difference. This blog post will explore two common patterns for handling exceptions in a C# client-server API and provide recommendations on how clients should handle exceptions.
Throwing Exceptions in the API
The first pattern involves throwing exceptions directly in the API. When an error occurs in the API, an exception is thrown. This approach provides detailed information about what went wrong, which can be incredibly useful for debugging. However, it also means that the client needs to be prepared to catch and handle these exceptions.
public void SomeApiMethod()
{
    // Some code...
    if (someErrorCondition)
    {
        throw new SomeException("Something went wrong");
    }
    // More code...
}
Returning HTTP Error Codes
The second pattern involves returning HTTP status codes to indicate the result of the operation. For example, a `200` status code means the operation was successful, a `400` series status code means there was a client error, and a `500` series status code means there was a server error. This approach provides a standard way for the client to check the result of the operation without having to catch exceptions. However, it may not provide as much detailed information about what went wrong.
[HttpGet]
public IActionResult Get()
{
    try
    {
        // Code that could throw an exception
    }
    catch (SomeException ex)
    {
        return StatusCode(500, $"Internal server error: {ex}");
    }
}
Best Practices
In general, a good practice is to handle exceptions on the server side and return appropriate HTTP status codes and error messages in the response. This way, the client only needs to interpret the HTTP status code and the error message, if any, and doesn’t need to know how to handle specific exceptions that are thrown by the server. This makes the client code simpler and less coupled to the server.
Remember, it’s important to avoid exposing sensitive information in error messages. The error messages should be helpful for the client to understand what went wrong, but they shouldn’t reveal any sensitive information or details about the internal workings of the server.
Conclusion
Exception handling is a crucial aspect of any application, and it’s especially important in a client-server architecture like the SyncFramework. By handling exceptions on the server side and returning meaningful HTTP status codes and error messages, you can create a robust and user-friendly application. Happy coding!