
by Joche Ojeda | Feb 9, 2026 | A.I
Last week I was in Sochi on a ski trip. Instead of skiing, I got sick.
So I spent a few days locked in a hotel room, doing what I always do when I can’t move much: working. Or at least what looks like work. In reality, it’s my hobby.
YouTube wasn’t working well there, so I downloaded a few episodes in advance. Most of them were about OpenClaw and its creator, Peter Steinberger — also known for building PSPDFKit.
What started as passive watching turned into one of those rare moments of clarity you only get when you’re forced to slow down.
Shipping Code You Don’t Read (In the Right Context)
In one of the interviews, Peter said something that immediately caught my attention: he ships code he doesn’t review.
At first that sounds reckless. But then I realized… I sometimes do the same.
However, context matters.
Most of my daily work is research and development. I build experimental systems, prototypes, and proofs of concept — either for our internal office or for exploring ideas with clients. A lot of what I write is not production software yet. It’s exploratory. It’s about testing possibilities.
In that environment, I don’t always need to read every line of generated code.
If the use case works and the tests pass, that’s often enough.
I work mainly with C#, ASP.NET, Entity Framework, and XAF from DevExpress. I know these ecosystems extremely well. So if something breaks later, I can go in and fix it myself. But most of the time, the goal isn’t to perfect the implementation — it’s to validate the idea.
That’s a crucial distinction.
When writing production code for a customer, quality and review absolutely matter. You must inspect, verify, and ensure maintainability. But when working on experimental R&D, the priority is different: speed of validation and clarity of results.
In research mode, not every line needs to be perfect. It just needs to prove whether the idea works.
Working “Without Hands”
My real goal is to operate as much as possible without hands.
By that I mean minimizing direct human interaction with implementation. I want to express intent clearly enough so agents can execute it.
If I can describe a system precisely — especially in domains I know deeply — then the agent should be able to build, test, and refine it. My role becomes guiding and validating rather than manually constructing everything.
This is where modern development is heading.
The Problem With Vibe Coding
Peter talked about something that resonated deeply: when you’re vibe coding, you produce a lot of AI slop.
You prompt. The AI generates. You run it. It fails. You tweak. You run again. Still wrong. You tweak again.
Eventually, the human gets tired.
Even when you feel close to a solution, it’s not done until it’s actually done. And manually pushing that process forward becomes exhausting.
This is where many AI workflows break down. Not because the AI can’t generate solutions — but because the loop still depends too heavily on human intervention.
Closing the Loop
The key idea is simple and powerful: agentic development works when the agent can test and correct itself.
You must close the loop.
Instead of: human → prompt → AI → human checks → repeat
You want: AI → builds → tests → detects errors → fixes → tests again → repeat
The agent needs tools to evaluate its own output.
When AI can run tests, detect failures, and iterate automatically, something shifts. The process stops being experimental prompting and starts becoming real engineering.
Spec-Driven vs Self-Correcting Systems
Spec-driven development still matters. Some people dismiss it as too close to waterfall, but every methodology has flaws.
The real evolution is combining clear specifications with self-correcting loops.
The human defines:
- The specification
- The expected behavior
- The acceptance criteria
Then the AI executes, tests, and refines until those criteria are satisfied.
The human doesn’t need to babysit every iteration. The human validates the result once the loop is closed.
Engineering vs Parasitic Ideas
There’s a concept from a book about parasitic ideas.
In social sciences, parasitic ideas can spread because they’re hard to disprove. In engineering, bad ideas fail quickly.
If you design a bridge incorrectly, it collapses. Reality provides immediate feedback.
Software — especially AI-generated software — needs the same grounding in reality. Without continuous testing and validation, generated code can drift into something that looks plausible but doesn’t work.
Closing the loop forces ideas to confront reality.
Tests are that reality.
Taking the Human Out of the Repetitive Loop
The goal isn’t removing humans entirely. It’s removing humans from repetitive validation.
The human should:
- Define the specification
- Define what “done” means
- Approve the final result
The AI should:
- Implement
- Test
- Detect issues
- Fix itself
- Repeat until success
When that happens, development becomes scalable in a new way. Not because AI writes code faster — but because AI can finish what it starts.
What I Realized in That Hotel Room
Getting sick in Sochi wasn’t part of the plan. But it forced me to slow down long enough to notice something important.
Most friction in modern development isn’t writing code. It’s closing loops.
We generate faster than we validate. We start more than we finish. We rely on humans to constantly re-check work that machines could verify themselves.
In research and experimental work, it’s fine not to inspect every line — as long as the system proves its behavior. In production work, deeper review is essential. Knowing when each approach applies is part of modern engineering maturity.
The future of agentic development isn’t just better models. It’s better loops.
Because in the end, nothing is finished until the loop is closed.

by Joche Ojeda | Oct 8, 2025 | Oqtane, Tenants
OK — it’s time for today’s Oqtane blog post!
Yesterday, I wrote about changing the runtime mode in Oqtane and how that allows you to switch between
Blazor Server and Blazor WebAssembly functionality.
Today, I decided to explore how multi-tenancy works — specifically, how Oqtane manages multiple sites within the same
installation.
Originally, I wanted to cover the entire administrative panel and all of its modules in one post, but that would’ve been too big.
So, I’m breaking it down into smaller topics. This post focuses only on site functionality and how
multi-tenancy works from the administrative side — basically, how to set up tenants in Oqtane.
Setting Up a Multi-Tenant Oqtane Installation
To make these experiments easy to replicate, I decided to use SQLite as my database.
I created a new .NET Oqtane application using the official templates and added it to a
GitHub repository.
Here’s what I did:
- Set up the host configuration directly in
appsettings.json.
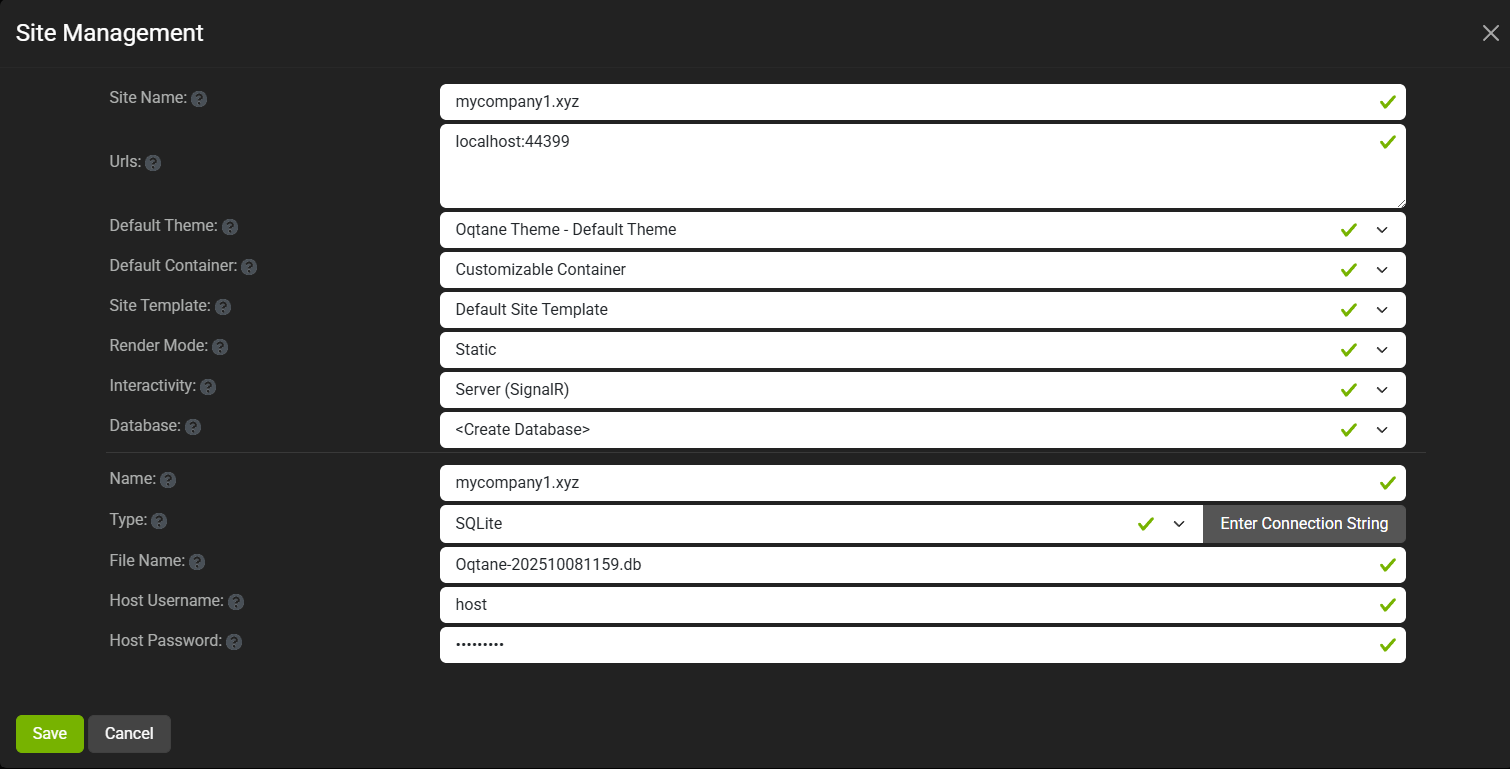
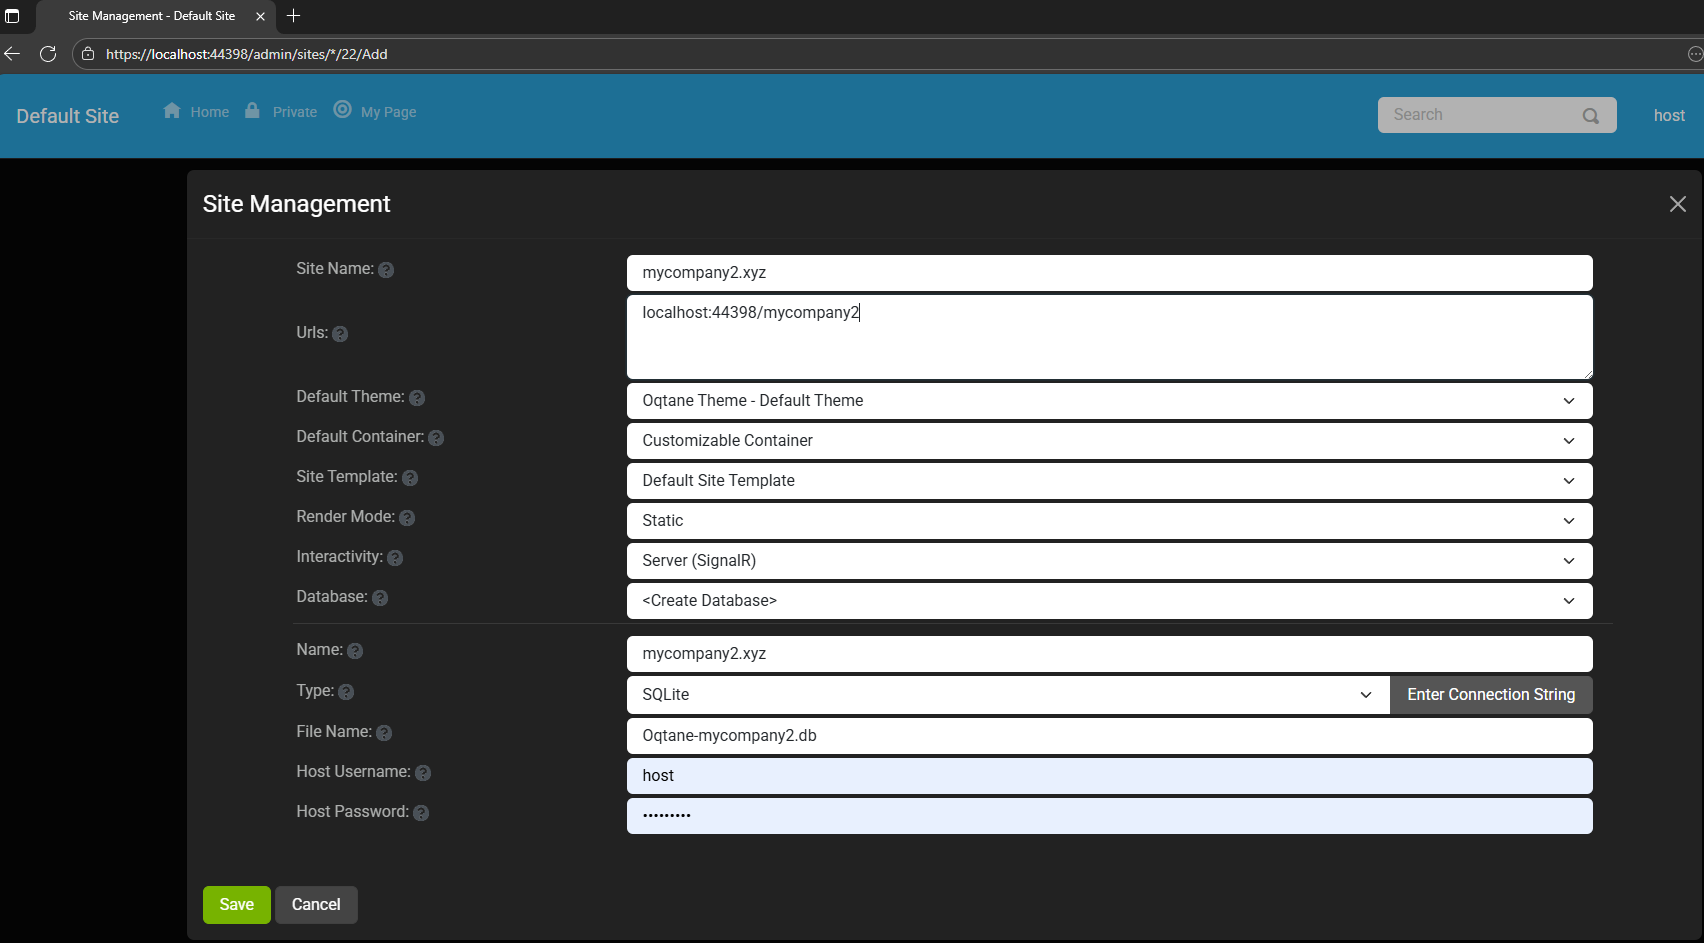
- Ran the app, went to the admin panel, and created two additional sites.
You can see the screenshots below showing the settings for each site.
At first, it was a bit confusing — I thought I could simply use different ports for each site (like 8081,
8082, etc.), but that’s not how Oqtane works. Everything runs in the same process, so all tenants
share the same port.
Instead of changing ports, you configure different URL paths or folders. For example:
http://localhost:8080/ → the main hosthttp://localhost:8080/mycompany1 → first tenanthttp://localhost:8080/mycompany2 → second tenant
Site Managment
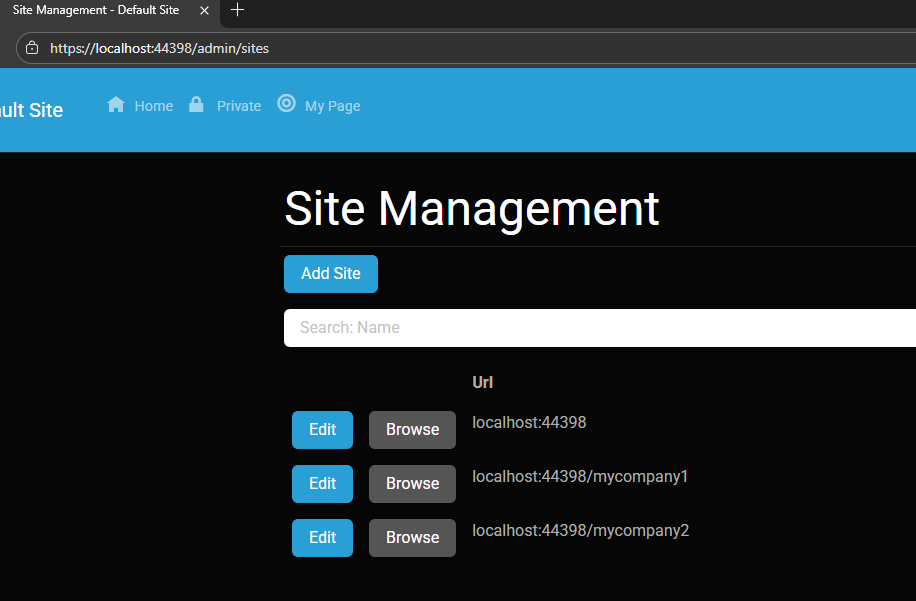
Site MyCompany1
Site MyCompany2
Each tenant can:
- Use a separate database or share the same one as the host
- Have its own theme
- Maintain independent site settings
In the short GIF animation I attached to the repository, you can see how each site has its
own unique visual theme — it’s really neat to watch.
When you add a new site, its connection string is also stored automatically in the application settings. So, if you download
the repository and run it locally, you’ll be able to access all the sites and see how the URLs and configurations work.
Here is the repository egarim/OqtaneMultiTenant: an example of how to use multi tenant in oqtane
Why I’m Doing These Posts
These blog entries are like my personal research notes — documenting what I discover while working with Oqtane.
I’m keeping each experiment small and reproducible so I can:
- Share them with others easily
- Download them later and reproduce the same setup, including data and configuration
What’s Next
In the next post, I’ll cover virtual hosting — how to use domain names that forward to specific
URLs or tenants. I’ve already done some research on that, but I don’t want to overload this post with too many topics.
For now, I’ll just attach the screenshots showing the different site configurations and URLs, along with a link to the GitHub
repository so you can try it yourself.
If you have any questions, feel free to reach out! I’ll keep documenting everything as I go.
One of the great things about Oqtane is that it’s open source — you can always dive into the code, or if you’re
stuck, open a GitHub issue. Shaun Walker and the community are incredibly helpful, so don’t hesitate to ask.
Thanks again to the Oqtane team for building such an amazing framework.

by Joche Ojeda | Sep 24, 2025 | Github Spec Kit, Vibe Code, Vibe document
I thought vibe coding was chaotic at home. Try doing it while traveling halfway across the world.
Between layovers, hotel lobbies, and unpredictable Wi-Fi, I convinced myself I could keep momentum by letting AI carry the weight. Just toss it some prompts, let it generate code, and keep vibing in transit. Sounds good, right?
It wasn’t. Instead of progress, I found myself trapped in the same entropy loop as before—except now with added airport noise and bad coffee. It finally hit me: coding wasn’t the hard part anymore. The real challenge was lowering the chaos of my ideas into clear, executable requirements.
The Travel Chaos of Vibe Coding
While bouncing from Saint Petersburg to El Salvador, I leaned on vibe coding like a crutch. I threw half-formed prompts at the AI:
- “Build me a service that works offline.”
- “Hook this into a booking flow.”
- “Make it sync when online again.”
And, of course, the AI delivered: endless snippets, scaffolds, and fragments. But none of it fit together. It was like watching a band jam without ever agreeing on the key. Six hours in, all I had was a disjointed mess—again.
Enter GitHub Spec Kit and New Perspectives
Somewhere between flights, I stumbled on GitHub Spec Kit, thanks to a Visual Studio Code podcast episode: Let it Cook – Introducing Spec Kit for Spec-Driven Development! (Episode 13).
Not long after, I tuned into the Merge Conflict podcast: All in on Spec-Driven Development (Episode 479), where James Montemagno and Frank Kruger broke down what spec-driven workflows really mean for developers.
Spec Kit showed me a different angle: instead of treating the AI like a mind reader, treat it like a contractor. Write clear specs, break them down into tasks, and then let the AI handle execution.
James and Frank went further. They contrasted waterfall (where everything is specified upfront) with agile (where progress is iterative and requirements evolve). Their point was simple but profound: no matter the methodology, you can’t skip requirements. Even agile depends on clarity at each iteration.
The Programmer’s True Role
That’s when it clicked: my job as a human programmer isn’t to crank out lines of code anymore. The AI can do that faster than I ever could. My job is to reduce entropy.
I take vague ideas, half-baked business rules, and chaotic travel thoughts—and refine them into something structured. That’s the blueprint AI thrives on. Without it, I’m asking the model to improvise a symphony from random notes. With it, I get clean, working solutions in minutes.
Why Requirements Are the Real Magic
Spec Kit and similar tools are amazing, but they don’t remove the hardest part—they expose it. Writing good requirements is the bottleneck. Once that’s done, the rest flows.
Think of it this way:
- Vibe coding while traveling = chaos squared.
- Spec-driven clarity = progress even in noisy, unpredictable environments.
It’s not about choosing waterfall or agile. It’s about embracing the timeless truth that clarity upfront—whether in a full spec or a tight user story—is what makes AI effective.
Conclusion
My journey from vibe coding on the road to spec-driven clarity taught me that code is no longer the hardest problem. The real magic lies in writing requirements that reduce chaos and give AI a fighting chance to deliver.
So next time you feel tempted to vibe code—whether at home or 30,000 feet in the air—pause. Write the requirement. Structure the idea. Then let the AI do what it does best: execute clarity at scale.
Because in the end, humans reduce entropy. AI executes it.
Related Articles
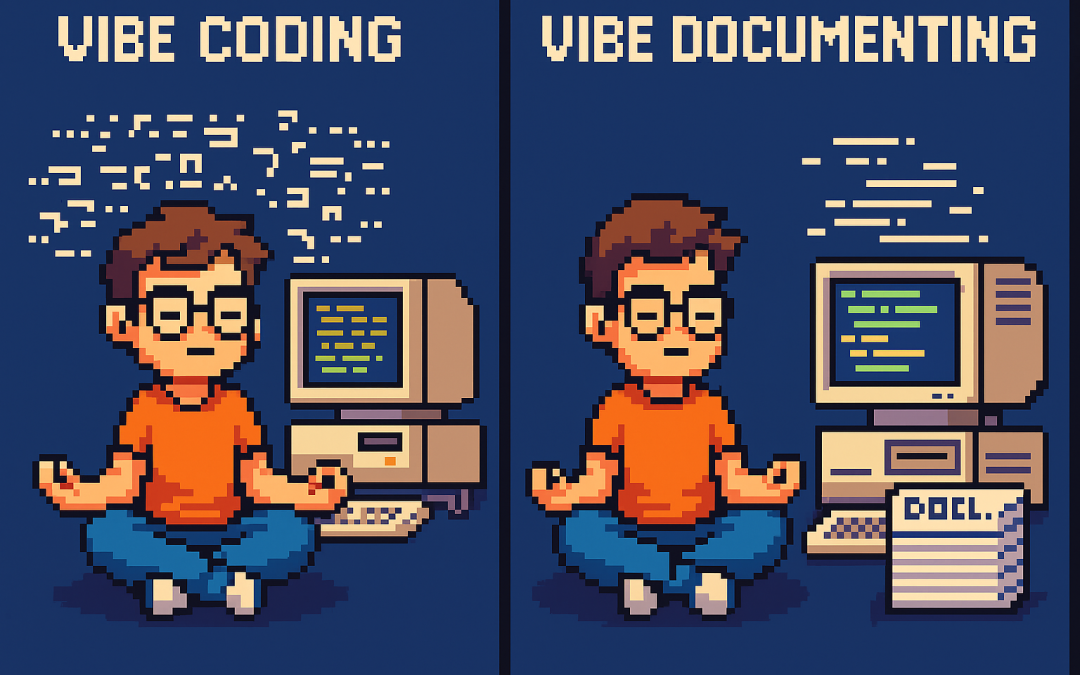
From Vibe Coding to Vibe Documenting: How I Turned 6 Hours of Chaos into 8 Minutes of Clarity | Joche Ojeda
by Joche Ojeda | Sep 23, 2025 | Oqtane, Vibe Code, Vibe document
Most of us have fallen into the trap of what I like to call vibe coding. It’s that moment when you’re excited about an idea, you open your editor, call on your favorite AI assistant, and just… vibe. You throw half-baked requirements at the model, it spits out a lot of code, and for a while, it feels like progress.
The problem is, vibe coding usually leads to garbage code, wasted time, and mounting frustration. I know this because I recently spent six hours vibe coding a feature I could have completed in under ten minutes—once I stopped vibing and started documenting.
What Is Vibe Coding?
Vibe coding is coding without a plan. It’s asking an AI to build something from incomplete context, hoping it magically fills in the blanks.
It can look like:
- Pasting vague prompts into an LLM: “Build me an activity stream module.”
- Copy-pasting stack overflow snippets without really understanding them.
- Letting AI hallucinate structures, dependencies, and business rules you never specified.
And it feels productive, because you see code flying across your screen. But what’s really happening is that the AI is guessing. It compiles imaginary versions of your system in its “head,” tries different routes, and produces lots of words that look like solutions but don’t actually fit your framework or needs. The result: chaos disguised as progress.
My Oqtane Activity Stream Story
Here’s a concrete example.
I wanted to build an activity stream—basically, a social-network-style feed—on top of Oqtane, a .NET-based CMS. Now, I know the domain of activity streams really well, but I decided to test how far I could get if I let AI build an Oqtane module for me as if I knew nothing about the framework.
For six hours, I vibe coded. I kept prompting the AI with fragments like:
- “Make an Oqtane module for an activity feed.”
- “Add a timeline of user events.”
- “Hook this up to Oqtane’s structure.”
And the AI did what it does best: it generated code. Lots of it. But the code didn’t fit the Oqtane module lifecycle. It missed important patterns, created unnecessary complexity, and left me stuck in a trial-and-error spiral.
Six hours later, I had nothing usable. Just a pile of messy code and a headache.
The Switch to Vibe Documenting
Then I stepped back. Instead of continuing to let the AI guess, I wrote down what I already knew:
- How an Oqtane module is structured.
- What the activity stream needed to display.
- The key integration points with the CMS.
In other words, I documented the requirements as if I were teaching someone new to Oqtane. Then, I fed that documentation to the AI.
The result? In about eight minutes, I had a clean, working Oqtane module for my activity stream. No trial and error. No hallucinated patterns. Just code that fit perfectly into the framework.
Why Documentation Beats Guesswork
The lesson was obvious: the AI is only as good as the clarity of its input. Documentation gives it structure, reducing the entropy of the problem. Without it, you’re effectively asking the AI to be psychic. With it, you’re giving the AI a blueprint it can execute on with precision.
Think about it this way:
- Vibe coding = lots of code, little progress.
- Vibe documenting = clear plan, fast progress.
The irony is that documentation often feels slower up front—but it saves exponential time later. In my case, it turned six wasted hours into eight minutes of actual productivity.
The Human Programmer’s Role
This experience reinforced something important: the human programmer isn’t going anywhere. Our role is to act as the bridge between vague ideas and structured requirements.
We’re the ones who take messy, half-formed thoughts and turn them into clear steps. That’s not just busywork—that’s the essence of engineering. Once those steps exist, the AI can handle the grunt work of coding far more effectively than it can guess at our intentions.
In other words: humans reduce chaos; AI executes clarity.
The Guru Lesson
I like to think of it as a guru’s journey. On one side, the vibe coder sits cross-legged in front of a retro computer, letting chaotic lines of code swirl around them. On the other, the vibe documenter floats serenely, armed with neat stacks of documentation, watching clean code flow effortlessly.
The wisdom is simple: don’t vibe code. Vibe document. It’s the difference between six hours of chaos and eight minutes of clarity.
Conclusion
AI coding assistants are incredible, but they’re not mind readers. If you skip documentation, you’ll spend hours wrestling with hallucinated code. If you take the time to document, you’ll unlock the real power of AI: rapid, reliable execution.
So the next time you feel the urge to vibe code, pause. Write down your requirements. Document your framework. Then let the AI do what it does best: build from clarity.
Because vibe coding wastes time—but vibe documenting saves it.
by Joche Ojeda | Jun 26, 2025 | EfCore
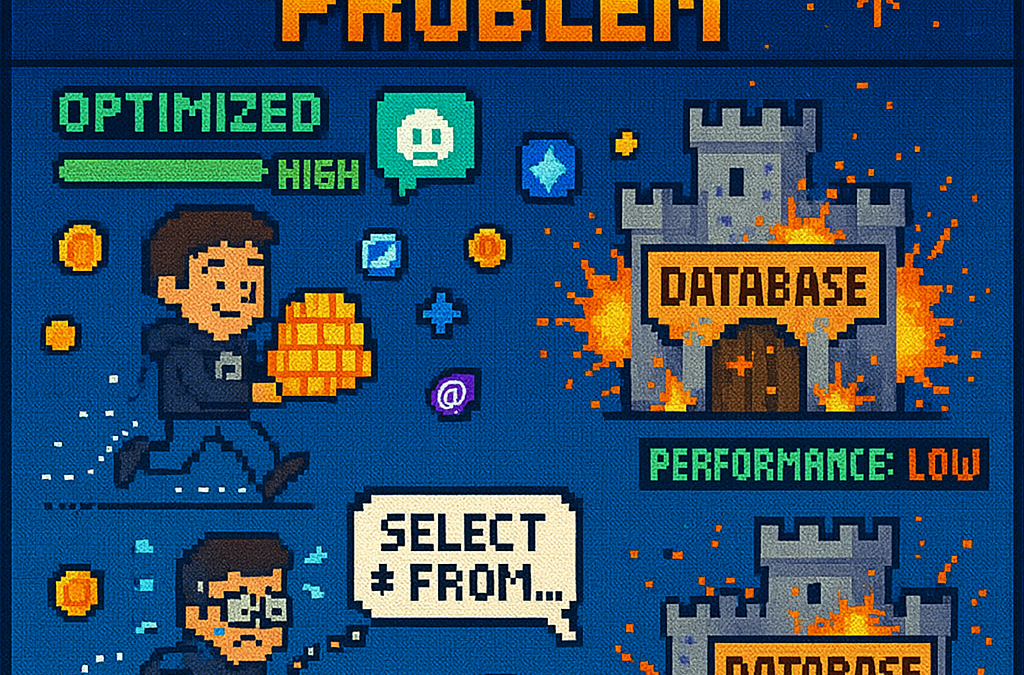
What is the N+1 Problem?
Imagine you’re running a blog website and want to display a list of all blogs along with how many posts each one has. The N+1 problem is a common database performance issue that happens when your application makes way too many database trips to get this simple information.
Our Test Database Setup
Our test suite creates a realistic blog scenario with:
- 3 different blogs
- Multiple posts for each blog
- Comments on posts
- Tags associated with blogs
This mirrors real-world applications where data is interconnected and needs to be loaded efficiently.
Test Case 1: The Classic N+1 Problem (Lazy Loading)
What it does: This test demonstrates how “lazy loading” can accidentally create the N+1 problem. Lazy loading sounds helpful – it automatically fetches related data when you need it. But this convenience comes with a hidden cost.
The Code:
[Test]
public void Test_N_Plus_One_Problem_With_Lazy_Loading()
{
    var blogs = _context.Blogs.ToList(); // Query 1: Load blogs

    foreach (var blog in blogs)
    {
        var postCount = blog.Posts.Count; // Each access triggers a query!
        TestLogger.WriteLine($"Blog: {blog.Title} - Posts: {postCount}");
    }
}
The SQL Queries Generated:
-- Query 1: Load all blogs
SELECT "b"."Id", "b"."CreatedDate", "b"."Description", "b"."Title"
FROM "Blogs" AS "b"

-- Query 2: Load posts for Blog 1 (triggered by lazy loading)
SELECT "p"."Id", "p"."BlogId", "p"."Content", "p"."PublishedDate", "p"."Title"
FROM "Posts" AS "p"
WHERE "p"."BlogId" = 1

-- Query 3: Load posts for Blog 2 (triggered by lazy loading)
SELECT "p"."Id", "p"."BlogId", "p"."Content", "p"."PublishedDate", "p"."Title"
FROM "Posts" AS "p"
WHERE "p"."BlogId" = 2

-- Query 4: Load posts for Blog 3 (triggered by lazy loading)
SELECT "p"."Id", "p"."BlogId", "p"."Content", "p"."PublishedDate", "p"."Title"
FROM "Posts" AS "p"
WHERE "p"."BlogId" = 3
The Problem: 4 total queries (1 + 3) – Each time you access blog.Posts.Count, lazy loading triggers a separate database trip.
Test Case 2: Alternative N+1 Demonstration
What it does: This test manually recreates the N+1 pattern to show exactly what’s happening, even if lazy loading isn’t working properly.
The Code:
[Test]
public void Test_N_Plus_One_Problem_Alternative_Approach()
{
    var blogs = _context.Blogs.ToList(); // Query 1

    foreach (var blog in blogs)
    {
        // This explicitly loads posts for THIS blog only (simulates lazy loading)
        var posts = _context.Posts.Where(p => p.BlogId == blog.Id).ToList();
        TestLogger.WriteLine($"Loaded {posts.Count} posts for blog {blog.Id}");
    }
}
The Lesson: This explicitly demonstrates the N+1 pattern with manual queries. The result is identical to lazy loading – one query per blog plus the initial blogs query.
Test Case 3: N+1 vs Include() – Side by Side Comparison
What it does: This is the money shot – a direct comparison showing the dramatic difference between the problematic approach and the solution.
The Bad Code (N+1):
// BAD: N+1 Problem
var blogsN1 = _context.Blogs.ToList(); // Query 1
foreach (var blog in blogsN1)
{
    var posts = _context.Posts.Where(p => p.BlogId == blog.Id).ToList(); // Queries 2,3,4...
}
The Good Code (Include):
// GOOD: Include() Solution
var blogsInclude = _context.Blogs
    .Include(b => b.Posts)
    .ToList(); // Single query with JOIN

foreach (var blog in blogsInclude)
{
    // No additional queries needed - data is already loaded!
    var postCount = blog.Posts.Count;
}
The SQL Queries:
Bad Approach (Multiple Queries):
-- Same 4 separate queries as shown in Test Case 1
Good Approach (Single Query):
SELECT "b"."Id", "b"."CreatedDate", "b"."Description", "b"."Title",
       "p"."Id", "p"."BlogId", "p"."Content", "p"."PublishedDate", "p"."Title"
FROM "Blogs" AS "b"
LEFT JOIN "Posts" AS "p" ON "b"."Id" = "p"."BlogId"
ORDER BY "b"."Id"
Results from our test:
- Bad approach: 4 total queries (1 + 3)
- Good approach: 1 total query
- Performance improvement: 75% fewer database round trips!
Test Case 4: Guaranteed N+1 Problem
What it does: This test removes any doubt by explicitly demonstrating the N+1 pattern with clear step-by-step output.
The Code:
[Test]
public void Test_Guaranteed_N_Plus_One_Problem()
{
    var blogs = _context.Blogs.ToList(); // Query 1
    int queryCount = 1;

    foreach (var blog in blogs)
    {
        queryCount++;
        // This explicitly demonstrates the N+1 pattern
        var posts = _context.Posts.Where(p => p.BlogId == blog.Id).ToList();
        TestLogger.WriteLine($"Loading posts for blog '{blog.Title}' (Query #{queryCount})");
    }
}
Why it’s useful: This ensures we can always see the problem clearly by manually executing the problematic pattern, making it impossible to miss.
Test Case 5: Eager Loading with Include()
What it does: Shows the correct way to load related data upfront using Include().
The Code:
[Test]
public void Test_Eager_Loading_With_Include()
{
    var blogsWithPosts = _context.Blogs
        .Include(b => b.Posts)
        .ToList();

    foreach (var blog in blogsWithPosts)
    {
        // No additional queries - data already loaded!
        TestLogger.WriteLine($"Blog: {blog.Title} - Posts: {blog.Posts.Count}");
    }
}
The SQL Query:
SELECT "b"."Id", "b"."CreatedDate", "b"."Description", "b"."Title",
       "p"."Id", "p"."BlogId", "p"."Content", "p"."PublishedDate", "p"."Title"
FROM "Blogs" AS "b"
LEFT JOIN "Posts" AS "p" ON "b"."Id" = "p"."BlogId"
ORDER BY "b"."Id"
The Benefit: One database trip loads everything. When you access blog.Posts.Count, the data is already there.
Test Case 6: Multiple Includes with ThenInclude()
What it does: Demonstrates loading deeply nested data – blogs → posts → comments – all in one query.
The Code:
[Test]
public void Test_Multiple_Includes_With_ThenInclude()
{
    var blogsWithPostsAndComments = _context.Blogs
        .Include(b => b.Posts)
            .ThenInclude(p => p.Comments)
        .ToList();

    foreach (var blog in blogsWithPostsAndComments)
    {
        foreach (var post in blog.Posts)
        {
            // All data loaded in one query!
            TestLogger.WriteLine($"Post: {post.Title} - Comments: {post.Comments.Count}");
        }
    }
}
The SQL Query:
SELECT "b"."Id", "b"."CreatedDate", "b"."Description", "b"."Title",
       "p"."Id", "p"."BlogId", "p"."Content", "p"."PublishedDate", "p"."Title",
       "c"."Id", "c"."Author", "c"."Content", "c"."CreatedDate", "c"."PostId"
FROM "Blogs" AS "b"
LEFT JOIN "Posts" AS "p" ON "b"."Id" = "p"."BlogId"
LEFT JOIN "Comments" AS "c" ON "p"."Id" = "c"."PostId"
ORDER BY "b"."Id", "p"."Id"
The Challenge: Loading three levels of data in one optimized query instead of potentially hundreds of separate queries.
Test Case 7: Projection with Select()
What it does: Shows how to load only the specific data you actually need instead of entire objects.
The Code:
[Test]
public void Test_Projection_With_Select()
{
    var blogData = _context.Blogs
        .Select(b => new
        {
            BlogTitle = b.Title,
            PostCount = b.Posts.Count(),
            RecentPosts = b.Posts
                .OrderByDescending(p => p.PublishedDate)
                .Take(2)
                .Select(p => new { p.Title, p.PublishedDate })
        })
        .ToList();
}
The SQL Query (from our test output):
SELECT "b"."Title", (
    SELECT COUNT(*)
    FROM "Posts" AS "p"
    WHERE "b"."Id" = "p"."BlogId"), "b"."Id", "t0"."Title", "t0"."PublishedDate", "t0"."Id"
FROM "Blogs" AS "b"
LEFT JOIN (
    SELECT "t"."Title", "t"."PublishedDate", "t"."Id", "t"."BlogId"
    FROM (
        SELECT "p0"."Title", "p0"."PublishedDate", "p0"."Id", "p0"."BlogId",
               ROW_NUMBER() OVER(PARTITION BY "p0"."BlogId" ORDER BY "p0"."PublishedDate" DESC) AS "row"
        FROM "Posts" AS "p0"
    ) AS "t"
    WHERE "t"."row" <= 2
) AS "t0" ON "b"."Id" = "t0"."BlogId"
ORDER BY "b"."Id", "t0"."BlogId", "t0"."PublishedDate" DESC
Why it matters: This query only loads the specific fields needed, uses window functions for efficiency, and calculates counts in the database rather than loading full objects.
Test Case 8: Split Query Strategy
What it does: Demonstrates an alternative approach where one large JOIN is split into multiple optimized queries.
The Code:
[Test]
public void Test_Split_Query()
{
    var blogs = _context.Blogs
        .AsSplitQuery()
        .Include(b => b.Posts)
        .Include(b => b.Tags)
        .ToList();
}
The SQL Queries (from our test output):
-- Query 1: Load blogs
SELECT "b"."Id", "b"."CreatedDate", "b"."Description", "b"."Title"
FROM "Blogs" AS "b"
ORDER BY "b"."Id"

-- Query 2: Load posts (automatically generated)
SELECT "p"."Id", "p"."BlogId", "p"."Content", "p"."PublishedDate", "p"."Title", "b"."Id"
FROM "Blogs" AS "b"
INNER JOIN "Posts" AS "p" ON "b"."Id" = "p"."BlogId"
ORDER BY "b"."Id"

-- Query 3: Load tags (automatically generated)
SELECT "t"."Id", "t"."Name", "b"."Id"
FROM "Blogs" AS "b"
INNER JOIN "BlogTag" AS "bt" ON "b"."Id" = "bt"."BlogsId"
INNER JOIN "Tags" AS "t" ON "bt"."TagsId" = "t"."Id"
ORDER BY "b"."Id"
When to use it: When JOINing lots of related data creates one massive, slow query. Split queries break this into several smaller, faster queries.
Test Case 9: Filtered Include()
What it does: Shows how to load only specific related data – in this case, only recent posts from the last 15 days.
The Code:
[Test]
public void Test_Filtered_Include()
{
    var cutoffDate = DateTime.Now.AddDays(-15);
    var blogsWithRecentPosts = _context.Blogs
        .Include(b => b.Posts.Where(p => p.PublishedDate > cutoffDate))
        .ToList();
}
The SQL Query:
SELECT "b"."Id", "b"."CreatedDate", "b"."Description", "b"."Title",
       "p"."Id", "p"."BlogId", "p"."Content", "p"."PublishedDate", "p"."Title"
FROM "Blogs" AS "b"
LEFT JOIN "Posts" AS "p" ON "b"."Id" = "p"."BlogId" AND "p"."PublishedDate" > @cutoffDate
ORDER BY "b"."Id"
The Efficiency: Only loads posts that meet the criteria, reducing data transfer and memory usage.
Test Case 10: Explicit Loading
What it does: Demonstrates manually controlling when related data gets loaded.
The Code:
[Test]
public void Test_Explicit_Loading()
{
    var blogs = _context.Blogs.ToList(); // Load blogs only

    // Now explicitly load posts for all blogs
    foreach (var blog in blogs)
    {
        _context.Entry(blog)
            .Collection(b => b.Posts)
            .Load();
    }
}
The SQL Queries:
-- Query 1: Load blogs
SELECT "b"."Id", "b"."CreatedDate", "b"."Description", "b"."Title"
FROM "Blogs" AS "b"

-- Query 2: Explicitly load posts for blog 1
SELECT "p"."Id", "p"."BlogId", "p"."Content", "p"."PublishedDate", "p"."Title"
FROM "Posts" AS "p"
WHERE "p"."BlogId" = 1

-- Query 3: Explicitly load posts for blog 2
SELECT "p"."Id", "p"."BlogId", "p"."Content", "p"."PublishedDate", "p"."Title"
FROM "Posts" AS "p"
WHERE "p"."BlogId" = 2

-- ... and so on
When useful: When you sometimes need related data and sometimes don’t. You control exactly when the additional database trip happens.
Test Case 11: Batch Loading Pattern
What it does: Shows a clever technique to avoid N+1 by loading all related data in one query, then organizing it in memory.
The Code:
[Test]
public void Test_Batch_Loading_Pattern()
{
    var blogs = _context.Blogs.ToList(); // Query 1
    var blogIds = blogs.Select(b => b.Id).ToList();

    // Single query to get all posts for all blogs
    var posts = _context.Posts
        .Where(p => blogIds.Contains(p.BlogId))
        .ToList(); // Query 2

    // Group posts by blog in memory
    var postsByBlog = posts.GroupBy(p => p.BlogId).ToDictionary(g => g.Key, g => g.ToList());
}
The SQL Queries:
-- Query 1: Load all blogs
SELECT "b"."Id", "b"."CreatedDate", "b"."Description", "b"."Title"
FROM "Blogs" AS "b"

-- Query 2: Load ALL posts for ALL blogs in one query
SELECT "p"."Id", "p"."BlogId", "p"."Content", "p"."PublishedDate", "p"."Title"
FROM "Posts" AS "p"
WHERE "p"."BlogId" IN (1, 2, 3)
The Result: Just 2 queries total, regardless of how many blogs you have. Data organization happens in memory.
Test Case 12: Performance Comparison
What it does: Puts all the approaches head-to-head to show their relative performance.
The Code:
[Test]
public void Test_Performance_Comparison()
{
    // N+1 Problem (Multiple Queries)
    var blogs1 = _context.Blogs.ToList();
    foreach (var blog in blogs1)
    {
        var count = blog.Posts.Count(); // Triggers separate query
    }

    // Eager Loading (Single Query)
    var blogs2 = _context.Blogs
        .Include(b => b.Posts)
        .ToList();

    // Projection (Minimal Data)
    var blogSummaries = _context.Blogs
        .Select(b => new { b.Title, PostCount = b.Posts.Count() })
        .ToList();
}
The SQL Queries Generated:
N+1 Problem: 4 separate queries (as shown in previous examples)
Eager Loading: 1 JOIN query (as shown in Test Case 5)
Projection: 1 optimized query with subquery:
SELECT "b"."Title", (
    SELECT COUNT(*)
    FROM "Posts" AS "p"
    WHERE "b"."Id" = "p"."BlogId") AS "PostCount"
FROM "Blogs" AS "b"
Real-World Performance Impact
Let’s scale this up to see why it matters:
Small Application (10 blogs):
- N+1 approach: 11 queries (≈110ms)
- Optimized approach: 1 query (≈10ms)
- Time saved: 100ms
Medium Application (100 blogs):
- N+1 approach: 101 queries (≈1,010ms)
- Optimized approach: 1 query (≈10ms)
- Time saved: 1 second
Large Application (1000 blogs):
- N+1 approach: 1001 queries (≈10,010ms)
- Optimized approach: 1 query (≈10ms)
- Time saved: 10 seconds
Key Takeaways
- The N+1 problem gets exponentially worse as your data grows
- Lazy loading is convenient but dangerous – it can hide performance problems
- Include() is your friend for loading related data efficiently
- Projection is powerful when you only need specific fields
- Different problems need different solutions – there’s no one-size-fits-all approach
- SQL query inspection is crucial – always check what queries your ORM generates
The Bottom Line
This test suite shows that small changes in how you write database queries can transform a slow, database-heavy operation into a fast, efficient one. The difference between a frustrated user waiting 10 seconds for a page to load and a happy user getting instant results often comes down to understanding and avoiding the N+1 problem.
The beauty of these tests is that they use real database queries with actual SQL output, so you can see exactly what’s happening under the hood. Understanding these patterns will make you a more effective developer and help you build applications that stay fast as they grow.
You can find the source for this article in my here