
by Joche Ojeda | May 5, 2025 | Uncategorized
The chart of accounts module is a critical component of any financial accounting system, serving as the organizational structure that categorizes financial transactions. As a software developer working on accounting applications, understanding how to properly implement a chart of accounts module is essential for creating robust and effective financial management solutions.
What is a Chart of Accounts?
Before diving into the implementation details, let’s clarify what a chart of accounts is. In accounting, the chart of accounts is a structured list of all accounts used by an organization to record financial transactions. These accounts are categorized by type (assets, liabilities, equity, revenue, and expenses) and typically follow a numbering system to facilitate organization and reporting.
Core Components of a Chart of Accounts Module
Based on best practices in financial software development, a well-designed chart of accounts module should include:
1. Account Entity
The fundamental entity in the module is the account itself. A properly designed account entity should include:
- A unique identifier (typically a GUID in modern systems)
- Account name
- Account type (asset, liability, equity, revenue, expense)
- Official account code (often used for regulatory reporting)
- Reference to financial statement lines
- Audit information (who created/modified the account and when)
- Archiving capability (for soft deletion)
2. Account Type Enumeration
Account types are typically implemented as an enumeration:
public enum AccountType
{
    Asset = 1,
    Liability = 2,
    Equity = 3,
    Revenue = 4,
    Expense = 5
}
This enumeration serves as more than just a label—it determines critical business logic, such as whether an account normally has a debit or credit balance.
3. Account Validation
A robust chart of accounts module includes validation logic for accounts:
- Ensuring account codes follow the required format (typically numeric)
- Verifying that account codes align with their account types (e.g., asset accounts starting with “1”)
- Validating consistency between account types and financial statement lines
- Checking that account names are not empty and are unique
4. Balance Calculation
One of the most important functions of the chart of accounts module is calculating account balances:
- Point-in-time balance calculations (as of a specific date)
- Period turnover calculations (debit and credit movement within a date range)
- Determining if an account has any transactions
Implementation Best Practices
When implementing a chart of accounts module, consider these best practices:
1. Use Interface-Based Design
Implement interfaces like IAccount to define the contract for account entities:
public interface IAccount : IEntity, IAuditable, IArchivable
{
    Guid? BalanceAndIncomeLineId { get; set; }
    string AccountName { get; set; }
    AccountType AccountType { get; set; }
    string OfficialCode { get; set; }
}
2. Apply SOLID Principles
- Single Responsibility: Separate account validation, balance calculation, and persistence
- Open-Closed: Design for extension without modification (e.g., for custom account types)
- Liskov Substitution: Ensure derived implementations can substitute base interfaces
- Interface Segregation: Create focused interfaces for different concerns
- Dependency Inversion: Depend on abstractions rather than concrete implementations
3. Implement Comprehensive Validation
Account validation should be thorough to prevent data inconsistencies:
public bool ValidateAccountCode(string accountCode, AccountType accountType)
{
    if (string.IsNullOrWhiteSpace(accountCode))
        return false;

    // Account code should be numeric
    if (!accountCode.All(char.IsDigit))
        return false;

    // Check that account code prefix matches account type
    char expectedPrefix = GetExpectedPrefix(accountType);
    return accountCode.Length > 0 && accountCode[0] == expectedPrefix;
}
4. Integrate with Financial Reporting
The chart of accounts should map accounts to financial statement lines for reporting:
- Balance sheet lines
- Income statement lines
- Cash flow statement lines
- Equity statement lines
Testing the Chart of Accounts Module
Comprehensive testing is crucial for a chart of accounts module:
- Unit Tests: Test individual components like account validation and balance calculation
- Integration Tests: Verify that components work together properly
- Business Rule Tests: Ensure business rules like “assets have debit balances” are enforced
- Persistence Tests: Confirm correct database interaction
Common Challenges and Solutions
When working with a chart of accounts module, you might encounter:
1. Account Code Standardization
Challenge: Different jurisdictions may have different account coding requirements.
Solution: Implement a flexible validation system that can be configured for different accounting standards.
2. Balance Calculation Performance
Challenge: Balance calculations for accounts with many transactions can be slow.
Solution: Implement caching strategies and consider storing period-end balances for faster reporting.
3. Account Hierarchies
Challenge: Supporting account hierarchies for reporting.
Solution: Implement a nested set model or closure table for efficient hierarchy querying.
Conclusion
A well-designed chart of accounts module is the foundation of a reliable accounting system. By following these implementation guidelines and understanding the core concepts, you can create a flexible, maintainable, and powerful chart of accounts that will serve as the backbone of your financial accounting application.
Remember that the chart of accounts is not just a technical construct—it should reflect the business needs and reporting requirements of the organization using the system. Taking time to properly design this module will pay dividends throughout the life of your application.
Repo
egarim/SivarErp: Open Source ERP
About Us
YouTube
https://www.youtube.com/c/JocheOjedaXAFXAMARINC
Our sites
Let’s discuss your XAF
This call/zoom will give you the opportunity to define the roadblocks in your current XAF solution. We can talk about performance, deployment or custom implementations. Together we will review you pain points and leave you with recommendations to get your app back in track
https://calendly.com/bitframeworks/bitframeworks-free-xaf-support-hour
Our free A.I courses on Udemy

by Joche Ojeda | Mar 2, 2025 | C#, System Theory
This past week, I have been working on a prototype for a wizard component. As you might know, in computer interfaces, wizard components (or multi-step forms) allow users to navigate through a finite number of steps or pages until they reach the end. Wizards are particularly useful because they don’t overwhelm users with too many choices at once, effectively minimizing the number of decisions a user needs to make at any specific moment.
The current prototype is created using XAF from DevExpress. If you follow this blog, you probably know that I’m a DevExpress MVP, and I wanted to use their tools to create this prototype.
I’ve built wizard components before, but mostly in a rush. Those previous implementations had the wizard logic hardcoded directly inside the UI components, with no separation between the UI and the underlying logic. While they worked, they were quite messy. This time, I wanted to take a more structured approach to creating a wizard component, so here are a few of my findings. Most of this might seem obvious, but sometimes it’s hard to see the forest for the trees when you’re sitting in front of the computer writing code.
Understanding the Core Concept: State Machines
To create an effective wizard component, you need to understand several underlying concepts. The idea of a wizard is actually rooted in system theory and computer science—it’s essentially an implementation of what’s called a state machine or finite state machine.
Theory of a State Machine
A state machine is the same as a finite state machine (FSM). Both terms refer to a computational model that describes a system existing in one of a finite number of states at any given time.
A state machine (or FSM) consists of:
- States: Distinct conditions the system can be in
- Transitions: Rules for moving between states
- Events/Inputs: Triggers that cause transitions
- Actions: Operations performed when entering/exiting states or during transitions
The term “finite” emphasizes that there’s a limited, countable number of possible states. This finite nature is crucial as it makes the system predictable and analyzable.
State machines come in several variants:
- Deterministic FSMs (one transition per input)
- Non-deterministic FSMs (multiple possible transitions per input)
- Mealy machines (outputs depend on state and input)
- Moore machines (outputs depend only on state)
They’re widely used in software development, hardware design, linguistics, and many other fields because they make complex behavior easier to visualize, implement, and debug. Common examples include traffic lights, UI workflows, network protocols, and parsers.
In practical usage, when someone refers to a “state machine,” they’re almost always talking about a finite state machine.
Implementing a Wizard State Machine
Here’s an implementation of a wizard state machine that separates the logic from the UI:
public class WizardStateMachineBase
{
    readonly List<WizardPage> _pages;
    int _currentIndex;

    public WizardStateMachineBase(IEnumerable<WizardPage> pages)
    {
        _pages = pages.OrderBy(p => p.Index).ToList();
        _currentIndex = 0;
    }

    public event EventHandler<StateTransitionEventArgs> StateTransition;

    public WizardPage CurrentPage => _pages[_currentIndex];

    public virtual bool MoveNext()
    {
        if (_currentIndex < _pages.Count - 1) { var args = new StateTransitionEventArgs(CurrentPage, _pages[_currentIndex + 1]); OnStateTransition(args); if (!args.Cancel) { _currentIndex++; return true; } } return false; } public virtual bool MovePrevious() { if (_currentIndex > 0)
        {
            var args = new StateTransitionEventArgs(CurrentPage, _pages[_currentIndex - 1]);
            OnStateTransition(args);

            if (!args.Cancel)
            {
                _currentIndex--;
                return true;
            }
        }
        return false;
    }

    protected virtual void OnStateTransition(StateTransitionEventArgs e)
    {
        StateTransition?.Invoke(this, e);
    }
}

public class StateTransitionEventArgs : EventArgs
{
    public WizardPage CurrentPage { get; }
    public WizardPage NextPage { get; }
    public bool Cancel { get; set; }

    public StateTransitionEventArgs(WizardPage currentPage, WizardPage nextPage)
    {
        CurrentPage = currentPage;
        NextPage = nextPage;
        Cancel = false;
    }
}

public class WizardPage
{
    public int Index { get; set; }
    public string Title { get; set; }
    public string Description { get; set; }
    public bool IsRequired { get; set; } = true;
    public bool IsCompleted { get; set; }

    // Additional properties specific to your wizard implementation
    public object Content { get; set; }

    public WizardPage(int index, string title)
    {
        Index = index;
        Title = title;
    }

    public virtual bool Validate()
    {
        // Default implementation assumes page is valid
        // Override this method in derived classes to provide specific validation logic
        return true;
    }
}
Benefits of This Approach
As you can see, by defining a state machine, you significantly narrow down the implementation possibilities. You solve the problem of “too many parts to consider” – questions like “How do I start?”, “How do I control the state?”, “Should the state be in the UI or a separate class?”, and so on. These problems can become really complicated, especially if you don’t centralize the state control.
This simple implementation of a wizard state machine shows how to centralize control of the component’s state. By separating the state management from the UI components, we create a cleaner, more maintainable architecture.
The WizardStateMachineBase class manages the collection of pages and handles navigation between them, while the StateTransitionEventArgs class provides a mechanism to cancel transitions if needed (for example, if validation fails). The newly added WizardPage class encapsulates all the information needed for each step in the wizard.
What’s Next?
The next step will be to control how the visual components react to the state of the machine – essentially connecting our state machine to the UI layer. This will include handling the display of the current page content, updating navigation buttons (previous/next/finish), and possibly showing progress indicators. I’ll cover this UI integration in my next post.
By following this pattern, you can create wizard interfaces that are not only user-friendly but also maintainable and extensible from a development perspective.
Source Code
egarim/WizardStateMachineTest
About US
YouTube
https://www.youtube.com/c/JocheOjedaXAFXAMARINC
Our sites
https://www.bitframeworks.com
https://www.xari.io
https://www.xafers.training
Let’s discuss your XAF Support needs together! This 1-hour call/zoom will give you the opportunity to define the roadblocks in your current XAF solution
Schedule a meeting with us on this link

by Joche Ojeda | Jan 13, 2025 | Uncategorized
As the new year (2025) starts, I want to share some insights from my role at Xari. While Javier and I founded the company together (he’s the Chief in Command, and I’ve dubbed myself the Minister of Dark Magic), our rapid growth has made these playful titles more meaningful than we expected.
Among my self-imposed responsibilities are:
- Providing ancient knowledge to the team (I’ve been coding since MS-DOS 6.1 – you do the math!)
- Testing emerging technologies
- Deciphering how and why our systems work
- Achieving the “impossible” (even if impractical, we love proving it can be done)
Our Technical Landscape
As a .NET shop, we develop everything from LOB applications to AI-powered object detection systems and mainframe database connectors. Our preference for C# isn’t just about the language – it’s about the power of the .NET ecosystem itself.
.NET’s architecture, with its intermediate language and JIT compilation, opens up fascinating possibilities for code manipulation. This brings us to one of my favorite features: Reflection, or more broadly, metaprogramming.
Enter Harmony: The Art of Runtime Magic
Harmony is a powerful library that transforms how we approach runtime method patching in .NET applications. Think of it as a sophisticated Swiss Army knife for metaprogramming. But why would you need it?
Real-World Applications
1. Performance Monitoring
[HarmonyPatch(typeof(CriticalService), "ProcessData")]
class PerformancePatch
{
    static void Prefix(out Stopwatch __state)
    {
        __state = Stopwatch.StartNew();
    }

    static void Postfix(Stopwatch __state)
    {
        Console.WriteLine($"Processing took {__state.ElapsedMilliseconds}ms");
    }
}
2. Feature Toggling in Legacy Systems
[HarmonyPatch(typeof(LegacySystem), "SaveToDatabase")]
class ModernizationPatch
{
    static bool Prefix(object data)
    {
        if (FeatureFlags.UseNewStorage)
        {
            ModernDbContext.Save(data);
            return false; // Skip old implementation
        }
        return true;
    }
}
The Three Pillars of Harmony
Harmony offers three powerful ways to modify code:
1. Prefix Patches
- Execute before the original method
- Perfect for validation
- Can prevent original method execution
- Modify input parameters
2. Postfix Patches
- Run after the original method
- Ideal for logging
- Can modify return values
- Access to execution state
3. Transpilers
- Modify the IL code directly
- Most powerful but complex
- Direct instruction manipulation
- Used for advanced scenarios
Practical Example: Method Timing
Here’s a real-world example we use at Xari for performance monitoring:
[HarmonyPatch(typeof(Controller), "ProcessRequest")]
class MonitoringPatch
{
    static void Prefix(out Stopwatch __state)
    {
        __state = Stopwatch.StartNew();
    }

    static void Postfix(MethodBase __originalMethod, Stopwatch __state)
    {
        __state.Stop();
        Logger.Log($"{__originalMethod.Name} execution: {__state.ElapsedMilliseconds}ms");
    }
}
When to Use Harmony
Harmony shines when you need to:
- Modify third-party code without source access
- Implement system-wide logging or monitoring
- Create modding frameworks
- Add features to sealed classes
- Test legacy systems
The Dark Side of Power
While Harmony is powerful, use it wisely:
- Avoid in production-critical systems where stability is paramount
- Consider simpler alternatives first
- Be cautious with high-performance scenarios
- Document your patches thoroughly
Conclusion
In our work at Xari, Harmony has proven invaluable for solving seemingly impossible problems. While it might seem like “dark magic,” it’s really about understanding and leveraging the powerful features of .NET’s architecture.
Remember: with great power comes great responsibility. Use Harmony when it makes sense, but always consider simpler alternatives first. Happy coding!
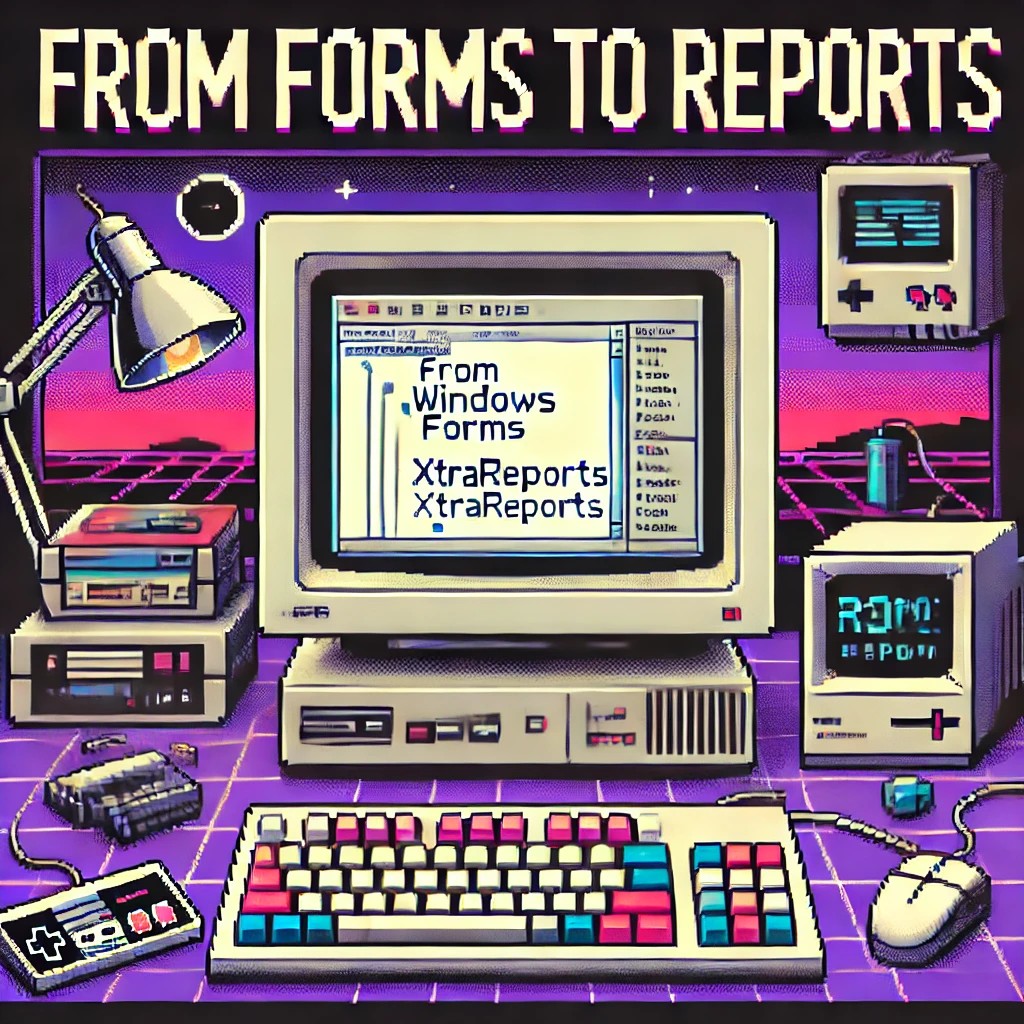
by Joche Ojeda | Jan 2, 2025 | XtraReports
Introduction ?
If you’re familiar with Windows Forms development, transitioning to XtraReports will feel remarkably natural. This guide explores how XtraReports leverages familiar Windows Forms concepts while extending them for robust reporting capabilities.
? Quick Tip: Think of XtraReports as Windows Forms optimized for paper output instead of screen output!
A Personal Journey ✨
Microsoft released .NET Framework in late 2002. At the time, I was a VB6 developer, relying on Crystal Reports 7 for reporting. By 2003, my team was debating whether to transition to this new thing called .NET. We were concerned about VB6’s longevity—thinking it had just a couple more years left. How wrong we were! Even today, VB6 applications are still running in some places (it’s January 2, 2025, as I write this).
Back in the VB6 era, we used the Crystal Reports COM object to integrate reports. When we finally moved to .NET Framework, we performed some “black magic” to continue using our existing 700 reports across nine countries. The decision to fully embrace .NET was repeatedly delayed due to the sheer volume of reports we had to manage. Our ultimate goal was to unify our reporting and parameter forms within a single development environment.
This led us to explore other technologies. While considering Delphi, we discovered DevExpress. My boss procured our first DevExpress .NET license for Windows Forms, marking the start of my adventure with DevExpress and XtraReports. Initially, transitioning from the standalone Crystal Report Designer to the IDE-based XtraReports Designer was challenging. To better understand how XtraReports worked, I decided to write reports programmatically instead of using the visual designer.
Architectural Similarities ?️
XtraReports mirrors many fundamental Windows Forms concepts:
| Source |
Destination |
| XtraReport Class |
Report Designer Surface |
| XtraReport Class |
Control Container |
| XtraReport Class |
Event System |
| XtraReport Class |
Properties Window |
| Control Container |
Labels & Text |
| Control Container |
Tables & Grids |
| Control Container |
Images & Charts |
| Report Designer Surface |
Control Toolbox |
| Report Designer Surface |
Design Surface |
| Report Designer Surface |
Preview Window |
Like how Windows Forms applications start with a Form class, XtraReports begin with an XtraReport base class. Both serve as containers that can:
- Host other controls
- Manage layout
- Handle events
- Support data binding
Visual Designer Experience ?
The design experience remains consistent with Windows Forms:
| Windows Forms |
XtraReports |
| Form Designer |
Report Designer |
| Toolbox |
Report Controls |
| Properties Window |
Properties Grid |
| Component Tray |
Component Tool |
Control Ecosystem ?
XtraReports provides analogous controls to Windows Forms:
// Windows Forms
public partial class CustomerForm : Form
{
    private Label customerNameLabel;
    private DataGridView orderDetailsGrid;
}

// XtraReports
public partial class CustomerReport : XtraReport
{
    private XRLabel customerNameLabel;
    private XRTable orderDetailsTable;
}
Common control mappings:
- Label ➡️ XRLabel
- Panel ➡️ XRPanel
- PictureBox ➡️ XRPictureBox
- DataGridView ➡️ XRTable
- GroupBox ➡️ Band
- UserControl ➡️ Subreport
Data Binding Patterns ?
The data binding syntax maintains familiarity:
// Windows Forms data binding
customerNameLabel.DataBindings.Add("Text", customerDataSet, "Customers.Name");

// XtraReports data binding
customerNameLabel.ExpressionBindings.Add(
    new ExpressionBinding("Text", "[Name]"));
Code Architecture ?️
The code-behind model remains consistent:
public partial class CustomerReport : DevExpress.XtraReports.UI.XtraReport
{
    public CustomerReport()
    {
        InitializeComponent(); // Familiar Windows Forms pattern
    }

    private void CustomerReport_BeforePrint(object sender, PrintEventArgs e)
    {
        // Event handling similar to Windows Forms
        // Instead of Form_Load, we have Report_BeforePrint
    }
}
Key Differences ⚡
While similarities abound, important differences exist:
- Output Focus ?️
- Windows Forms: Screen-based interaction
- XtraReports: Print/export optimization
- Layout Model ?
- Windows Forms: Flexible screen layouts
- XtraReports: Page-based layouts with bands
- Control Behavior ?
- Windows Forms: Interactive controls
- XtraReports: Display-oriented controls
- Data Processing ?️
- Windows Forms: Real-time data interaction
- XtraReports: Batch data processing
Some Advices ?
- Design Philosophy
// Think in terms of paper output
public class InvoiceReport : XtraReport
{
    protected override void OnBeforePrint(PrintEventArgs e)
    {
        // Calculate page breaks
        // Optimize for printing
    }
}
- Layout Strategy
- Use bands for logical grouping
- Consider paper size constraints
- Plan for different export formats
- Data Handling
- Pre-process data when possible
- Use calculated fields for complex logic
- Consider subreports for complex layouts

by Joche Ojeda | Jun 3, 2024 | C#, Data Synchronization
Writing Reusable Tests for SyncFramework Interfaces in C#
When creating a robust database synchronization framework like SyncFramework, ensuring that each component adheres to its defined interface is crucial. Reusable tests for interfaces are an essential aspect of this verification process. Here’s how you can approach writing reusable tests for your interfaces in C#:
1. Understand the Importance of Interface Testing
Interfaces define contracts that all implementing classes must follow. By testing these interfaces, you ensure that every implementation behaves as expected. This is especially important in frameworks like SyncFramework, where different components (e.g., IDeltaStore) need to be interchangeable.
2. Create Base Test Classes
Create abstract test classes for each interface. These test classes should contain all the tests that verify the behavior defined by the interface.
using Microsoft.VisualStudio.TestTools.UnitTesting;

public abstract class BaseDeltaStoreTest
{
    protected abstract IDeltaStore GetDeltaStore();

    [TestMethod]
    public void TestAddDelta()
    {
        var deltaStore = GetDeltaStore();
        deltaStore.AddDelta("delta1");
        Assert.IsTrue(deltaStore.ContainsDelta("delta1"));
    }

    [TestMethod]
    public void TestRemoveDelta()
    {
        var deltaStore = GetDeltaStore();
        deltaStore.AddDelta("delta2");
        deltaStore.RemoveDelta("delta2");
        Assert.IsFalse(deltaStore.ContainsDelta("delta2"));
    }

    // Add more tests to cover all methods in IDeltaStore
}
3. Implement Concrete Test Classes
For each implementation of the interface, create a concrete test class that inherits from the base test class and provides an implementation for the abstract method to instantiate the concrete class.
using Microsoft.VisualStudio.TestTools.UnitTesting;

[TestClass]
public class ConcreteDeltaStoreTest : BaseDeltaStoreTest
{
    protected override IDeltaStore GetDeltaStore()
    {
        return new ConcreteDeltaStore();
    }
}
4. Use a Testing Framework
Utilize a robust testing framework such as MSTest, NUnit, or xUnit to ensure all tests are run across all implementations.
5. Automate Testing
Integrate your tests into your CI/CD pipeline to ensure that every change is automatically tested across all implementations. This ensures that any new implementation or modification adheres to the interface contracts.
6. Document Your Tests
Clearly document your tests and the rationale behind reusable tests for interfaces. This will help other developers understand the importance of these tests and encourage them to add tests for new implementations.
Example of Full Implementation
// IDeltaStore Interface
public interface IDeltaStore
{
    void AddDelta(string delta);
    void RemoveDelta(string delta);
    bool ContainsDelta(string delta);
}

// Base Test Class
using Microsoft.VisualStudio.TestTools.UnitTesting;

public abstract class BaseDeltaStoreTest
{
    protected abstract IDeltaStore GetDeltaStore();

    [TestMethod]
    public void TestAddDelta()
    {
        var deltaStore = GetDeltaStore();
        deltaStore.AddDelta("delta1");
        Assert.IsTrue(deltaStore.ContainsDelta("delta1"));
    }

    [TestMethod]
    public void TestRemoveDelta()
    {
        var deltaStore = GetDeltaStore();
        deltaStore.AddDelta("delta2");
        deltaStore.RemoveDelta("delta2");
        Assert.IsFalse(deltaStore.ContainsDelta("delta2"));
    }

    // Add more tests to cover all methods in IDeltaStore
}

// Concrete Implementation
public class ConcreteDeltaStore : IDeltaStore
{
    private readonly HashSet _deltas = new HashSet();

    public void AddDelta(string delta)
    {
        _deltas.Add(delta);
    }

    public void RemoveDelta(string delta)
    {
        _deltas.Remove(delta);
    }

    public bool ContainsDelta(string delta)
    {
        return _deltas.Contains(delta);
    }
}

// Concrete Implementation Test Class
using Microsoft.VisualStudio.TestTools.UnitTesting;

[TestClass]
public class ConcreteDeltaStoreTest : BaseDeltaStoreTest
{
    protected override IDeltaStore GetDeltaStore()
    {
        return new ConcreteDeltaStore();
    }
}

// Running the tests
// Ensure to use a test runner compatible with MSTest to execute the tests