
by Joche Ojeda | Apr 20, 2025 | WSL
My Docker Adventure in Athens
Hello fellow tech enthusiasts!
I’m currently in Athens, Greece, enjoying a lovely Easter Sunday, when I decided to tackle a little tech project – getting Docker running on my Microsoft Surface with an ARM64 CPU. If you’ve ever tried to do this, you might know it’s not as straightforward as it sounds!
After some research, I discovered something important: there’s a difference between Docker Enterprise and Docker Community Edition (CE). While the enterprise version doesn’t support ARM64 yet, Docker CE does have versions for both ARM64 and x64 architectures. Perfect!
The WSL2 Solution
I initially tried to install Docker directly on Windows, but quickly ran into roadblocks. That’s when I decided to try the Windows Subsystem for Linux (WSL2) route instead. Spoiler alert: it worked like a charm!
While you won’t get the nice Docker Desktop UI that Windows users might be accustomed to, the command line interface through WSL2 works perfectly fine. After all, Docker was born on Linux, so running it in a Linux environment makes sense!
Step-by-Step Guide to Installing Docker CE on WSL2
Here’s how I got Docker CE up and running on my Surface using WSL2:
Step 1: Update Your Packages
First, make sure your WSL2 system is up to date:
sudo apt update && sudo apt upgrade -y
Step 2: Install Required Packages
Install the necessary packages to use HTTPS repositories:
sudo apt install -y apt-transport-https ca-certificates curl software-properties-common gnupg lsb-release
Step 3: Add Docker’s Official GPG Key
curl -fsSL https://download.docker.com/linux/ubuntu/gpg | sudo gpg --dearmor -o /usr/share/keyrings/docker-archive-keyring.gpg
Step 4: Set Up the Stable Docker Repository
echo "deb [arch=$(dpkg --print-architecture) signed-by=/usr/share/keyrings/docker-archive-keyring.gpg] https://download.docker.com/linux/ubuntu $(lsb_release -cs) stable" | sudo tee /etc/apt/sources.list.d/docker.list > /dev/null
Step 5: Update APT with the New Repository
sudo apt update
Step 6: Install Docker CE
sudo apt install -y docker-ce docker-ce-cli containerd.io
Step 7: Start the Docker Service
sudo service docker start
Step 8: Add Your User to the Docker Group
This allows you to run Docker without sudo:
sudo usermod -aG docker $USER
Step 9: Apply the Group Changes
Either log out and back in, or run:
newgrp docker
Step 10: Verify Your Installation
docker --version
docker run hello-world
Pro Tip!
If you want Docker to start automatically when you launch WSL2, add the service start command to your .bashrc or .zshrc file:
echo "sudo service docker start" >> ~/.bashrc
Final Thoughts
What started as a potentially frustrating experience turned into a surprisingly smooth process. WSL2 continues to impress me with how well it bridges the Windows and Linux worlds. If you have a Surface or any other ARM64-based Windows device and need to run Docker, I highly recommend the WSL2 approach.
Have you tried running Docker on an ARM device? What was your experience like? Let me know in the comments below!
Happy containerizing! 🐳

by Joche Ojeda | May 24, 2024 | CPU
As technology continues to evolve, the need for seamless interoperability between different hardware architectures becomes increasingly crucial. One significant aspect of this interoperability is the ability to run software compiled for one CPU architecture on another. This blog post explores how CPU translation layers enable the execution of ARM-compiled applications on x86/x64 platforms across Windows, macOS, and Linux.
Windows OS: Bridging ARM and x86/x64
Microsoft’s approach to running ARM applications on x86/x64 hardware is embodied in Windows 10 on ARM. This system allows ARM-based devices to run Windows efficiently, incorporating several key technologies:
- WOW (Windows on Windows): This subsystem provides compatibility for 32-bit x86 applications on ARM devices through a mix of emulation and native execution.
- x86/x64 Emulation: Windows 10 and 11 on ARM can emulate both x86 and x64 applications. The emulation layer dynamically translates x86/x64 instructions to ARM instructions at runtime, using Just-In-Time (JIT) compilation techniques to convert code as it is needed.
- Native ARM64 Support: To avoid the performance overhead associated with emulation, Microsoft encourages developers to compile their applications directly for ARM64.
macOS: The Power of Rosetta 2
Apple’s transition from Intel (x86/x64) to Apple Silicon (ARM) has been facilitated by Rosetta 2, a sophisticated translation layer designed to make this process as smooth as possible:
- Dynamic Binary Translation: Rosetta 2 converts x86_64 instructions to ARM instructions on-the-fly, enabling users to run x86_64 applications transparently on ARM-based Macs.
- Ahead-of-Time (AOT) Compilation: For some applications, Rosetta 2 can pre-translate x86_64 binaries to ARM before execution, boosting performance.
- Universal Binaries: Apple encourages developers to use Universal Binaries, which include both x86_64 and ARM64 executables, allowing the operating system to select the appropriate version based on the hardware.
Linux: Flexibility with QEMU
Linux’s open-source nature provides a versatile approach to CPU translation through QEMU, a widely-used emulator that supports various architectures, including ARM to x86/x64:
- User-mode Emulation: QEMU can run individual Linux executables compiled for ARM on an x86/x64 host by translating system calls and CPU instructions.
- Full-system Emulation: It can also emulate a complete ARM system, enabling an x86/x64 machine to run an ARM operating system and its applications.
- Performance Enhancements: QEMU’s performance can be significantly improved with KVM (Kernel-based Virtual Machine), which allows near-native execution speed for guest instructions.
How Translation Layers Work
The translation process involves several steps to ensure smooth execution of applications across different architectures:
- Instruction Fetch: The emulator fetches instructions from the source (ARM) binary.
- Instruction Decode: The fetched instructions are decoded into a format understandable by the translation layer.
- Instruction Translation:
- JIT Compilation: Converts source instructions into target (x86/x64) instructions in real-time.
- Caching: Frequently used translations are cached to avoid repeated translation.
- Execution: The translated instructions are executed on the target CPU.
- System Calls and Libraries:
- System Call Translation: System calls from the source architecture are translated to their equivalents on the host architecture.
- Library Mapping: Shared libraries from the source architecture are mapped to their counterparts on the host system.
Performance Considerations
- Overhead: Emulation introduces overhead, which can impact performance, particularly for compute-intensive applications.
- Optimization Strategies: Techniques like ahead-of-time compilation, caching, and promoting native support help mitigate performance penalties.
- Hardware Support: Some ARM processors include hardware extensions to accelerate binary translation.
Developer Considerations
For developers, ensuring compatibility and performance across different architectures involves several best practices:
- Cross-Compilation: Developers should compile their applications for multiple architectures to provide native performance on each platform.
- Extensive Testing: Applications must be tested thoroughly in both native and emulated environments to ensure compatibility and performance.
Conclusion
CPU translation layers are pivotal for maintaining software compatibility across different hardware architectures. By leveraging sophisticated techniques such as dynamic binary translation, JIT compilation, and system call translation, these layers bridge the gap between ARM and x86/x64 architectures on Windows, macOS, and Linux. As technology continues to advance, these translation layers will play an increasingly important role in enabling seamless interoperability across diverse computing environments.

by Joche Ojeda | May 15, 2024 | C#, dotnet, Linux, Ubuntu, WSL
Hello, dear readers! Today, we’re going to talk about something called the Windows Subsystem for Linux, or WSL for short. Now, don’t worry if you’re not a tech wizard – this guide is meant to be approachable for everyone!
What is WSL?
In simple terms, WSL is a feature in Windows that allows you to use Linux right within your Windows system. Think of it as having a little bit of Linux magic right in your Windows computer!
Why Should I Care?
Well, WSL is like having a Swiss Army knife on your computer. It can make certain tasks easier and faster, and it can even let you use tools that were previously only available on Linux.
Is It Hard to Use?
Not at all! If you’ve ever used the Command Prompt on your Windows computer, then you’re already halfway there. And even if you haven’t, there are plenty of easy-to-follow guides out there to help you get started.
Do I Need to Be a Computer Expert to Use It?
Absolutely not! While WSL is a powerful tool that many developers love to use, it’s also quite user-friendly. With a bit of curiosity and a dash of patience, anyone can start exploring the world of WSL.
As a DotNet developer, you might be wondering why there’s so much buzz around the Windows Subsystem for Linux (WSL). Let’s dive into the reasons why WSL could be a game-changer for you.
- Seamless Integration: WSL provides a full-fledged Linux environment right within your Windows system. This means you can run Linux commands and applications without needing a separate machine or dual-boot setup.
- Development Environment Consistency: With WSL, you can maintain consistency between your development and production environments, especially if your applications are deployed on Linux servers. This can significantly reduce the “it works on my machine” syndrome.
- Access to Linux-Only Tools: Some tools and utilities are only available or work better on Linux. WSL brings these tools to your Windows desktop, expanding your toolkit without additional overhead.
- Improved Performance: WSL 2, the latest version, runs a real Linux kernel inside a lightweight virtual machine (VM), which leads to faster file system performance and complete system call compatibility.
- Docker Support: WSL 2 provides full Docker support without requiring additional layers for translation between Windows and Linux, resulting in a more efficient and seamless Docker experience.
In conclusion, WSL is not just a fancy tool; it’s a powerful ally that can enhance your productivity and capabilities as a DotNet developer.
by Joche Ojeda | Oct 29, 2020 | Linux, netcore, Ubuntu, XAF
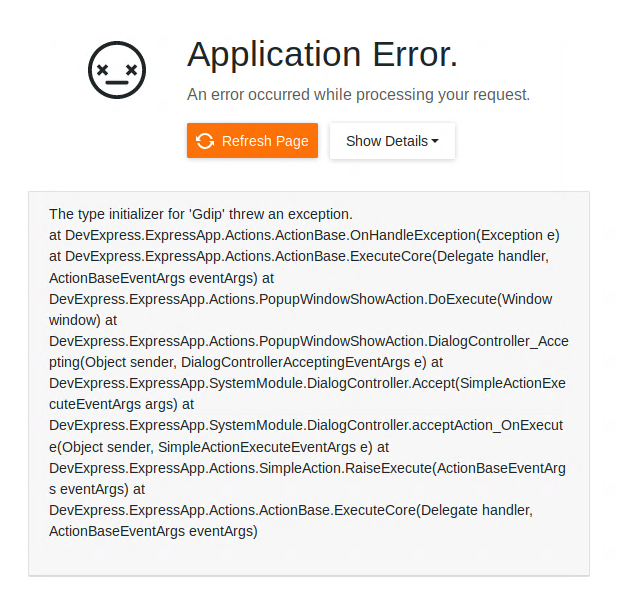
If you are running Xaf Blazor in ubuntu 18.04 you might have seen the following exception
The type initializer for ‘Gdip’ threw an exception.
at DevExpress.ExpressApp.Actions.ActionBase.OnHandleException(Exception e) at DevExpress.ExpressApp.Actions.ActionBase.ExecuteCore(Delegate handler, ActionBaseEventArgs eventArgs) at DevExpress.ExpressApp.Actions.PopupWindowShowAction.DoExecute(Window window) at DevExpress.ExpressApp.Actions.PopupWindowShowAction.DialogController_Accepting(Object sender, DialogControllerAcceptingEventArgs e) at DevExpress.ExpressApp.SystemModule.DialogController.Accept(SimpleActionExecuteEventArgs args) at DevExpress.ExpressApp.SystemModule.DialogController.acceptAction_OnExecute(Object sender, SimpleActionExecuteEventArgs e) at DevExpress.ExpressApp.Actions.SimpleAction.RaiseExecute(ActionBaseEventArgs eventArgs) at DevExpress.ExpressApp.Actions.ActionBase.ExecuteCore(Delegate handler, ActionBaseEventArgs eventArgs)
The error is caused by missing dependency, so the DotNet runtime itself will throw that exception. Also, I want to highlight that the exception is not related to XAF, you can read more about this problem here https://github.com/dotnet/runtime/issues/27200
To get the missing dependency just open a console and run the following commands
sudo apt-get update -y

sudo apt-get install -y libgdiplus

by Joche Ojeda | Sep 14, 2020 | Linux, netcore, Ubuntu
Here are some recommendations to host your new shiny aspnet core app on Linux in this case in Ubuntu 18.04
First, create a user with the name aspnetapp
sudo adduser myaspnetapp
after executing the command, you will have a new folder in your home directory the folder will have the same name as your username so in this case “myaspnetapp”
now let’s SSH to with the new user you just created you can do that using your favorite SSH client, for example, if you are using windows you can use putty
when you log in with the new user you will be in its home folder, now we can create a folder called app with the following command
mkdir app
your folder structure should look like this now
/home/myaspnetapp/app
Now we are ready to upload the files. By now should have already compiled and publish your application to run in Linux, if you have not done that yet then you should take a look to this article https://www.jocheojeda.com/2019/06/10/how-to-create-a-self-contained-netcore-3-console-application/
There are many options to upload a zip file but I think is the best way is to use the secure copy command from linux “scp”, I won’t explain how you should call the scp command but if you are using windows you can run that command from the WSL console and if you are using Linux the command is already built-in, anyway here is an article about it https://linuxize.com/post/how-to-use-scp-command-to-securely-transfer-files/
Here I will write an example of how the scp command should look like and you adjust it to your needs
scp publish.zip myaspnetapp@200.35.15.25:/home/myaspnetapp/app
so that command above will do the following, it will copy the file publish.zip from the local folder to a server running on the following the IP 200.35.15.25 and the folder “/home/myaspnetapp/app”
now let’s unzip the content of the folder zip with the following command
unzip publish.zip
What we have done so far:
- We have created a user in the OS
- We have created a folder to host our application within the user home folder
- We have uploaded a zip file containing our application the folder “/home/myaspnetapp/app”
Now that the app is already in the server we need to change the permission of the folder where the app lives to 0777, you can learn more about Linux file system permissions here https://www.guru99.com/file-permissions.html
Creating a service to monitor the app
The next step to monitor our app is to use systemd is an init system that provides many powerful features for starting, stopping, and managing processes.
Let’s start by creating a service file in the following path “/etc/systemd/system/”
You can do that with the following command:
sudo nano /etc/systemd/system/MyExecutableFile.service
here is how the content of the file should look like
[Unit]

Description=A description of your app


[Service]

WorkingDirectory=/home/myaspnetapp /app

ExecStart= /home/ myaspnetapp /app/MyExecutableFile

Restart=always

# Restart service after 10 seconds if the dotnet service crashes:

RestartSec=10

KillSignal=SIGINT

SyslogIdentifier= MyExecutableFile

User=apache

Environment=ASPNETCORE_ENVIRONMENT=Production


[Install]

WantedBy=multi-user.target
Here is a little explanation of what you might need to change if the file above
WorkingDirectory: this is the working directory, usually is the same where the app lives
ExecStart: This is the executable file how what will you write here will depend on your application if its self-contained you just need to write the name the full path of the executable file otherwise you need to write the path to the dotnet runtime and then the path to your dll as show below:
/usr/local/bin/dotnet /var/www/helloapp/helloapp.dll
RestartSec: this is the time to wait before trying to restart the app after if the process crashes
SyslogIdentifier: the app identifier for sys logs
User: this is really important since the app will run under this user privileges, so you need to make sure that the user exists and that is able to access the files needed to start the app
That is all that we need for the service file now we need to go back to the console and enable our new service, you can do that with the following command
sudo systemctl enable MyExecutableFile.service
To start and stop the service you can use the following commands
//To Start
sudo systemctl start MyExecutableFile.service

//To Stop
sudo systemctl status MyExecutableFile.service