
by Joche Ojeda | Jan 21, 2025 | Uncategorized
During my recent AI research break, I found myself taking a walk down memory lane, reflecting on my early career in data analysis and ETL operations. This journey brought me back to an interesting aspect of software development that has evolved significantly over the years: the management of shared libraries.
The VB6 Era: COM Components and DLL Hell
My journey began with Visual Basic 6, where shared libraries were managed through COM components. The concept seemed straightforward: store shared DLLs in the Windows System directory (typically C:\Windows\System32) and register them using regsvr32.exe. The Windows Registry kept track of these components under HKEY_CLASSES_ROOT.
However, this system had a significant flaw that we now famously know as “DLL Hell.” Let me share a practical example: Imagine you have two systems, A and B, both using Crystal Reports 7. If you uninstall either system, the other would break because the shared DLL would be removed. Version control was primarily managed by location, making it a precarious system at best.
Enter .NET Framework: The GAC Revolution
When Microsoft introduced the .NET Framework, it brought a sophisticated solution to these problems: the Global Assembly Cache (GAC). Located at C:\Windows\Microsoft.NET\assembly\ (for .NET 4.0 and later), the GAC represented a significant improvement in shared library management.
The most revolutionary aspect was the introduction of assembly identity. Instead of relying solely on filenames and locations, each assembly now had a unique identity consisting of:
- Simple name (e.g., “MyCompany.MyLibrary”)
- Version number (e.g., “1.0.0.0”)
- Culture information
- Public key token
A typical assembly full name would look like this:
MyCompany.MyLibrary, Version=1.0.0.0, Culture=neutral, PublicKeyToken=b77a5c561934e089
This robust identification system meant that multiple versions of the same assembly could coexist peacefully, solving many of the versioning nightmares that plagued the VB6 era.
The Modern Approach: Private Dependencies
Fast forward to 2025, and we’re living in what I call the “brave new world” of .NET for multi-operative systems. The landscape has changed dramatically. Storage is no longer the premium resource it once was, and the trend has shifted away from shared libraries toward application-local deployment.
Modern applications often ship with their own private version of the .NET runtime and dependencies. This approach eliminates the risks associated with shared components and gives applications complete control over their runtime environment.
Reflection on Technology Evolution
While researching Blazor’s future and seeing discussions about Microsoft’s technology choices, I’m reminded that technology evolution is a constant journey. Organizations move slowly in production environments, and that’s often for good reason. The shift from COM components to GAC to private dependencies wasn’t just a technical evolution – it was a response to real-world problems and changing resources.
This journey from VB6 to modern .NET reveals an interesting pattern: sometimes the best solution isn’t sharing resources but giving each application its own isolated environment. It’s fascinating how the decreasing cost of storage and increasing need for reliability has transformed our approach to dependency management.
As I return to my AI research, this trip down memory lane serves as a reminder that while technology constantly evolves, understanding its history helps us appreciate the solutions we have today and better prepare for the challenges of tomorrow.

by Joche Ojeda | Jan 20, 2025 | ADO, ADO.NET, Database, dotnet
When I first encountered the challenge of migrating hundreds of Visual Basic 6 reports to .NET, I never imagined it would lead me down a path of discovering specialized data analytics tools. Today, I want to share my experience with ADOMD.NET and how it could have transformed our reporting challenges, even though we couldn’t implement it due to our database constraints.
The Challenge: The Sales Gap Report
The story begins with a seemingly simple report called “Sales Gap.” Its purpose was critical: identify periods when regular customers stopped purchasing specific items. For instance, if a customer typically bought 10 units monthly from January to May, then suddenly stopped in June and July, sales representatives needed to understand why.
This report required complex queries across multiple transactional tables:
- Invoicing
- Sales
- Returns
- Debits
- Credits
Initially, the report took about a minute to run. As our data grew, so did the execution time—eventually reaching an unbearable 15 minutes. We were stuck with a requirement to use real-time transactional data, making traditional optimization techniques like data warehousing off-limits.
Enter ADOMD.NET: A Specialized Solution
ADOMD.NET (ActiveX Data Objects Multidimensional .NET) emerged as a potential solution. Here’s why it caught my attention:
Key Features:
-
Multidimensional Analysis
Unlike traditional SQL queries, ADOMD.NET uses MDX (Multidimensional Expressions), specifically designed for analytical queries. Here’s a basic example:
string mdxQuery = @"
    SELECT
        {[Measures].[Sales Amount]} ON COLUMNS,
        {[Date].[Calendar Year].MEMBERS} ON ROWS
    FROM [Sales Cube]
    WHERE [Product].[Category].[Electronics]";
-
Performance Optimization
ADOMD.NET is built for analytical workloads, offering better performance for complex calculations and aggregations. It achieves this through:
- Specialized data structures for multidimensional analysis
- Efficient handling of hierarchical data
- Built-in support for complex calculations
-
Advanced Analytics Capabilities
The tool supports sophisticated analysis patterns like:
string mdxQuery = @"
    WITH MEMBER [Measures].[GrowthVsPreviousYear] AS
        ([Measures].[Sales Amount] -
        ([Measures].[Sales Amount], [Date].[Calendar Year].PREVMEMBER)
        )/([Measures].[Sales Amount], [Date].[Calendar Year].PREVMEMBER)
    SELECT
        {[Measures].[Sales Amount], [Measures].[GrowthVsPreviousYear]}
    ON COLUMNS...";
Lessons Learned
While we couldn’t implement ADOMD.NET due to our use of Pervasive Database instead of SQL Server, the investigation taught me valuable lessons about report optimization:
- The importance of choosing the right tools for analytical workloads
- The limitations of running complex analytics on transactional databases
- The value of specialized query languages for different types of data analysis
Modern Applications
Today, ADOMD.NET continues to be relevant for organizations using:
- SQL Server Analysis Services (SSAS)
- Azure Analysis Services
- Power BI Premium datasets
If I were facing the same challenge today with SQL Server, ADOMD.NET would be my go-to solution for:
- Complex sales analysis
- Customer behavior tracking
- Performance-intensive analytical reports
Conclusion
While our specific situation with Pervasive Database prevented us from using ADOMD.NET, it remains a powerful tool for organizations using Microsoft’s analytics stack. The experience taught me that sometimes the solution isn’t about optimizing existing queries, but about choosing the right specialized tools for analytical workloads.
Remember: Just because you can run analytics on your transactional database doesn’t mean you should. Tools like ADOMD.NET exist for a reason, and understanding when to use them can save countless hours of optimization work and provide better results for your users.

by Joche Ojeda | Jan 15, 2025 | C#, dotnet, Emit, MetaProgramming, Reflection
Every programmer encounters that one technology that draws them into the darker arts of software development. For some, it’s metaprogramming; for others, it’s assembly hacking. For me, it was the mysterious world of runtime code generation through Emit in the early 2000s, during my adventures with XPO and the enigmatic Sage Accpac ERP.
The Quest Begins: A Tale of Documentation and Dark Arts
Back in the early 2000s, when the first version of XPO was released, I found myself working alongside my cousin Carlitos in our startup. Fresh from his stint as an ERP consultant in the United States, Carlitos brought with him deep knowledge of Sage Accpac, setting us on a path to provide integration services for this complex system.
Our daily bread and butter were custom reports – starting with Crystal Reports before graduating to DevExpress’s XtraReports and XtraPivotGrid. But we faced an interesting challenge: Accpac’s database was intentionally designed to resist reverse engineering, with flat tables devoid of constraints or relationships. All we had was their HTML documentation, a labyrinth of interconnected pages holding the secrets of their entity relationships.
Genesis: When Documentation Meets Dark Magic
This challenge birthed Project Genesis, my ambitious attempt to create an XPO class generator that could parse Accpac’s documentation. The first hurdle was parsing HTML – a quest that led me to CodePlex (yes, I’m dating myself here) and the discovery of HTMLAgilityPack, a remarkable tool that still serves developers today.
But the real dark magic emerged when I faced the challenge of generating classes dynamically. Buried in our library’s .NET books, I discovered the arcane art of Emit – a powerful technique for runtime assembly and class generation that would forever change my perspective on what’s possible in .NET.
Diving into the Abyss: Understanding Emit
At its core, Emit is like having a magical forge where you can craft code at runtime. Imagine being able to write code that writes more code – not just as text to be compiled later, but as actual, executable IL instructions that the CLR can run immediately.
AssemblyName assemblyName = new AssemblyName("DynamicAssembly");
AssemblyBuilder assemblyBuilder = AssemblyBuilder.DefineDynamicAssembly(
    assemblyName,
    AssemblyBuilderAccess.Run
);
This seemingly simple code opens a portal to one of .NET’s most powerful capabilities: dynamic assembly generation. It’s the beginning of a spell that allows you to craft types and methods from pure thought (and some carefully crafted IL instructions).
The Power and the Peril
Like all dark magic, Emit comes with its own dangers and responsibilities. When you’re generating IL directly, you’re dancing with the very fabric of .NET execution. One wrong move – one misplaced instruction – and your carefully crafted spell can backfire spectacularly.
The first rule of Emit Club is: don’t use Emit unless you absolutely have to. The second rule is: if you do use it, document everything meticulously. Your future self (and your team) will thank you.
Modern Alternatives and Evolution
Today, the .NET ecosystem offers alternatives like Source Generators that provide similar power with less risk. But understanding Emit remains valuable – it’s like knowing the fundamental laws of magic while using higher-level spells for daily work.
In my case, Project Genesis evolved beyond its original scope, teaching me crucial lessons about runtime code generation, performance optimization, and the delicate balance between power and maintainability.
Conclusion: The Magic Lives On
Twenty years later, Emit remains one of .NET’s most powerful and mysterious features. While modern development practices might steer us toward safer alternatives, understanding these fundamental building blocks of runtime code generation gives us deeper insight into the framework’s capabilities.
For those brave enough to venture into this realm, remember: with great power comes great responsibility – and the need for comprehensive unit tests. The dark magic of Emit might be seductive, but like all powerful tools, it demands respect and careful handling.
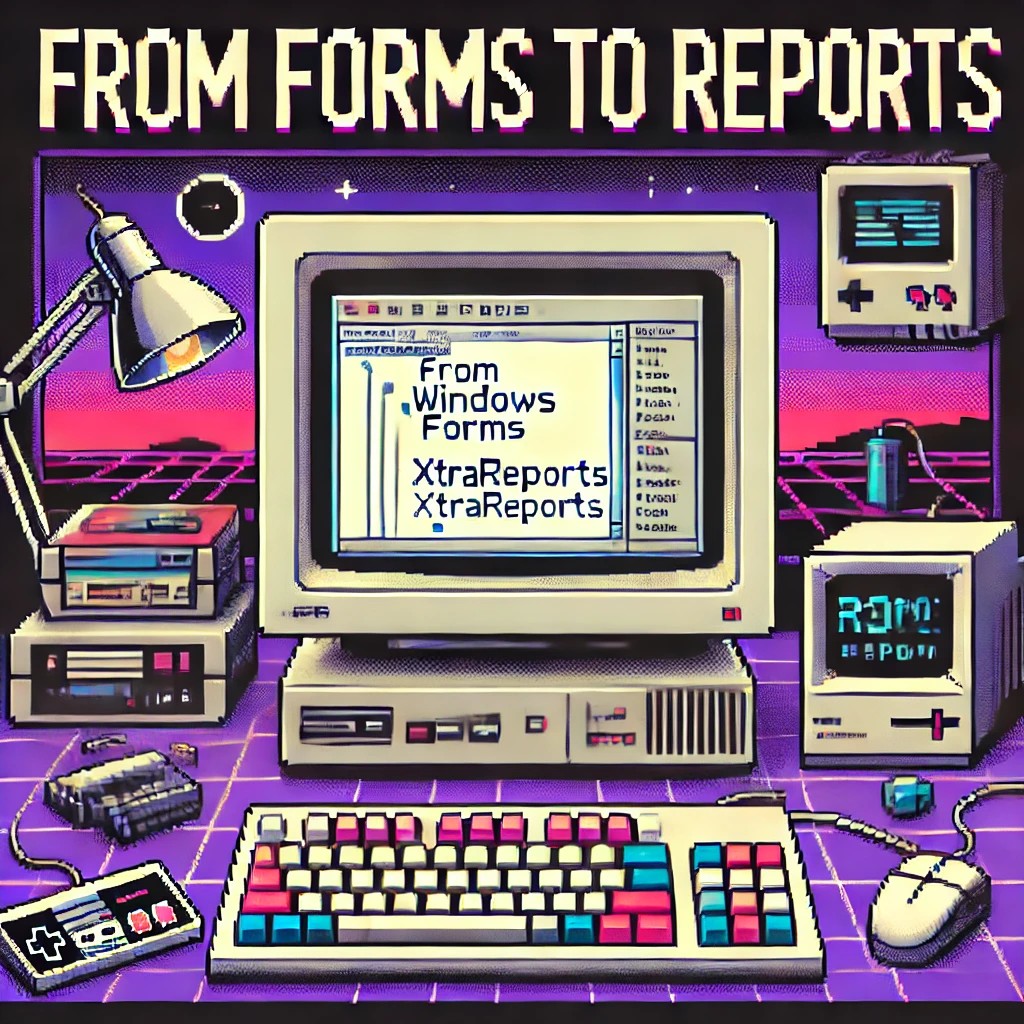
by Joche Ojeda | Jan 2, 2025 | XtraReports
Introduction ?
If you’re familiar with Windows Forms development, transitioning to XtraReports will feel remarkably natural. This guide explores how XtraReports leverages familiar Windows Forms concepts while extending them for robust reporting capabilities.
? Quick Tip: Think of XtraReports as Windows Forms optimized for paper output instead of screen output!
A Personal Journey ✨
Microsoft released .NET Framework in late 2002. At the time, I was a VB6 developer, relying on Crystal Reports 7 for reporting. By 2003, my team was debating whether to transition to this new thing called .NET. We were concerned about VB6’s longevity—thinking it had just a couple more years left. How wrong we were! Even today, VB6 applications are still running in some places (it’s January 2, 2025, as I write this).
Back in the VB6 era, we used the Crystal Reports COM object to integrate reports. When we finally moved to .NET Framework, we performed some “black magic” to continue using our existing 700 reports across nine countries. The decision to fully embrace .NET was repeatedly delayed due to the sheer volume of reports we had to manage. Our ultimate goal was to unify our reporting and parameter forms within a single development environment.
This led us to explore other technologies. While considering Delphi, we discovered DevExpress. My boss procured our first DevExpress .NET license for Windows Forms, marking the start of my adventure with DevExpress and XtraReports. Initially, transitioning from the standalone Crystal Report Designer to the IDE-based XtraReports Designer was challenging. To better understand how XtraReports worked, I decided to write reports programmatically instead of using the visual designer.
Architectural Similarities ?️
XtraReports mirrors many fundamental Windows Forms concepts:
| Source |
Destination |
| XtraReport Class |
Report Designer Surface |
| XtraReport Class |
Control Container |
| XtraReport Class |
Event System |
| XtraReport Class |
Properties Window |
| Control Container |
Labels & Text |
| Control Container |
Tables & Grids |
| Control Container |
Images & Charts |
| Report Designer Surface |
Control Toolbox |
| Report Designer Surface |
Design Surface |
| Report Designer Surface |
Preview Window |
Like how Windows Forms applications start with a Form class, XtraReports begin with an XtraReport base class. Both serve as containers that can:
- Host other controls
- Manage layout
- Handle events
- Support data binding
Visual Designer Experience ?
The design experience remains consistent with Windows Forms:
| Windows Forms |
XtraReports |
| Form Designer |
Report Designer |
| Toolbox |
Report Controls |
| Properties Window |
Properties Grid |
| Component Tray |
Component Tool |
Control Ecosystem ?
XtraReports provides analogous controls to Windows Forms:
// Windows Forms
public partial class CustomerForm : Form
{
    private Label customerNameLabel;
    private DataGridView orderDetailsGrid;
}

// XtraReports
public partial class CustomerReport : XtraReport
{
    private XRLabel customerNameLabel;
    private XRTable orderDetailsTable;
}
Common control mappings:
- Label ➡️ XRLabel
- Panel ➡️ XRPanel
- PictureBox ➡️ XRPictureBox
- DataGridView ➡️ XRTable
- GroupBox ➡️ Band
- UserControl ➡️ Subreport
Data Binding Patterns ?
The data binding syntax maintains familiarity:
// Windows Forms data binding
customerNameLabel.DataBindings.Add("Text", customerDataSet, "Customers.Name");

// XtraReports data binding
customerNameLabel.ExpressionBindings.Add(
    new ExpressionBinding("Text", "[Name]"));
Code Architecture ?️
The code-behind model remains consistent:
public partial class CustomerReport : DevExpress.XtraReports.UI.XtraReport
{
    public CustomerReport()
    {
        InitializeComponent(); // Familiar Windows Forms pattern
    }

    private void CustomerReport_BeforePrint(object sender, PrintEventArgs e)
    {
        // Event handling similar to Windows Forms
        // Instead of Form_Load, we have Report_BeforePrint
    }
}
Key Differences ⚡
While similarities abound, important differences exist:
- Output Focus ?️
- Windows Forms: Screen-based interaction
- XtraReports: Print/export optimization
- Layout Model ?
- Windows Forms: Flexible screen layouts
- XtraReports: Page-based layouts with bands
- Control Behavior ?
- Windows Forms: Interactive controls
- XtraReports: Display-oriented controls
- Data Processing ?️
- Windows Forms: Real-time data interaction
- XtraReports: Batch data processing
Some Advices ?
- Design Philosophy
// Think in terms of paper output
public class InvoiceReport : XtraReport
{
    protected override void OnBeforePrint(PrintEventArgs e)
    {
        // Calculate page breaks
        // Optimize for printing
    }
}
- Layout Strategy
- Use bands for logical grouping
- Consider paper size constraints
- Plan for different export formats
- Data Handling
- Pre-process data when possible
- Use calculated fields for complex logic
- Consider subreports for complex layouts

by Joche Ojeda | Dec 2, 2024 | Blazor
Over time, I transitioned to using the first versions of my beloved framework, XAF. As you might know, XAF generates a polished and functional UI out of the box. Using XAF made me more of a backend developer since most of the development work wasn’t visual—especially in the early versions, where the model designer was rudimentary (it’s much better now).
Eventually, I moved on to developing .NET libraries and NuGet packages, diving deep into SOLID design principles. Fun fact: I actually learned about SOLID from DevExpress TV. Yes, there was a time before YouTube when DevExpress posted videos on technical tasks!
Nowadays, I feel confident creating and publishing my own libraries as NuGet packages. However, my “old monster” was still lurking in the shadows: UI components. I finally decided it was time to conquer it, but first, I needed to choose a platform. Here were my options:
- Windows Forms: A robust and mature platform but limited to desktop applications.
- WPF: A great option with some excellent UI frameworks that I love, but it still feels a bit “Windows Forms-ish” to me.
- Xamarin/Maui: I’m a big fan of Xamarin Forms and Xamarin/Maui XAML, but they’re primarily focused on device-specific applications.
- Blazor: This was the clear winner because it allows me to create desktop applications using Electron, embed components into Windows Forms, or even integrate with MAUI.
Recently, I’ve been helping my brother with a project in Blazor. (He’s not a programmer, but I am.) This gave me an opportunity to experiment with design patterns to get the most out of my components, which started as plain HTML5 pages.
Without further ado, here are the key insights I’ve gained so far.
Building high-quality Blazor components requires attention to both the C# implementation and Razor markup patterns. This guide combines architectural best practices with practical implementation patterns to create robust, reusable components.
1. Component Architecture and Organization
Parameter Organization
Start by organizing parameters into logical groups for better maintainability:
public class CustomForm : ComponentBase
{
    // Layout Parameters
    [Parameter] public string Width { get; set; }
    [Parameter] public string Margin { get; set; }
    [Parameter] public string Padding { get; set; }

    // Validation Parameters
    [Parameter] public bool EnableValidation { get; set; }
    [Parameter] public string ValidationMessage { get; set; }

    // Event Callbacks
    [Parameter] public EventCallback<bool> OnValidationComplete { get; set; }
    [Parameter] public EventCallback<string> OnSubmit { get; set; }
}
Corresponding Razor Template
<div class="form-container" style="width: @Width; margin: @Margin; padding: @Padding">
    <form @onsubmit="HandleSubmit">
        @if (EnableValidation)
        {
            <div class="validation-message">
                @ValidationMessage
            </div>
        }
        @ChildContent
    </form>
</div>
2. Smart Default Values and Template Composition
Component Implementation
public class DataTable<T> : ComponentBase
{
    [Parameter] public int PageSize { get; set; } = 10;
    [Parameter] public bool ShowPagination { get; set; } = true;
    [Parameter] public string EmptyMessage { get; set; } = "No data available";
    [Parameter] public IEnumerable<T> Items { get; set; } = Array.Empty<T>();
    [Parameter] public RenderFragment HeaderTemplate { get; set; }
    [Parameter] public RenderFragment<T> RowTemplate { get; set; }
    [Parameter] public RenderFragment FooterTemplate { get; set; }
}
Razor Implementation
<div class="table-container">
    @if (HeaderTemplate != null)
    {
        <header class="table-header">
            @HeaderTemplate
        </header>
    }

    <div class="table-content">
        @if (!Items.Any())
        {
            <div class="empty-state">@EmptyMessage</div>
        }
        else
        {
            @foreach (var item in Items)
            {
                @RowTemplate(item)
            }
        }
    </div>

    @if (ShowPagination)
    {
        <div class="pagination">
            <!-- Pagination implementation -->
        </div>
    }
</div>
3. Accessibility and Unique IDs
Component Implementation
public class FormField : ComponentBase
{
    private string fieldId = $"field-{Guid.NewGuid():N}";
    private string labelId = $"label-{Guid.NewGuid():N}";
    private string errorId = $"error-{Guid.NewGuid():N}";

    [Parameter] public string Label { get; set; }
    [Parameter] public string Error { get; set; }
    [Parameter] public bool Required { get; set; }
}
Razor Implementation
<div class="form-field">
    <label id="@labelId" for="@fieldId">
        @Label
        @if (Required)
        {
            <span class="required" aria-label="required">*</span>
        }
    </label>

    <input id="@fieldId"
           aria-labelledby="@labelId"
           aria-describedby="@errorId"
           aria-required="@Required" />

    @if (!string.IsNullOrEmpty(Error))
    {
        <div id="@errorId" class="error-message" role="alert">
            @Error
        </div>
    }
</div>
4. Virtualization and Performance
Component Implementation
public class VirtualizedList<T> : ComponentBase
{
    [Parameter] public IEnumerable<T> Items { get; set; }
    [Parameter] public RenderFragment<T> ItemTemplate { get; set; }
    [Parameter] public int ItemHeight { get; set; } = 50;
    [Parameter] public Func<ItemsProviderRequest, ValueTask<ItemsProviderResult<T>>> ItemsProvider { get; set; }
}
Razor Implementation
<div class="virtualized-container" style="height: 500px; overflow-y: auto;">
    <Virtualize Items="@Items"
                ItemSize="@ItemHeight"
                ItemsProvider="@ItemsProvider"
                Context="item">
        <ItemContent>
            <div class="list-item" style="height: @(ItemHeight)px">
                @ItemTemplate(item)
            </div>
        </ItemContent>
        <Placeholder>
            <div class="loading-placeholder" style="height: @(ItemHeight)px">
                <div class="loading-animation"></div>
            </div>
        </Placeholder>
    </Virtualize>
</div>
Best Practices Summary
1. Parameter Organization
- Group related parameters with clear comments
- Provide meaningful default values
- Use parameter validation where appropriate
2. Template Composition
- Use RenderFragment for customizable sections
- Provide default templates when needed
- Enable granular control over component appearance
3. Accessibility
- Generate unique IDs for form elements
- Include proper ARIA attributes
- Support keyboard navigation
4. Performance
- Implement virtualization for large datasets
- Use loading states and placeholders
- Optimize rendering with appropriate conditions
Conclusion
Building effective Blazor components requires attention to both the C# implementation and Razor markup. By following these patterns and practices, you can create components that are:
- Highly reusable
- Performant
- Accessible
- Easy to maintain
- Flexible for different use cases
Remember to adapt these practices to your specific needs while maintaining clean component design principles.