
by Joche Ojeda | Jan 21, 2025 | Uncategorized
During my recent AI research break, I found myself taking a walk down memory lane, reflecting on my early career in data analysis and ETL operations. This journey brought me back to an interesting aspect of software development that has evolved significantly over the years: the management of shared libraries.
The VB6 Era: COM Components and DLL Hell
My journey began with Visual Basic 6, where shared libraries were managed through COM components. The concept seemed straightforward: store shared DLLs in the Windows System directory (typically C:\Windows\System32) and register them using regsvr32.exe. The Windows Registry kept track of these components under HKEY_CLASSES_ROOT.
However, this system had a significant flaw that we now famously know as “DLL Hell.” Let me share a practical example: Imagine you have two systems, A and B, both using Crystal Reports 7. If you uninstall either system, the other would break because the shared DLL would be removed. Version control was primarily managed by location, making it a precarious system at best.
Enter .NET Framework: The GAC Revolution
When Microsoft introduced the .NET Framework, it brought a sophisticated solution to these problems: the Global Assembly Cache (GAC). Located at C:\Windows\Microsoft.NET\assembly\ (for .NET 4.0 and later), the GAC represented a significant improvement in shared library management.
The most revolutionary aspect was the introduction of assembly identity. Instead of relying solely on filenames and locations, each assembly now had a unique identity consisting of:
- Simple name (e.g., “MyCompany.MyLibrary”)
- Version number (e.g., “1.0.0.0”)
- Culture information
- Public key token
A typical assembly full name would look like this:
MyCompany.MyLibrary, Version=1.0.0.0, Culture=neutral, PublicKeyToken=b77a5c561934e089
This robust identification system meant that multiple versions of the same assembly could coexist peacefully, solving many of the versioning nightmares that plagued the VB6 era.
The Modern Approach: Private Dependencies
Fast forward to 2025, and we’re living in what I call the “brave new world” of .NET for multi-operative systems. The landscape has changed dramatically. Storage is no longer the premium resource it once was, and the trend has shifted away from shared libraries toward application-local deployment.
Modern applications often ship with their own private version of the .NET runtime and dependencies. This approach eliminates the risks associated with shared components and gives applications complete control over their runtime environment.
Reflection on Technology Evolution
While researching Blazor’s future and seeing discussions about Microsoft’s technology choices, I’m reminded that technology evolution is a constant journey. Organizations move slowly in production environments, and that’s often for good reason. The shift from COM components to GAC to private dependencies wasn’t just a technical evolution – it was a response to real-world problems and changing resources.
This journey from VB6 to modern .NET reveals an interesting pattern: sometimes the best solution isn’t sharing resources but giving each application its own isolated environment. It’s fascinating how the decreasing cost of storage and increasing need for reliability has transformed our approach to dependency management.
As I return to my AI research, this trip down memory lane serves as a reminder that while technology constantly evolves, understanding its history helps us appreciate the solutions we have today and better prepare for the challenges of tomorrow.

by Joche Ojeda | Jun 5, 2024 | C#, Data Synchronization
Introduction
In modern API development, choosing the correct return type is crucial for performance, flexibility, and maintainability. In my SyncFramework server API, I opted to use strings as the return type. This decision stems from the need to serialize messages efficiently and flexibly, ensuring seamless communication between the server and client. This article explores the rationale behind this choice, specifically focusing on C# code with HttpClient and Web API on the server side.
The Problem
When building APIs, data serialization and deserialization are fundamental operations. Typically, APIs return objects that are automatically serialized into JSON or XML. While this approach is straightforward, it can introduce several challenges:
- Performance Overhead: Automatic serialization/deserialization can add unnecessary overhead, especially for large or complex data structures.
- Lack of Flexibility: Relying on default serialization mechanisms can limit control over the serialization process, making it difficult to customize data formats or handle specific serialization requirements.
- Interoperability Issues: Different clients may require different data formats. Sticking to a single format can lead to compatibility issues.
The Solution: Using Strings
To address these challenges, I decided to use strings as the return type for my API. Here’s why:
- Control Over Serialization: By returning a string, I can serialize the data myself, ensuring that the format meets specific requirements. This control is essential for optimizing the data format and ensuring compatibility with various clients.
- Performance Optimization: Custom serialization allows me to optimize the data structure, potentially reducing the size of the serialized data and improving transmission efficiency. For example, converting a complex object to a compressed byte array and then encoding it as a string can save bandwidth.
- Flexibility: Using strings enables me to easily switch between different serialization formats (e.g., JSON, XML, binary) based on the client’s needs without changing the API contract. This flexibility is crucial for maintaining backward compatibility and supporting multiple client types.
Implementation in C#
Here’s a practical example of how this approach is implemented using C#:
Server Side: Web API
using System;
using System.Text;
using System.Web.Http;

public class MyApiController : ApiController
{
    [HttpGet]
    [Route("api/getdata")]
    public IHttpActionResult GetData()
    {
        var data = new MyData
        {
            Id = 1,
            Name = "Sample Data"
        };

        // Custom serialization to JSON string
        var serializedData = SerializeData(data);

        return Ok(serializedData);
    }

    private string SerializeData(MyData data)
    {
        // Use custom serialization logic (e.g., JSON, XML, or binary)
        return Newtonsoft.Json.JsonConvert.SerializeObject(data);
    }
}

public class MyData
{
    public int Id { get; set; }
    public string Name { get; set; }
}
Client Side: HttpClient
using System;
using System.Net.Http;
using System.Threading.Tasks;

public class ApiClient
{
    private readonly HttpClient _httpClient;

    public ApiClient()
    {
        _httpClient = new HttpClient();
    }

    public async Task GetDataAsync()
    {
        var response = await _httpClient.GetStringAsync("http://localhost/api/getdata");

        // Custom deserialization from JSON string
        return DeserializeData(response);
    }

    private MyData DeserializeData(string serializedData)
    {
        // Use custom deserialization logic (e.g., JSON, XML, or binary)
        return Newtonsoft.Json.JsonConvert.DeserializeObject(serializedData);
    }
}

public class MyData
{
    public int Id { get; set; }
    public string Name { get; set; }
}
Benefits Realized
By using strings as the return type, the SynFramework server API achieves several benefits:
- Enhanced Performance: Custom serialization reduces the payload size and improves response times.
- Greater Flexibility: The ability to easily switch serialization formats ensures compatibility with various clients.
- Better Control: Custom serialization allows fine-tuning of the data format, improving both performance and interoperability.
Conclusion
Choosing strings as the return type for the SyncFramework server API offers significant advantages in terms of performance, flexibility, and control over the serialization process. This approach simplifies the management of data formats, ensures efficient data transmission, and enhances compatibility with diverse clients. For developers working with C# and Web API, this strategy provides a robust solution for handling API responses effectively.

by Joche Ojeda | Jun 1, 2024 | Data Synchronization, EfCore, SyncFrameworkV2
In modern software development, extending the functionality of a framework while maintaining its integrity and usability can be a complex task. One common scenario involves extending interfaces to add new events or methods. In this post, we’ll explore the impact of extending interfaces within the Sync Framework, specifically looking at IDeltaStore and IDeltaProcessor interfaces to include SavingDelta and SavedDelta events, as well as ProcessingDelta and ProcessedDelta events. We’ll discuss the options available—extending existing interfaces versus adding new interfaces—and examine the side effects of each approach.
Background
The Sync Framework is designed to synchronize data across different data stores, ensuring consistency and integrity. The IDeltaStore interface typically handles delta storage operations, while the IDeltaProcessor interface manages delta (change) processing. To enhance the functionality, you might want to add events such as SavingDelta, SavedDelta, ProcessingDelta, and ProcessedDelta to these interfaces.
Extending Existing Interfaces
Extending existing interfaces involves directly adding new events or methods to the current interface definitions. Here’s an example:
public interface IDeltaStore {
    void SaveData(Data data);
    // New events
    event EventHandler<DeltaEventArgs> SavingDelta;
    event EventHandler<DeltaEventArgs> SavedDelta;
}

public interface IDeltaProcessor {
    void ProcessDelta(Delta delta);
    // New events
    event EventHandler<DeltaEventArgs> ProcessingDelta;
    event EventHandler<DeltaEventArgs> ProcessedDelta;
}
Pros of Extending Existing Interfaces
- Simplicity: The existing implementations need to be updated to include the new functionality, making the overall design simpler.
- Direct Integration: The new events are directly available in the existing interface, making them easy to use and understand within the current framework.
Cons of Extending Existing Interfaces
- Breaks Existing Implementations: All existing classes implementing these interfaces must be updated to handle the new events. This can lead to significant refactoring, especially in large codebases.
- Violates SOLID Principles: Adding new responsibilities to existing interfaces can violate the Single Responsibility Principle (SRP) and Interface Segregation Principle (ISP), leading to bloated interfaces.
- Potential for Bugs: The necessity to modify all implementing classes increases the risk of introducing bugs and inconsistencies.
Adding New Interfaces
An alternative approach is to create new interfaces that extend the existing ones, encapsulating the new events. Here’s how you can do it:
public interface IDeltaStore {
    void SaveData(Data data);
}

public interface IDeltaStoreWithEvents : IDeltaStore {
    event EventHandler<DeltaEventArgs> SavingDelta;
    event EventHandler<DeltaEventArgs> SavedDelta;
}

public interface IDeltaProcessor {
    void ProcessDelta(Delta delta);
}

public interface IDeltaProcessorWithEvents : IDeltaProcessor {
    event EventHandler<DeltaEventArgs> ProcessingDelta;
    event EventHandler<DeltaEventArgs> ProcessedDelta;
}
Pros of Adding New Interfaces
- Adheres to SOLID Principles: This approach keeps the existing interfaces clean and focused, adhering to the SRP and ISP.
- Backward Compatibility: Existing implementations remain functional without modification, ensuring backward compatibility.
- Flexibility: New functionality can be selectively adopted by implementing the new interfaces where needed.
Cons of Adding New Interfaces
- Complexity: Introducing new interfaces can increase the complexity of the codebase, as developers need to understand and manage multiple interfaces.
- Redundancy: There can be redundancy in code, where some classes might need to implement both the original and new interfaces.
- Learning Curve: Developers need to be aware of and understand the new interfaces, which might require additional documentation and training.
Conclusion
Deciding between extending existing interfaces and adding new ones depends on your specific context and priorities. Extending interfaces can simplify the design but at the cost of violating SOLID principles and potentially breaking existing code. On the other hand, adding new interfaces preserves existing functionality and adheres to best practices but can introduce additional complexity.
In general, if maintaining backward compatibility and adhering to SOLID principles are high priorities, adding new interfaces is the preferred approach. However, if you are working within a controlled environment where updating existing implementations is manageable, extending the interfaces might be a viable option.
By carefully considering the trade-offs and understanding the implications of each approach, you can make an informed decision that best suits your project’s needs.
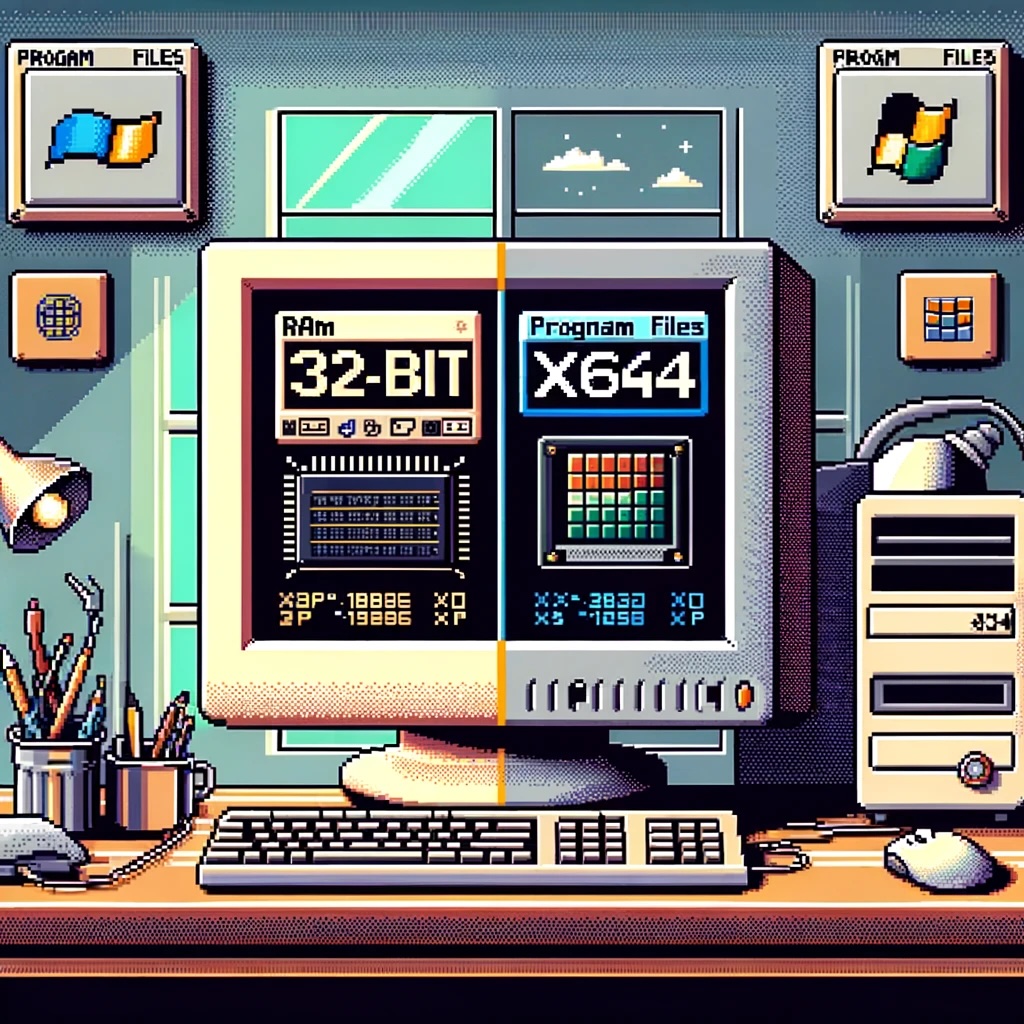
by Joche Ojeda | May 25, 2024 | CPU
A Brief Historical Context
x86 Architecture: The x86 architecture, referring to 32-bit processors, was originally developed by Intel. It was the foundation for early Windows operating systems and supported up to 4GB of RAM.
x64 Architecture: Also known as x86-64 or AMD64, the x64 architecture was introduced to overcome the limitations of x86. This 64-bit architecture supports significantly more RAM (up to 16 exabytes theoretically) and offers enhanced performance and security features.
The Transition Period
The shift from x86 to x64 began in the early 2000s:
- Windows XP Professional x64 Edition: Released in April 2005, this was one of the first major Windows versions to support 64-bit architecture.
- Windows Vista: Launched in 2007, it offered both 32-bit and 64-bit versions, encouraging a gradual migration to the 64-bit platform.
- Windows 7 and Beyond: By the release of Windows 7 in 2009, the push towards 64-bit systems became more pronounced, with most new PCs shipping with 64-bit Windows by default.
Impact on Program File Structure
To manage compatibility and distinguish between 32-bit and 64-bit applications, Windows implemented separate directories:
- 32-bit Applications: Installed in the
C:\Program Files (x86)\ directory.
- 64-bit Applications: Installed in the
C:\Program Files\ directory.
This separation ensures that the correct version of libraries and components is used by the respective applications.
Naming Convention for x64 and x86 Programs
x86 Programs: Often referred to simply as “32-bit” programs, they are installed in the Program Files (x86) directory.
x64 Programs: Referred to as “64-bit” programs, they are installed in the Program Files directory.
Why “Program Files (x86)” Instead of “Program Files (x64)”?
The decision to create Program Files (x86) instead of Program Files (x64) was driven by two main factors:
- Backward Compatibility: Many existing applications and scripts were hardcoded to use the
C:\Program Files\ path. Changing this path for 64-bit applications would have caused significant compatibility issues. By keeping 64-bit applications in Program Files and moving 32-bit applications to a new directory, Microsoft ensured that existing software would continue to function without modification.
- Clarity: Since 32-bit applications were the legacy standard, explicitly marking their directory with
(x86) indicated they were not the default or modern standard. Thus, Program Files without any suffix indicates the use of the newer, 64-bit standard.
Common Confusions
- Program Files Directories: Users often wonder why there are two “Program Files” directories and what the difference is. The presence of
Program Files and Program Files (x86) is to segregate 64-bit and 32-bit applications, respectively.
- Compatibility Issues: Running 32-bit applications on a 64-bit Windows system is generally smooth due to the Windows-on-Windows 64-bit (WoW64) subsystem, but there can be occasional compatibility issues with older software. Conversely, 64-bit applications cannot run on a 32-bit system.
- Driver Support: During the initial transition period, a common issue was the lack of 64-bit drivers for certain hardware, which caused compatibility problems and discouraged some users from migrating to 64-bit Windows.
- Performance Misconceptions: Some users believed that simply switching to a 64-bit operating system would automatically result in better performance. While 64-bit systems can handle more RAM and potentially run applications more efficiently, the actual performance gain depends on whether the applications themselves are optimized for 64-bit.
- Application Availability: Initially, not all software had 64-bit versions, leading to a mix of 32-bit and 64-bit applications on the same system. Over time, most major applications have transitioned to 64-bit.
Conclusion
The transition from x86 to x64 in Windows marked a significant evolution in computing capabilities, allowing for better performance, enhanced security, and the ability to utilize more memory. However, it also introduced some complexities, particularly in terms of program file structures and compatibility. Understanding the distinctions between 32-bit and 64-bit applications, and how Windows manages these, is crucial for troubleshooting and optimizing system performance.
By appreciating these nuances, users and developers alike can better navigate the modern computing landscape and make the most of their hardware and software investments.