Creating XAF Property Editors in a Unified Way for Windows Forms and Blazor Using WebView
Introduction
The eXpressApp Framework (XAF) from DevExpress is a versatile application framework that supports multiple UI platforms, including Windows Forms and Blazor. Maintaining separate property editors for each platform can be cumbersome. This article explores how to create unified property editors for both Windows Forms and Blazor by leveraging WebView for Windows Forms and the Monaco Editor, the editor used in Visual Studio Code.
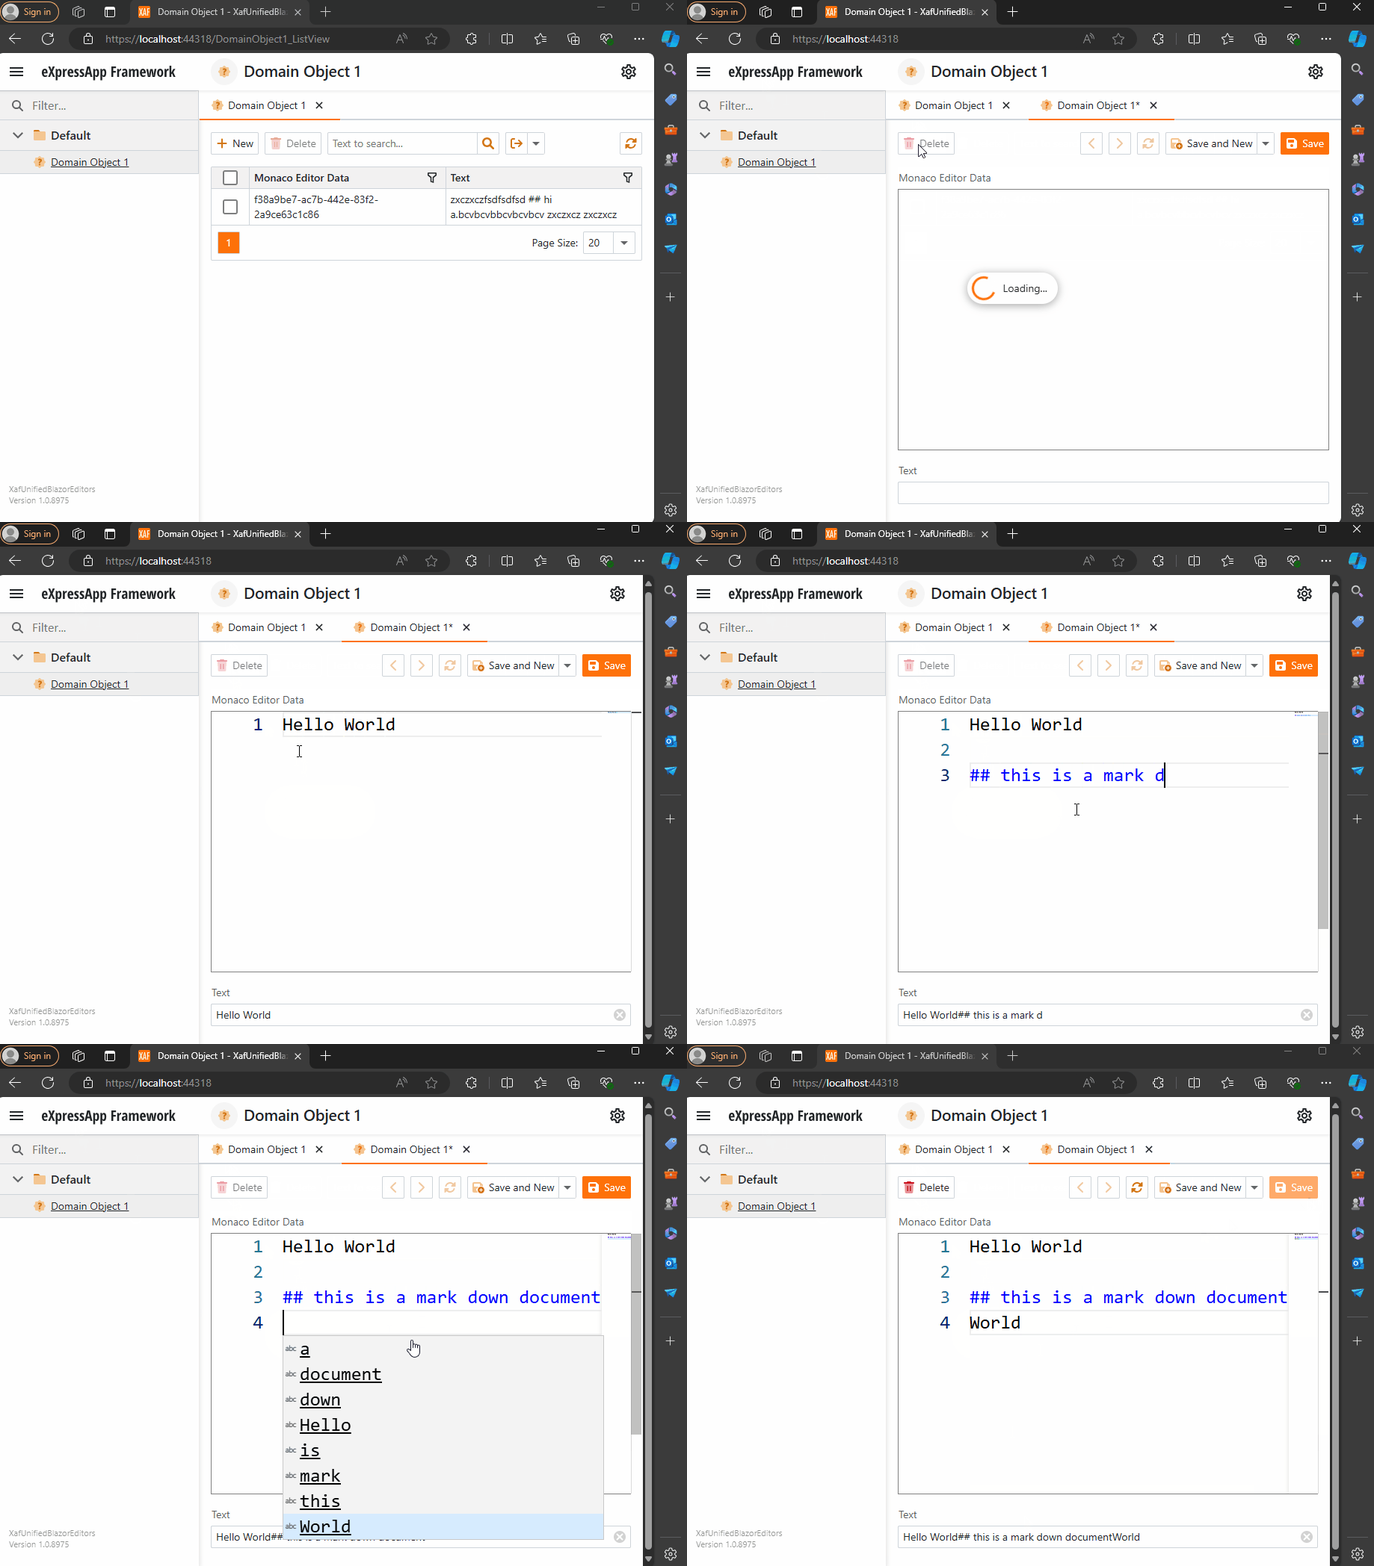
Blazor Implementation

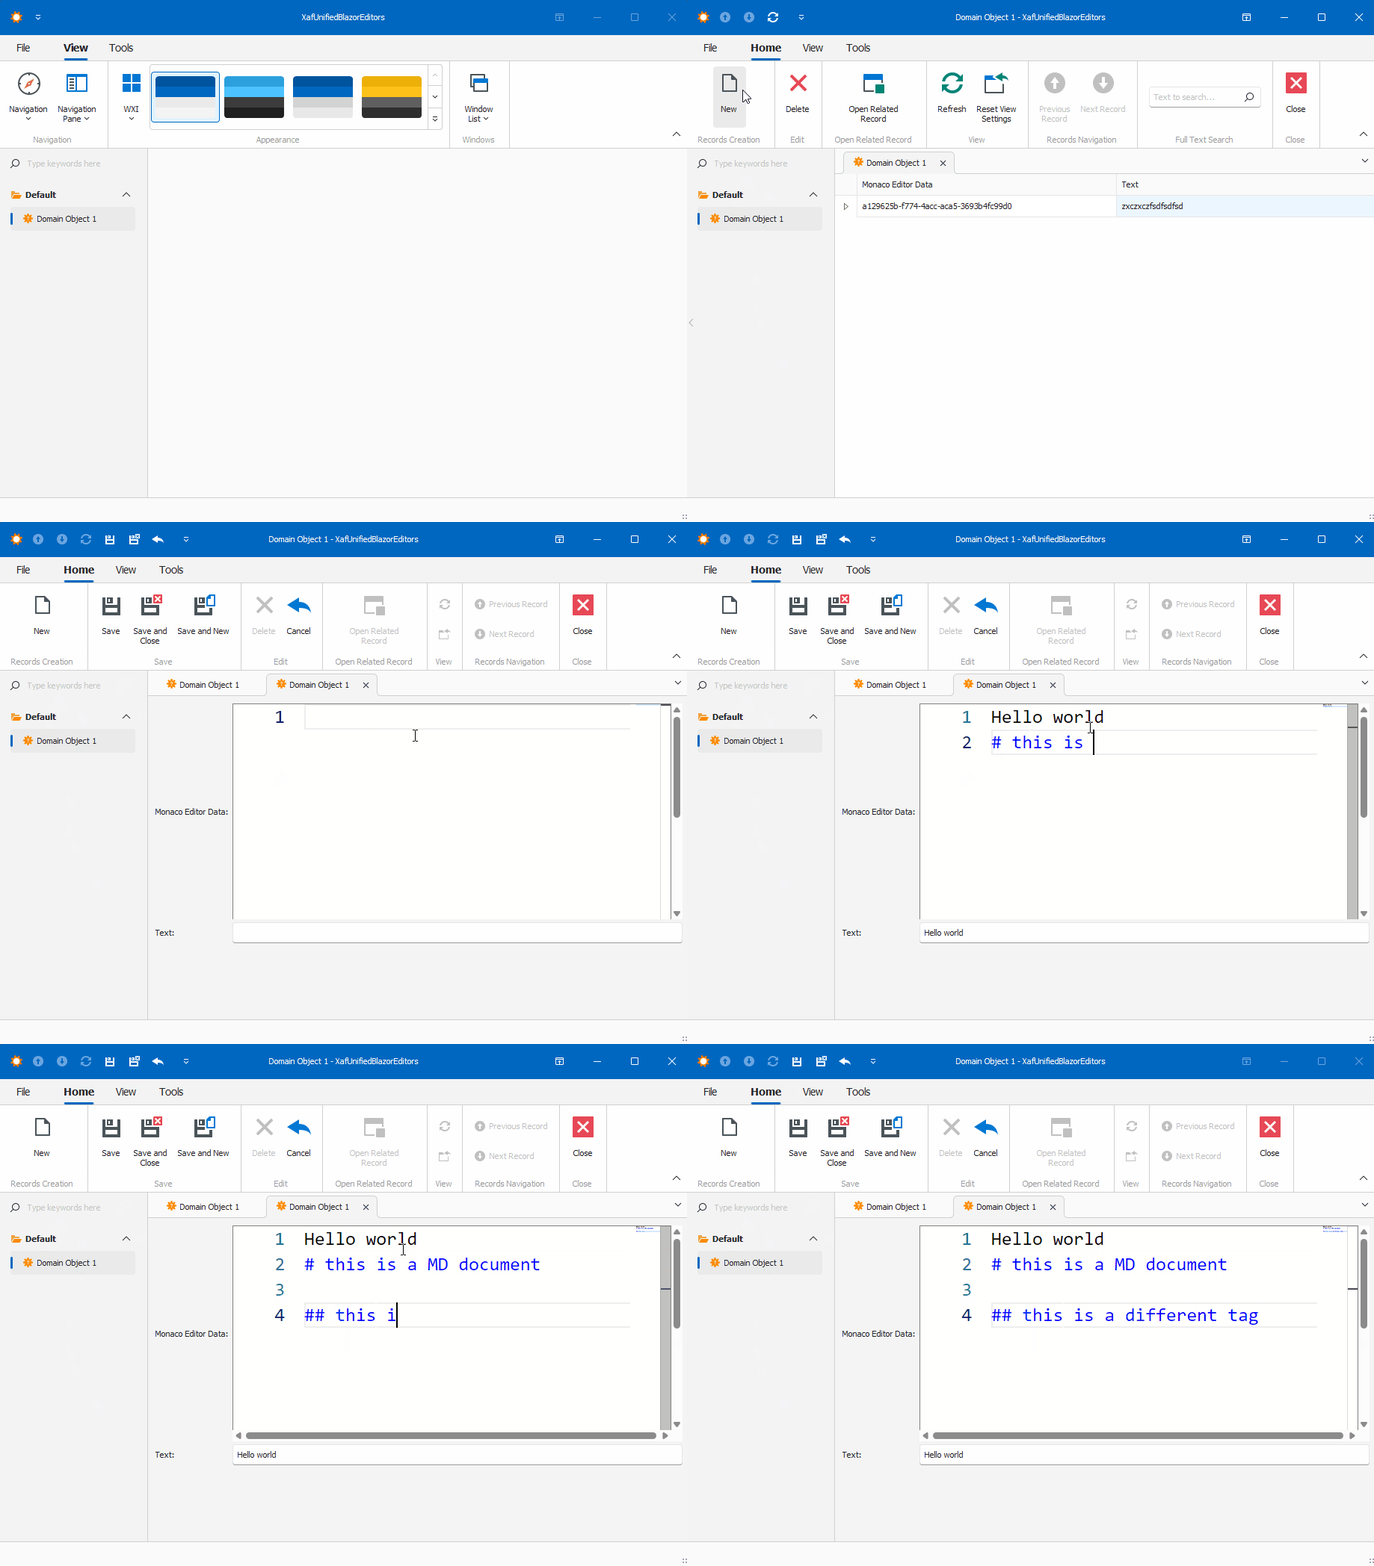
Windows forms Implementation

Prerequisites
Before we begin, ensure you have the following installed:
- Visual Studio 2022 or later
- .NET 8.0 SDK or later
- DevExpress XAF 22.2 or later
Step 1: Create a XAF Application for Windows Forms and Blazor
- Create a New Solution:
- Open Visual Studio and create a new solution.
- Add two projects to this solution:
- A Windows Forms project.
- A Blazor project.
- Set Up XAF:
- Follow the DevExpress documentation to set up XAF in both projects. Official documentation here
Step 2: Create a Razor Class Library
- Create a Razor Class Library:
- Add a new Razor Class Library project to the solution.
- Name it XafVsCodeEditor.
- Design the Monaco Editor Component:
- In the Razor Class Library project, add a new Razor component named MonacoEditorComponent.razor.
- Define the UI for the Monaco Editor as shown in MonacoEditorComponent.razor and MonacoEditorComponent.razor.cs.
- Define the data model. This is important; the idea is to use objects and not “by val” types like strings.
- Create the tag helper and the service extension, source here. This step is optional and is only to make integration easier. A full article about that is available here.
We are done with the shared library that we will reference in both Blazor and Windows projects.
Step 3: Integrate the Razor Class Library into Windows Forms
- Add NuGet References:
- In the Windows Forms project, add the following NuGet packages:
- Microsoft.AspNetCore.Components.WebView.WindowsForms
- XafVsCodeEditor (the Razor Class Library created earlier).
- You can see all the references in the csproj file.
- In the Windows Forms project, add the following NuGet packages:
- Change the Project Type: In order to add the ability to host Blazor components, we need to change the project SDK from Microsoft.NET.Sdk to Microsoft.NET.Sdk.Razor.
- Add Required Files:
Official Microsoft tutorial is available here.
Step 4: Implementing the XAF Property Editors
I’m not going to show the full steps to create the property editors. Instead, I will focus on the most important parts of the editor. Let’s start with Windows.
In Windows Forms, the most important method is when you create the instance of the control, in this case, the WebView. As you can see, this is where you instantiate the services that will be passed as a parameter to the component, in our case, the data model. You can find the full implementation of the property editor for Windows here and the official DevExpress documentation here.
protected override object CreateControlCore()
{
    control = new BlazorWebView();
    control.Dock = DockStyle.Fill;
    var services = new ServiceCollection();
    services.AddWindowsFormsBlazorWebView();
    control.HostPage = "wwwroot\\index.html";
    var tags = MonacoEditorTagHelper.AddScriptTags;
    control.Services = services.BuildServiceProvider();
    parameters = new Dictionary<string, object>();
    if (PropertyValue == null)
    {
        PropertyValue = new MonacoEditorData() { Language = "markdown" };
    }
    parameters.Add("Value", PropertyValue);
    control.RootComponents.Add<MonacoEditorComponent>("#app", parameters);
    control.Size = new System.Drawing.Size(300, 300);
    return control;
}
Now, for the property editor for Blazor, you can find the full source code here and the official DevExpress documentation here.
protected override IComponentModel CreateComponentModel()
{
    var model = new MonacoEditorDataModel();
    model.ValueChanged = EventCallback.Factory.Create<IMonacoEditorData>(this, value => {
        model.Value = value;
        OnControlValueChanged();
        WriteValue();
    });
    return model;
}
One of the most important things to notice here is that in version 24 of XAF, Blazor property editors have been simplified so they require fewer layers of code. The magical databinding happens because in the data model there should be a property of the same value and type as one of the parameters in the Blazor component.
Step 5: Running the Application
Before we run our solution, we need to add a domain object that implements a property of type IMonacoData, which is the interface we associated with our property editor. Here is a sample domain object that has a property of type MonacoEditorData:
[DefaultClassOptions]
public class DomainObject1 : BaseObject, IXafEntityObject
{
    public DomainObject1(Session session) : base(session) { }
    public override void AfterConstruction()
    {
        base.AfterConstruction();
    }

    MonacoEditorData monacoEditorData;
    string text;

    public MonacoEditorData MonacoEditorData
    {
        get => monacoEditorData;
        set => SetPropertyValue(nameof(MonacoEditorData), ref monacoEditorData, value);
    }

    [Size(SizeAttribute.DefaultStringMappingFieldSize)]
    public string Text
    {
        get => text;
        set => SetPropertyValue(nameof(Text), ref text, value);
    }

    public void OnCreated()
    {
        this.MonacoEditorData = new MonacoEditorData("markdown", "");
        MonacoEditorData.PropertyChanged += SourceEditor_PropertyChanged;
    }

    void IXafEntityObject.OnSaving()
    {
        this.Text = this.MonacoEditorData.Code;
    }

    void IXafEntityObject.OnLoaded()
    {
        this.MonacoEditorData = new MonacoEditorData("markdown", this.Text);
        MonacoEditorData.PropertyChanged += SourceEditor_PropertyChanged;
    }

    private void SourceEditor_PropertyChanged(object sender, PropertyChangedEventArgs e)
    {
        this.Text = this.MonacoEditorData.Code;
    }
}
As you can see, DomainObject1 implements the interface IXafEntityObject. We are using the interface events to load and save the content of the editor to the text property.
Now, build and run the solution. You should now have a Windows Forms application that hosts a Blazor property editor using WebView and the Monaco Editor, as well as a Blazor application using the same property editor.
You can find a working example here.
Conclusion
By leveraging WebView and the Monaco Editor, you can create unified property editors for both Windows Forms and Blazor in XAF applications. This approach simplifies maintenance and provides a consistent user experience across different platforms. With the flexibility of Blazor and the robustness of Windows Forms, you can build powerful and versatile property editors that cater to a wide range of user needs.