If you’ve ever worked on a traditional .NET Framework application — the kind that predates .NET Core and .NET 5+ — this story may feel painfully familiar.
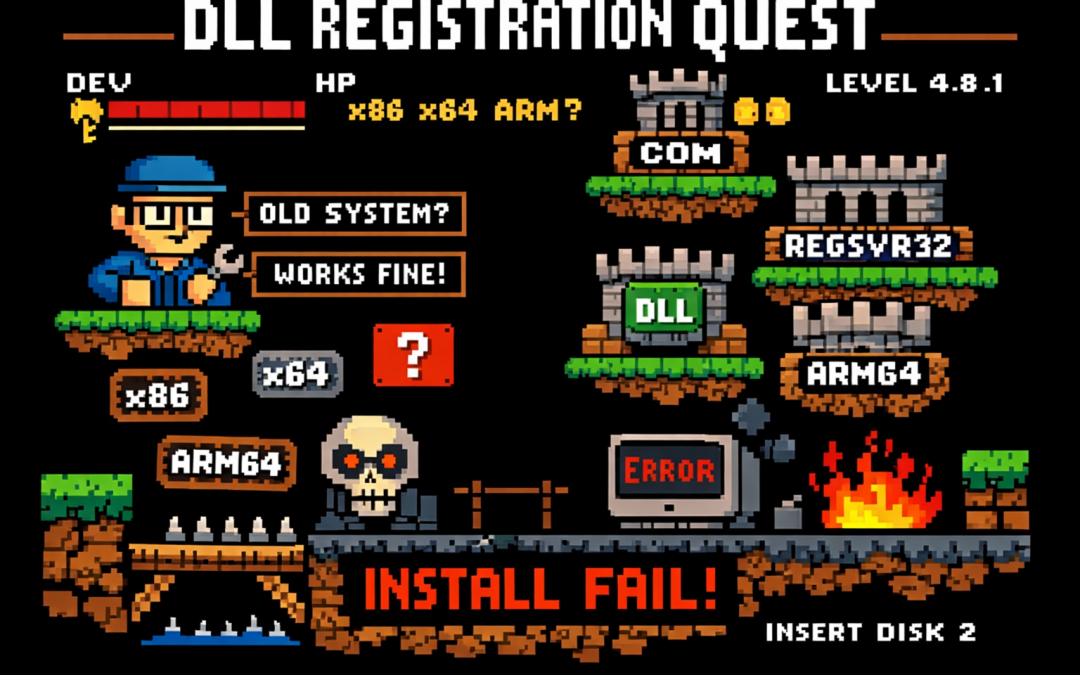
I’m talking about classic .NET Framework 4.x applications (4.0, 4.5, 4.5.1, 4.5.2, 4.6, 4.6.1, 4.6.2, 4.7, 4.7.1, 4.7.2, 4.8, and the final release 4.8.1). These systems often live long, productive lives… and accumulate interesting technical debt along the way.
This particular system is written in C# and relies heavily on COM components to render video, audio, and PDF content. Under the hood, many of these components are based on technologies like DirectShow filters, ActiveX controls, or other native COM DLLs.
And that’s where the story begins.
The Setup: COM, DirectShow, and Registration
Unlike managed .NET assemblies, COM components don’t just live quietly next to your executable. They need to be registered in the system registry so Windows knows:
What CLSID they expose
Which DLL implements that CLSID
Whether it’s 32-bit or 64-bit
How it should be activated
For DirectShow-based components (very common for video/audio playback in legacy apps), registration is usually done manually during development using regsvr32.
Async/await in C# is often described as “non-blocking,” but that description hides an important detail:
await is not just about waiting — it is about where execution continues afterward.
Understanding that single idea explains:
why deadlocks happen,
why ConfigureAwait(false) exists,
and why it *reduces* damage without fixing the root cause.
This article is not just theory. It’s written because this exact class of problem showed up again in real production code during the first week of 2026 — and it took a context-level fix to resolve it.
The Hidden Mechanism: Context Capture
When you await a task, C# does two things:
It pauses the current method until the awaited task completes.
It captures the current execution context (if one exists) so the continuation can resume there.
That context might be:
a UI thread (WPF, WinForms, MAUI),
a request context (classic ASP.NET),
or no special context at all (ASP.NET Core, console apps).
This default behavior is intentional. It allows code like this to work safely:
var data = await LoadAsync();
MyLabel.Text = data.Name; // UI-safe continuation
But that same mechanism becomes dangerous when async code is blocked synchronously.
The Root Problem: Blocking on Async
Deadlocks typically appear when async code is forced into a synchronous shape:
var result = GetDataAsync().Result; // or .Wait()
What happens next:
The calling thread blocks, waiting for the async method to finish.
The async method completes its awaited operation.
The continuation tries to resume on the original context.
That context is blocked.
Nothing can proceed.
💥 Deadlock.
This is not an async bug. This is a context dependency cycle.
The Blast Radius Concept
Blocking on async is the explosion.
The blast radius is how much of the system is taken down with it.
Full blast (default await)
Continuation *requires* the blocked context
The async operation cannot complete
The caller never unblocks
Everything stops
Reduced blast (ConfigureAwait(false))
Continuation does not require the original context
It resumes on a thread pool thread
The async operation completes
The blocking call unblocks
The original mistake still exists — but the damage is contained.
The real fix is “don’t block on async,”
but ConfigureAwait(false) reduces the blast radius when someone does.
What ConfigureAwait(false) Actually Does
await SomeAsyncOperation().ConfigureAwait(false);
This tells the runtime:
“I don’t need to resume on the captured context. Continue wherever it’s safe to do so.”
Important clarifications:
It does not make code faster by default
It does not make code parallel
It does not remove the need for proper async flow
It only removes context dependency
Why This Matters in Real Code
Async code rarely exists in isolation.
A method often awaits another method, which awaits another:
await AAsync();
    await BAsync();
        await CAsync();
If any method in that chain requires a specific context, the entire chain becomes context-bound.
That is why:
library code must be careful,
deep infrastructure layers must avoid context assumptions,
and UI layers must be explicit about where context is required.
When ConfigureAwait(false) Is the Right Tool
Use it when all of the following are true:
The method does not interact with UI state
The method does not depend on a request context
The method is infrastructure, library, or backend logic
The continuation does not care which thread resumes it
This is especially true for:
NuGet packages
shared libraries
data access layers
network and IO pipelines
What It Is Not
ConfigureAwait(false) is not:
a fix for bad async usage
a substitute for proper async flow
a reason to block on tasks
something to blindly apply everywhere
It is a damage-control tool, not a cure.
A Real Incident: When None of the Usual Fixes Worked
First week of 2026.
The first task I had with the programmers in my office was to investigate a problem in a trading block. The symptoms looked like a classic async issue: timing bugs, inconsistent behavior, and freezes that felt “await-shaped.”
We did what experienced .NET teams typically do when async gets weird:
Reviewed the full async/await chain end-to-end
Double-checked the source code carefully (everything looked fine)
Tried the usual “tools people reach for” under pressure:
.Wait()
.GetAwaiter().GetResult()
wrapping in Task.Run(...)
adding ConfigureAwait(false)
mixing combinations of those approaches
None of it reliably fixed the problem.
At that point it stopped being a “missing await” story. It became a “the model is right but reality disagrees” story.
One of the programmers, Daniel, and I went deeper. I found myself mentally replaying every async pattern I know — especially because I’ve written async-heavy code myself, including library work like SyncFramework, where I synchronize databases and deal with long-running operations.
That’s the moment where this mental model matters: it forces you to stop treating await like syntax and start treating it like mechanics.
The Actual Root Cause: It Was the Context
In the end, the culprit wasn’t which pattern we used — it was where the continuation was allowed to run.
This application was built on DevExpress XAF. In this environment, the “correct” continuation behavior is often tied to XAF’s own scheduling and application lifecycle rules. XAF provides a mechanism to run code in its synchronization context — for example using BlazorApplication.InvokeAsync, which ensures that continuations run where the framework expects.
Once we executed the problematic pipeline through XAF’s synchronization context, the issue was solved.
No clever pattern. No magical await. No extra parallelism.
Just: the right context.
And this is not unique to XAF. Similar ideas exist in:
Windows Forms (UI thread affinity + SynchronizationContext)
WPF (Dispatcher context)
Any framework that requires work to resume on a specific thread/context
Why I’m Writing This
What I wanted from this experience is simple: don’t forget it.
Because what makes this kind of incident dangerous is that it looks like a normal async bug — and the internet is full of “four fixes” people cycle through:
add/restore missing await
use .Wait() / .Result
wrap in Task.Run()
use ConfigureAwait(false)
Sometimes those are relevant. Sometimes they’re harmful. And sometimes… they’re all beside the point.
In our case, the missing piece was framework context — and once you see that, you realize why the “blast radius” framing is so useful:
Blocking is the explosion.
ConfigureAwait(false) contains damage when someone blocks.
If a framework requires a specific synchronization context, the fix may be to supply the correct context explicitly.
That’s what happened here. And that’s why I’m capturing it as live knowledge, not just documentation.
The Mental Model to Keep
Async bugs are often context bugs
Blocking creates the explosion
Context capture determines the blast radius
ConfigureAwait(false) limits the damage
Proper async flow prevents the explosion entirely
Frameworks may require their own synchronization context
Correct async code can still fail in the wrong context
Async is not just about tasks. It’s about where your code is allowed to continue.
Same UI language.
Totally unpredictable content language.
Spanish, Russian, Italian… sometimes all in the same message.
Humans handle that fine.
Vector retrieval… not so much.
This is the “silent failure” scenario: retrieval looks plausible, the LLM sounds confident, and you ship nonsense.
So I had to change the game.
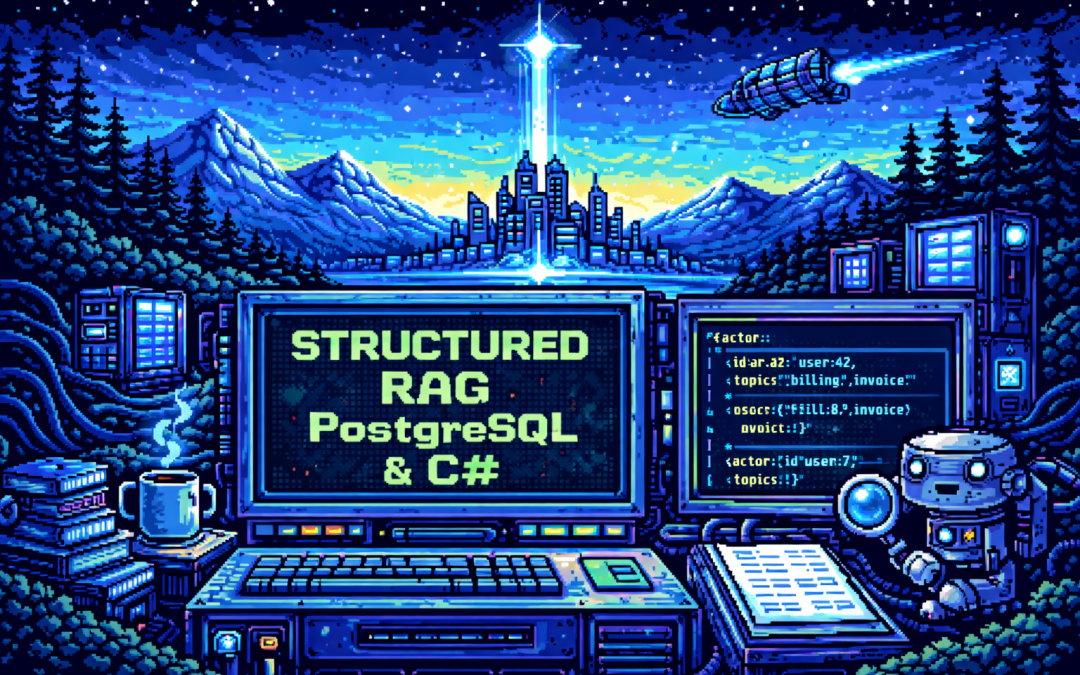
The Idea: Structured RAG
Structured RAG means you don’t embed raw text and pray.
You add a step before retrieval:
Extract a structured representation from each activity record
Store it as metadata (JSON)
Use that metadata to filter, route, and rank
Then do vector similarity on a cleaner, more stable representation
Think of it like this:
Unstructured text is what users write.
Structured metadata is what your RAG system can trust.
Why This Fix Works for Mixed Languages
The core problem with activity streams is not “language”.
The core problem is: you have no stable shape.
When the shape is missing, everything becomes fuzzy:
Who is speaking?
What is this about?
Which entities are involved?
Is this a reply, a reaction, a mention, a task update?
What language(s) are in here?
Structured RAG forces you to answer those questions once, at write-time, and save the answers.
PostgreSQL: Add a JSONB Column (and Keep pgvector)
We keep the previous approach (pgvector) but we add a JSONB column for structured metadata.
ALTER TABLE activities
ADD COLUMN rag_meta jsonb NOT NULL DEFAULT '{}'::jsonb;

-- Optional: if you store embeddings per activity/chunk
-- you keep your existing embedding column(s) or chunk table.
Then index it.
CREATE INDEX activities_rag_meta_gin
ON activities
USING gin (rag_meta);
Now you can filter with JSON queries before you ever touch vector similarity.
A Proposed Schema (JSON Shape You Control)
The exact schema depends on your product, but for activity streams I want at least:
language: detected languages + confidence
actors: who did it
subjects: what object is involved (ticket, order, user, document)
topics: normalized tags
relationships: reply-to, mentions, references
summary: short canonical summary (ideally in one pivot language)
Notice what happened here: the raw multilingual chaos got converted into a stable structure.
Write-Time Pipeline (The Part That Feels Expensive, But Saves You)
Structured RAG shifts work to ingestion time.
Yes, it costs tokens.
Yes, it adds steps.
But it gives you something you never had before: predictable retrieval.
Here’s the pipeline I recommend:
Store raw activity (as-is, don’t lose the original)
Detect language(s) (fast heuristic + LLM confirmation if needed)
Extract structured metadata into your JSON schema
Generate a canonical “summary” in a pivot language (often English)
Embed the summary + key fields (not the raw messy text)
Save JSON + embedding
The key decision: embed the stable representation, not the raw stream text.
C# Conceptual Implementation
I’m going to keep the code focused on the architecture. Provider details are swappable.
Entities
public sealed class Activity
{
    public long Id { get; set; }
    public string RawText { get; set; } = "";
    public string UiLanguage { get; set; } = "en";

    // JSONB column in Postgres
    public string RagMetaJson { get; set; } = "{}";

    // Vector (pgvector) - store via your pgvector mapping or raw SQL
    public float[] RagEmbedding { get; set; } = Array.Empty<float>();

    public DateTimeOffset CreatedAt { get; set; }
}
Metadata Contract (Strongly Typed in Code, Stored as JSONB)
public sealed class RagMeta
{
    public int SchemaVersion { get; set; } = 1;
    public List<DetectedLanguage> Languages { get; set; } = new();
    public ActorMeta Actor { get; set; } = new();
    public List<SubjectMeta> Subjects { get; set; } = new();
    public List<string> Topics { get; set; } = new();
    public RelationshipMeta Relationships { get; set; } = new();
    public string Intent { get; set; } = "unknown";
    public SummaryMeta Summary { get; set; } = new();
}

public sealed class DetectedLanguage
{
    public string Code { get; set; } = "und";
    public double Confidence { get; set; }
}

public sealed class ActorMeta
{
    public string Id { get; set; } = "";
    public string DisplayName { get; set; } = "";
}

public sealed class SubjectMeta
{
    public string Type { get; set; } = "";
    public string Id { get; set; } = "";
}

public sealed class RelationshipMeta
{
    public string? ReplyTo { get; set; }
    public List<string> Mentions { get; set; } = new();
}

public sealed class SummaryMeta
{
    public string PivotLanguage { get; set; } = "en";
    public string Text { get; set; } = "";
}
Extractor + Embeddings
You need two services:
Metadata extraction (LLM fills the schema)
Embeddings (Microsoft.Extensions.AI) for the stable text
public interface IRagMetaExtractor
{
    Task<RagMeta> ExtractAsync(Activity activity, CancellationToken ct);
}
Then the ingestion pipeline:
using System.Text.Json;
using Microsoft.Extensions.AI;

public sealed class StructuredRagIngestor
{
    private readonly IRagMetaExtractor _extractor;
    private readonly IEmbeddingGenerator<string, Embedding<float>> _embeddings;

    public StructuredRagIngestor(
        IRagMetaExtractor extractor,
        IEmbeddingGenerator<string, Embedding<float>> embeddings)
    {
        _extractor = extractor;
        _embeddings = embeddings;
    }

    public async Task ProcessAsync(Activity activity, CancellationToken ct)
    {
        // 1) Extract structured JSON
        RagMeta meta = await _extractor.ExtractAsync(activity, ct);

        // 2) Create stable text for embeddings (summary + keywords)
        string stableText =
            $"{meta.Summary.Text}\n" +
            $"Topics: {string.Join(", ", meta.Topics)}\n" +
            $"Intent: {meta.Intent}";

        // 3) Embed stable text
        var emb = await _embeddings.GenerateAsync(new[] { stableText }, ct);
        float[] vector = emb.First().Vector.ToArray();

        // 4) Save into activity record
        activity.RagMetaJson = JsonSerializer.Serialize(meta);
        activity.RagEmbedding = vector;

        // db.SaveChangesAsync(ct) happens outside (unit of work)
    }
}
This is the core move: you stop embedding chaos and start embedding structure.
Query Pipeline: JSON First, Vectors Second
When querying, you don’t jump into similarity search immediately.
You do:
Parse the user question
Decide filters (actor, subject type, topic)
Filter with JSONB (fast narrowing)
Then do vector similarity on the remaining set
Example: filter by topic + intent using JSONB:
SELECT id, raw_text
FROM activities
WHERE rag_meta @> '{"intent":"support_request"}'::jsonb
  AND rag_meta->'topics' ? 'invoice'
ORDER BY rag_embedding <=> @query_embedding
LIMIT 20;
That “JSON first” step is what keeps multilingual streams from poisoning your retrieval.
Tradeoffs (Because Nothing Is Free)
Structured RAG costs more at write-time:
more tokens
more latency
more moving parts
But it saves you at query-time:
less noise
better precision
more predictable answers
debuggable failures (because you can inspect metadata)
In real systems, I’ll take predictable and debuggable over “cheap but random” every day.
Final Thought
RAG over activity streams is hard because activity streams are messy by design.
If you want RAG to behave, you need structure.
Structured RAG is how you make retrieval boring again.
And boring retrieval is exactly what you want.
In the next article, I’ll go deeper into the exact pipeline details: language routing, mixed-language detection, pivot summaries, chunk policies, and how I made this production-friendly without turning it into a token-burning machine.
using OpenAI;
using Microsoft.Extensions.AI;
using Microsoft.Extensions.AI.OpenAI;

var client = new OpenAIClient("YOUR_API_KEY");

IEmbeddingGenerator<string, Embedding<float>> embeddings =
    client.AsEmbeddingGenerator("text-embedding-3-small");
Generating a Vector
var result = await embeddings.GenerateAsync(
    new[] { "Some activity text" });

float[] vector = result.First().Vector.ToArray();
That vector is what drives everything that follows.
⚠️ Embeddings Are Model-Locked (And Language Makes It Worse)
Embeddings are model-locked.
Meaning:
Vectors from different embedding models cannot be compared.
Even if:
the dimension matches
the text is identical
the provider is the same
Each model defines its own universe.
But here’s the kicker I learned the hard way:
Multilingual content amplifies this problem.
Even with multilingual-capable models:
language mixing shifts vector space
short messages lose semantic anchors
similarity becomes noisy
In an activity stream:
English UI
Spanish content
Russian replies
Emoji everywhere
Vector distance starts to mean “kind of related, maybe”.
That’s not good enough.
PostgreSQL + pgvector (Still the Right Choice)
Despite all that, PostgreSQL with pgvector is still the right foundation.
Enable pgvector
CREATE EXTENSION IF NOT EXISTS vector;
Chunk-Based Table
CREATE TABLE doc_chunks (
    id            bigserial PRIMARY KEY,
    document_id   bigint NOT NULL,
    chunk_index   int NOT NULL,
    content       text NOT NULL,
    embedding     vector(1536) NOT NULL,
    created_at    timestamptz NOT NULL DEFAULT now()
);
Technically correct.
Architecturally incomplete — as I later discovered.
Retrieval: Where Things Quietly Go Wrong
SELECT content
FROM doc_chunks
ORDER BY embedding <=> @query_embedding
LIMIT 5;
This query decides:
what the model sees
what it ignores
how wrong the answer will be
When language is mixed, retrieval looks correct — but isn’t.
Classic example: Moscow
Spanish:Moscú
Italian:Mosca
Meaning in Spanish: 🪰 a fly
So for a Spanish speaker, “Mosca” looks like it should mean insect (which it does), but it’s also the Italian name for Moscow.
Why RAG Failed in This Scenario
Let’s be honest:
Similar ≠ relevant
Multilingual ≠ multilingual-safe
Short activity messages ≠ documents
Noise ≠ knowledge
RAG didn’t fail because the model was bad.
It failed because the data had no structure.
Why This Article Exists
This article exists because:
I tried RAG on a real system
With real users
Writing in real languages
In real combinations
And the naïve RAG approach didn’t survive.
What Comes Next
The next article will not be about:
embeddings
models
APIs
It will be about structured RAG.
How I fixed this by:
introducing structure into the activity stream
separating concerns in the pipeline
controlling language before retrieval
reducing semantic noise
making RAG predictable again
In other words:
How to make RAG work after it breaks.
Final Thought
RAG is not magic.
It’s:
search + structure + discipline
If your data is chaotic, RAG will faithfully reflect that chaos — just with confidence.
Happy New Year 2026 🎆
If you’re reading this:
Happy New Year 2026.
Let’s make this the year we stop trusting demos
and start trusting systems that survived reality.
One of the recurring challenges in real-world systems is not building new software — it’s integrating with software that already exists.
Legacy systems don’t disappear just because newer technologies are available. They survive because they work,
because they hold critical business data, and because replacing them is often risky, expensive, or simply not allowed.
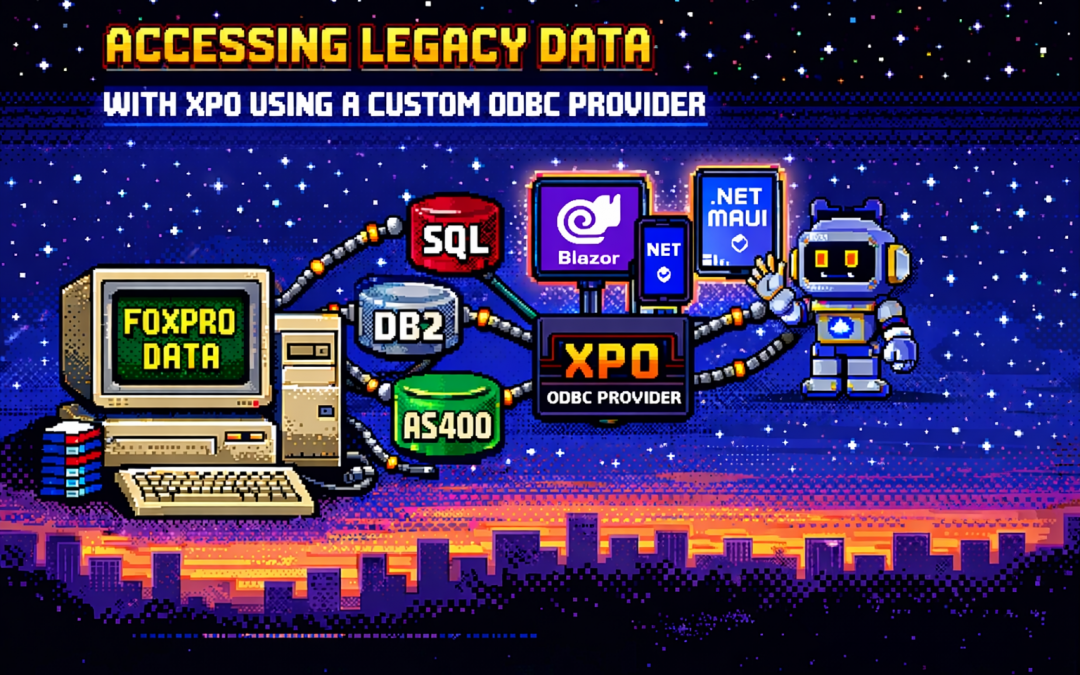
This article explores a practical approach to accessing legacy data using XPO by leveraging ODBC,
not as a universal abstraction, but as a bridge when no modern provider exists.
The Reality of Legacy Systems
Many organizations still rely on systems built on technologies such as:
FoxPro tables
AS400 platforms
DB2-based systems
Proprietary or vendor-abandoned databases
In these scenarios, it’s common to find that:
There is no modern .NET provider
There is no ORM support
There is an ODBC driver
That last point is crucial. ODBC often remains available long after official SDKs and providers have disappeared.
It becomes the last viable access path to critical data.
Why ORMs Struggle with Legacy Data
Modern ORMs assume a relatively friendly environment: a supported database engine, a known SQL dialect,
a compatible type system, and an actively maintained provider.
Legacy databases rarely meet those assumptions. As a result, teams are often forced to:
Drop down to raw SQL
Build ad-hoc data access layers
Treat legacy data as a second-class citizen
This becomes especially painful in systems that already rely heavily on DevExpress XPO for persistence,
transactions, and domain modeling.
ODBC Is Not Magic — and That’s the Point
ODBC is often misunderstood.
Using ODBC does not mean:
One provider works for every database
SQL becomes standardized
Type systems become compatible
Each ODBC-accessible database still has:
Its own SQL dialect
Its own limitations
Its own data types
Its own behavioral quirks
ODBC simply gives you a way in. It is a transport mechanism, not a universal language.
What an XPO ODBC Provider Really Is
When you implement an XPO provider on top of ODBC, you are not building a generic solution for all databases.
You are building a targeted adapter for a specific legacy system that happens to be reachable via ODBC.
This matters because ODBC is used here as a pragmatic trick:
To connect to something you otherwise couldn’t
To reuse an existing, stable access path
To avoid rewriting or destabilizing legacy systems
The database still dictates the SQL dialect, supported features, and type system. Your provider must respect those constraints.
Why XPO Makes This Possible
XPO is not just an ORM — it is a provider-based persistence framework.
All SQL-capable XPO providers are built on top of a shared foundation, most notably:
This architecture allows you to reuse XPO’s core benefits:
Object model
Sessions and units of work
Transaction handling
Integration with domain logic
While customizing what legacy systems require:
SQL generation
Command execution
Schema discovery
Type mapping
Dialects and Type Systems Still Matter
Even when accessed through ODBC:
FoxPro is not SQL Server
DB2 is not PostgreSQL
AS400 is not Oracle
Each system has its own:
Date and time semantics
Numeric precision rules
String handling behavior
Constraints and limits
An XPO ODBC provider must explicitly map database types, handle dialect-specific SQL,
and avoid assumptions about “standard SQL.” ODBC opens the door — it does not normalize what’s inside.
Real-World Experience: AS400 and DB2 in Production
This approach is not theoretical. Last year, we implemented a custom XPO provider using ODBC for AS400 and DB2 systems in Mexico, where:
No viable modern .NET provider existed
The systems were deeply embedded in business operations
ODBC was the only stable integration path
By introducing an XPO provider on top of ODBC, we were able to integrate legacy data into a modern .NET architecture,
preserve domain models and transactional behavior, and avoid rewriting or destabilizing existing systems.
The Hidden Advantage: Modern UI and AI Access
Once legacy data is exposed through XPO, something powerful happens: that data becomes immediately available to modern platforms.
Blazor applications
.NET MAUI mobile and desktop apps
Background services
Integration APIs
AI agents and assistants
And you get this without rewriting the database, migrating the data, or changing the legacy system.
XPO becomes the adapter that allows decades-old data to participate in modern UI stacks, automated workflows,
and AI-driven experiences.
Why Not Just Use Raw ODBC?
Raw ODBC gives you rows, columns, and primitive values. XPO gives you domain objects, identity tracking,
relationships, transactions, and a consistent persistence model.
The goal is not to modernize the database. The goal is to modernize access to legacy data
so it can safely participate in modern architectures.
Closing Thought
An XPO ODBC provider is not a silver bullet. It will not magically unify SQL dialects, type systems, or database behavior.
But when used intentionally, it becomes a powerful bridge between systems that cannot be changed
and architectures that still need to evolve.
ODBC is the trick that lets you connect.
XPO is what makes that connection usable — everywhere, from Blazor UIs to AI agents.
When I started working with computers, one of the tools that shaped my way of thinking as a developer was FoxPro.
At the time, FoxPro felt like a complete universe: database engine, forms, reports, and business logic all integrated into a single environment.
Looking back, FoxPro was effectively an application framework from the past—long before that term became common.
Accessing FoxPro data usually meant choosing between two paths:
Direct FoxPro access – fast, tightly integrated, and fully aware of FoxPro’s features
ODBC – a standardized way to access the data from outside the FoxPro ecosystem
This article focuses on that second option.
What Is ODBC?
ODBC (Open Database Connectivity) is a standardized API for accessing databases.
Instead of applications talking directly to a specific database engine, they talk to an ODBC driver,
which translates generic database calls into database-specific commands.
The promise was simple:
One API, many databases.
And for its time, this was revolutionary.
Supported Operating Systems and Use Cases
ODBC is still relevant today and supported across major platforms:
Windows – native support, mature tooling
Linux – via unixODBC and vendor drivers
macOS – supported through driver managers
Typical use cases include:
Legacy systems that must remain stable
Reporting and BI tools
Data migration and ETL pipelines
Cross-vendor integrations
Long-lived enterprise systems
ODBC excels where interoperability matters more than elegance.
The Lowest Common Denominator Problem
Although ODBC is a standard, it does not magically unify databases.
Each database has its own:
SQL dialect
Data types
Functions
Performance characteristics
ODBC standardizes access, not behavior.
You can absolutely open an ODBC connection and still:
Call native database functions
Use vendor-specific SQL
Rely on engine-specific behavior
This makes ODBC flexible—but not truly database-agnostic.
ODBC vs True Abstraction Layers
This is where ODBC differs from ORMs or persistence frameworks that aim for full abstraction.
ODBC: Gives you a common door and does not prevent database-specific usage
ORM-style frameworks: Try to hide database differences and enforce a common conceptual model
ODBC does not protect you from database specificity—it permits it.
ODBC in .NET: Avoiding Native Database Dependencies
This is an often-overlooked advantage of ODBC, especially in .NET applications.
ADO.NET is interface-driven:
IDbConnection
IDbCommand
IDataReader
However, each database requires its own concrete provider:
SQL Server
Oracle
DB2
Pervasive
PostgreSQL
MySQL
Each provider introduces:
Native binaries
Vendor SDKs
Version compatibility issues
Deployment complexity
Your code may be abstract — your deployment is not.
ODBC as a Binary Abstraction Layer
When using ODBC in .NET, your application depends on one provider only:
System.Data.Odbc
Database-specific dependencies are moved:
Out of your application
Into the operating system
Into driver configuration
This turns ODBC into a dependency firewall.
Minimal .NET Example: ODBC vs Native Provider
Native ADO.NET Provider (Example: SQL Server)
using System.Data.SqlClient;

using var connection =
    new SqlConnection("Server=.;Database=AppDb;Trusted_Connection=True;");

connection.Open();
Implications:
Requires SQL Server client libraries
Ties the binary to SQL Server
Changing database = new provider + rebuild
ODBC Provider (Database-Agnostic Binary)
using System.Data.Odbc;

using var connection =
    new OdbcConnection("DSN=AppDatabase");

connection.Open();
Implications:
Same binary works for SQL Server, Oracle, DB2, etc.
No vendor-specific DLLs in the app
Database choice is externalized
The SQL inside the connection may still be database-specific — but your application binary is not.
Trade-Offs (And Why They’re Acceptable)
Using ODBC means:
Fewer vendor-specific optimizations
Possible performance differences
Reliance on driver quality
But in exchange, you gain:
Simpler deployments
Easier migrations
Longer application lifespan
Reduced vendor lock-in
For many enterprise systems, this is a strategic win.
What’s Next – Phase 2: Customer Polish
Phase 1 is about making it work.
Phase 2 is about making it survivable for customers.
In Phase 2, ODBC shines by enabling:
Zero-code database switching
Cleaner installers
Fewer runtime surprises
Support for customer-controlled environments
Reduced friction in on-prem deployments
This is where architecture meets reality.
Customers don’t care how elegant your abstractions are — they care that your software runs on their infrastructure without drama.
OK, I’m still blocked from GitHub Copilot, so I still have more things to write about.
In this article, the topic that we’re going to see is the event system of Oqtane.For example, usually in most systems you want to hook up something when the application starts.
In XAF from Developer Express, which is my specialty (I mean, that’s the framework I really know well),
you have the DB Updater, which you can use to set up some initial data.
In Oqtane, you have the Module Manager, but there are also other types of events that you might need —
for example, when the user is created or when the user signs in for the first time.
So again, using the method that I explained in my previous article — the “OK, I have a doubt” method —
I basically let the guide of Copilot hike over my installation folder or even the Oqtane source code itself, and try to figure out how to do it.
That’s how I ended up using event subscribers.
In one of my prototypes, what I needed to do was detect when the user is created and then create some records in a different system
using that user’s information. So I’ll show an example of that type of subscriber, and I’ll actually share the Oqtane Event Handling Guide here, which explains how you can hook up to system events.
I’m sure there are more events available, but this is what I’ve found so far and what I’ve tested.
I guess I’ll make a video about all these articles at some point, but right now, I’m kind of vibing with other systems.
Whenever I get blocked, I write something about my research with Oqtane.
Oqtane Event Handling Guide
Comprehensive guide to capturing and responding to system events in Oqtane
This guide explains how to handle events in Oqtane, particularly focusing on user authentication events (login, logout, creation)
and other system events. Learn to build modules that respond to framework events and create custom event-driven functionality.
Version: 1.0.0 Last Updated: October 3, 2025 Oqtane Version: 6.0+ Framework: .NET 9.0
1. Overview of Oqtane Event System
Oqtane uses a centralized event system based on the SyncManager that broadcasts events throughout the application when entities change.
This enables loose coupling between components and allows modules to respond to framework events without tight integration.
Key Components
SyncManager — Central event hub that broadcasts entity changes
SyncEvent — Event data containing entity information and action type
IEventSubscriber — Interface for objects that want to receive events
EventDistributorHostedService — Background service that distributes events to subscribers
Entity Changes → SyncManager → EventDistributorHostedService → IEventSubscriber Implementations
                     ↓
               SyncEvent Created → Distributed to All Event Subscribers
2. Event Types and Actions
SyncEvent Model
public class SyncEvent : EventArgs
{
    public int TenantId { get; set; }
    public int SiteId { get; set; }
    public string EntityName { get; set; }
    public int EntityId { get; set; }
    public string Action { get; set; }
    public DateTime ModifiedOn { get; set; }
}
Available Actions
public class SyncEventActions
{
    public const string Refresh = "Refresh";
    public const string Reload = "Reload";
    public const string Create = "Create";
    public const string Update = "Update";
    public const string Delete = "Delete";
}
Common Entity Names
public class EntityNames
{
    public const string User = "User";
    public const string Site = "Site";
    public const string Page = "Page";
    public const string Module = "Module";
    public const string File = "File";
    public const string Folder = "Folder";
    public const string Notification = "Notification";
}
3. Creating Event Subscribers
To handle events, implement IEventSubscriber and filter for the entities and actions you care about.
Subscribers are automatically discovered by Oqtane and injected with dependencies.
public class UserActivityEventSubscriber : IEventSubscriber
{
    private readonly ILogger<UserActivityEventSubscriber> _logger;

    public UserActivityEventSubscriber(ILogger<UserActivityEventSubscriber> logger)
    {
        _logger = logger;
    }

    public void EntityChanged(SyncEvent syncEvent)
    {
        if (syncEvent.EntityName != EntityNames.User)
            return;

        switch (syncEvent.Action)
        {
            case SyncEventActions.Create:
                _logger.LogInformation("User created: {UserId}", syncEvent.EntityId);
                break;
            case "Login":
                _logger.LogInformation("User logged in: {UserId}", syncEvent.EntityId);
                break;
        }
    }
}
4. User Authentication Events
Login, logout, and registration trigger SyncEvent notifications that you can capture to send notifications,
track user activity, or integrate with external systems.
public class LoginActivityTracker : IEventSubscriber
{
    private readonly ILogger<LoginActivityTracker> _logger;

    public LoginActivityTracker(ILogger<LoginActivityTracker> logger)
    {
        _logger = logger;
    }

    public void EntityChanged(SyncEvent syncEvent)
    {
        if (syncEvent.EntityName == EntityNames.User && syncEvent.Action == "Login")
        {
            _logger.LogInformation("User {UserId} logged in at {Time}", syncEvent.EntityId, syncEvent.ModifiedOn);
        }
    }
}
5. System Entity Events
Besides user events, you can track changes in entities like Pages, Files, and Modules.
public class PageAuditTracker : IEventSubscriber
{
    private readonly ILogger<PageAuditTracker> _logger;

    public PageAuditTracker(ILogger<PageAuditTracker> logger)
    {
        _logger = logger;
    }

    public void EntityChanged(SyncEvent syncEvent)
    {
        if (syncEvent.EntityName == EntityNames.Page && syncEvent.Action == SyncEventActions.Create)
        {
            _logger.LogInformation("Page created: {PageId}", syncEvent.EntityId);
        }
    }
}
6. Custom Module Events
You can create custom events in your own modules using ISyncManager.
public class BlogManager
{
    private readonly ISyncManager _syncManager;

    public BlogManager(ISyncManager syncManager)
    {
        _syncManager = syncManager;
    }

    public void PublishBlog(int blogId)
    {
        _syncManager.AddSyncEvent(
            new Alias { TenantId = 1, SiteId = 1 },
            "Blog",
            blogId,
            "Published"
        );
    }
}
7. Best Practices
Filter early — Always check the entity and action before processing.
Handle exceptions — Never throw unhandled exceptions inside EntityChanged.
Log properly — Use structured logging with context placeholders.
Keep it simple — Extract complex logic to testable services.
Oqtane’s event system provides a clean, decoupled way to respond to system changes.
It’s perfect for audit logs, notifications, custom workflows, and integrations.
OK, I’ve been wanting to write this article for a few days now, but I’ve been vibing a lot — writing tons of prototypes and working on my Oqtane research. This morning I got blocked by GitHub Copilot because I hit the rate limit, so I can’t use it for a few hours. I figured that’s a sign to take a break and write some articles instead.
Actually, I’m not really “writing” — I’m using the Windows dictation feature (Windows key + H). So right now, I’m just having coffee and talking to my computer. I’m still in El Salvador with my family, and it’s like 5:00 AM here. My mom probably thinks I’ve gone crazy because I’ve been talking to my computer a lot lately. Even when I’m coding, I use dictation instead of typing, because sometimes it’s just easier to express yourself when you talk. When you type, you tend to shorten things, but when you talk, you can go on forever, right?
Anyway, this article is about Oqtane, specifically something that’s been super useful for me — how to set up a silent installation. Usually, when you download the Oqtane source or use the templates to create a new project or solution, and then run the server project, you’ll see the setup wizard first. That’s where you configure the database, email, host password, default theme, and all that.
Since I’ve been doing tons of prototypes, I’ve seen that setup screen thousands of times per day. So I downloaded the Oqtane source and started digging through it — using Copilot to generate guides whenever I got stuck. Honestly, the best way to learn is always by looking at the source code. I learned that the hard way years ago with XAF from DevExpress — there was no documentation back then, so I had to figure everything out manually and even assemble the projects myself because they weren’t in one solution. With Oqtane, it’s way simpler: everything’s in one place, just a few main projects.
Now, when I run into a problem, I just open the source code and tell Copilot, “OK, this is what I want to do. Help me figure it out.” Sometimes it goes completely wrong (as all AI tools do), but sometimes it nails it and produces a really good guide.
So the guide below was generated with Copilot, and it’s been super useful. I’ve been using it a lot lately, and I think it’ll save you a ton of time if you’re doing automated deployment with Oqtane.
I don’t want to take more of your time, so here it goes — I hope it helps you as much as it helped me.
Oqtane Installation Configuration Guide
This guide explains the configuration options available in the appsettings.json file under the Installation section for automated installation and default site settings.
Overview
The Installation section in appsettings.json controls the automated installation process and default settings for new sites in Oqtane. These settings are particularly useful for:
Automated installations – Deploy Oqtane without manual configuration
Development environments – Quickly spin up new instances
Multi-tenant deployments – Standardize new site creation
Mental notes on architecture, learning by reading source, and what’s next.
OK — so it’s time for a new article. Lately, I’ve been diving deep into the Oqtane framework, and it’s been a beautiful journey. It reminds me of my early days with XAF from Developer Express—when I learned to think in software architecture and modern design patterns by simply reading the code.Back then, documentation was scarce. The advice was: “Look at the code.” I did—and that shaped a big part of my software education. It taught me that good source code is often self-explanatory.
Even though XAF is still our main tool at the office (Xari & BIT Frameworks), we’re expanding. We’re researching new divisions for Flutter and React, since some projects already use those fronts with an XAF backend. I also wanted to explore building client-server apps with a single .NET codebase that includes mobile—another reason Oqtane caught my eye.
Why Oqtane Caught My Attention
The Oqtane team is very responsive on GitHub. You can open a discussion and get thoughtful replies quickly. The source code is clean and educational—perfect for learning by reading. There are plenty of talks and videos on architecture and module development; some are a bit dated, but if you cross-check with the code, you’ll be fine.
I’ve learned there are two steps to mastering a framework: (1) immerse yourself in material (videos, code, docs), and (2) explain it to someone else. These notes do both—part research, part knowledge sharing.
There’s one clip I couldn’t locate where Shaun Walker explains that .NET already provides the pieces for modern, multi-platform, server-and-client applications—but the ecosystem is fragmented. Oqtane unifies those pieces into a single .NET codebase. If I find it, I’ll make a highlight and share it.
On Learning and Time
I’m trying to publish as much as I can now because I’m about to start a new chapter: I’ll be joining the University of St. Petersburg to learn Russian as my second language. It’s a tough language—very different from Spanish or Italian—so I’ll likely have less time to write for a while. Better to document these experiments now than let them sit in my notes for months.
In my previous post (or “mental note,” as I like to call them), I covered how to set up multi-tenancy in Oqtane. Today, I got a really nice surprise — Shaun Walker just posted an excellent video explaining how multi-tenancy works,
along with its advantages and possible drawbacks.
From my point of view, the advantages clearly outweigh the disadvantages,
although it depends on your specific scenario.
Extending the Previous Example
I wanted to improve my previous example a bit. So, I created a new GitHub repository using the same base code,
but this time I added hostnames for each tenant.
A hostname is basically the domain that points to one of your tenants in Oqtane.
In a typical setup, you use DNS records for this.
The simplest case is an A record that points to a specific IP address.
When a request arrives, the server reads the hostname from the request and routes it to the correct tenant.
This part isn’t specific to Oqtane — it’s how web servers work in general.
The concept exists in IIS, Apache, and NGINX,
and it’s part of basic networking theory. If you want to learn more,
there are countless articles about how DNS works.
A Small Story from the Past
This actually takes me back — one of the first things I learned as a teenager was how to configure DNS
and run my own Apache web server.
I even started offering web hosting from my home using an old 486 computer (yes, really).
Eventually, my internet provider noticed what I was doing, blocked my connection, and called my parents.
Let’s just say… that Christmas was canceled for me. 😅
Anyway, that’s a story for another time.
Setting Up Local Domains for Tenants
For today’s example, I’m using the same structure as before:
One host site
Two tenant sites: MyCompany1 and MyCompany2
I want to show you how to assign domain names to each of them.
If you’re running everything locally (for example, through Visual Studio or VS Code),
you can’t use real domain names — but you can simulate them using the Windows hosts file.
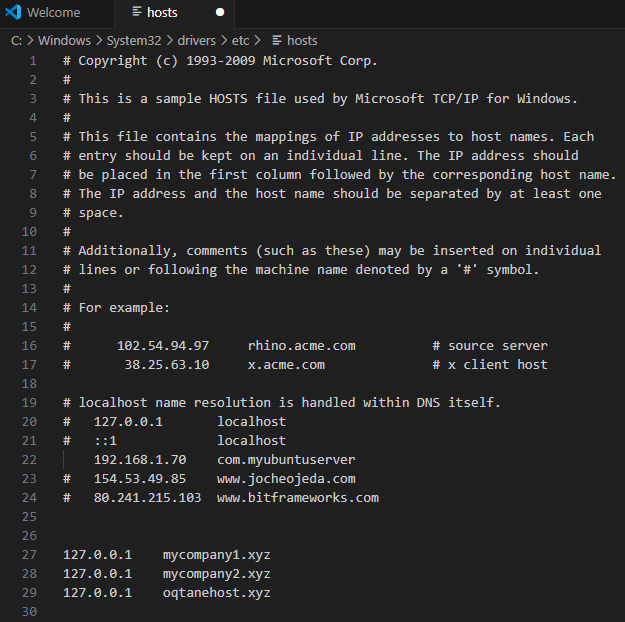
If you’ve ever wondered how your computer resolves localhost to 127.0.0.1,
the answer lies in that file. It’s located inside the Windows system folder,
and it maps domain names to IP addresses.
Here’s the cool part: you can add your own domains there, pointing them to any IP you like.
It’s a great trick for local testing.
Below, you’ll see a screenshot of my hosts file.
I’ve mapped my fake domains to my local IP address,
so when I open them in the browser, the requests go straight to my Kestrel server, which then routes them to the correct tenant.
How to Edit the Windows Hosts File
Editing the hosts file in Windows is simple, but you need administrative permissions.
Here’s how you can do it safely:
Press Start, type Notepad, then right-click it and select Run as administrator.
Once Notepad opens, go to File → Open and browse to:
C:\Windows\System32\drivers\etc\hosts
In the open dialog, change the filter from “Text Documents (*.txt)” to “All Files (*.*)”
so you can see the hosts file.
Add your entries at the bottom of the file. For example:
127.0.0.1   mycompany1.xyz
127.0.0.1   mycompany2.xyz
Each line maps an IP address to a domain name.
Save the file and close Notepad.
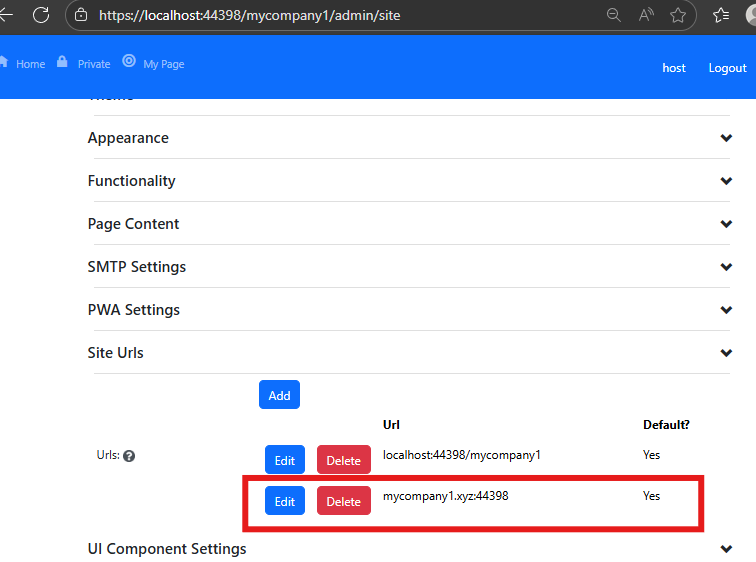
Open your browser and visit http://mycompany1.xyz:44398
(or the port your Oqtane app is running on).
You should see the tenant corresponding to that domain.
⚠️ Important: If you edit the file without admin rights,
you won’t be able to save it. Also, be careful — if you modify or delete system entries by accident,
your network resolution might stop working.
Here is how my host file actually looks at the moment
Set siteURL for :Company 1
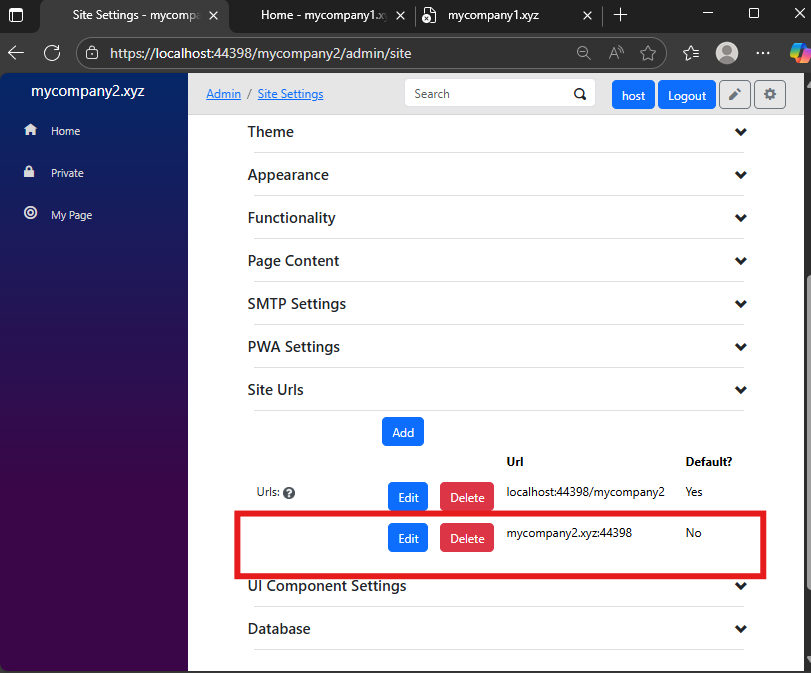
Set siteURL for :Company 2
Testing with Real Domains
Of course, this same logic applies to real domains too — as long as your Oqtane instance is publicly accessible.
In one of the next parts (maybe part 3 or 4), I’ll show how to configure it using a web server like Apache. I know that NGINX is more popular these days,
but I’ve used Apache since my teenage years, so I’m more comfortable with it.
Still, I’ll probably demonstrate both.
Most developers today use cloud providers like AWS or Azure,
but honestly, I still prefer spinning up a simple Ubuntu server and doing everything manually.
The best tool is the one you know best — and for me, that’s Apache on Ubuntu.
Demo
As you can see there is a little bit of a different behavior if is a default site or not If it’s a default site it will redirect to that URL if not it’s going to redirect to the default site URL
Resources
🧩 GitHub Repository — This project is based on the previous example
but adds hostname configuration and uses SQLite for simplicity.