by Joche Ojeda | Jun 26, 2025 | EfCore
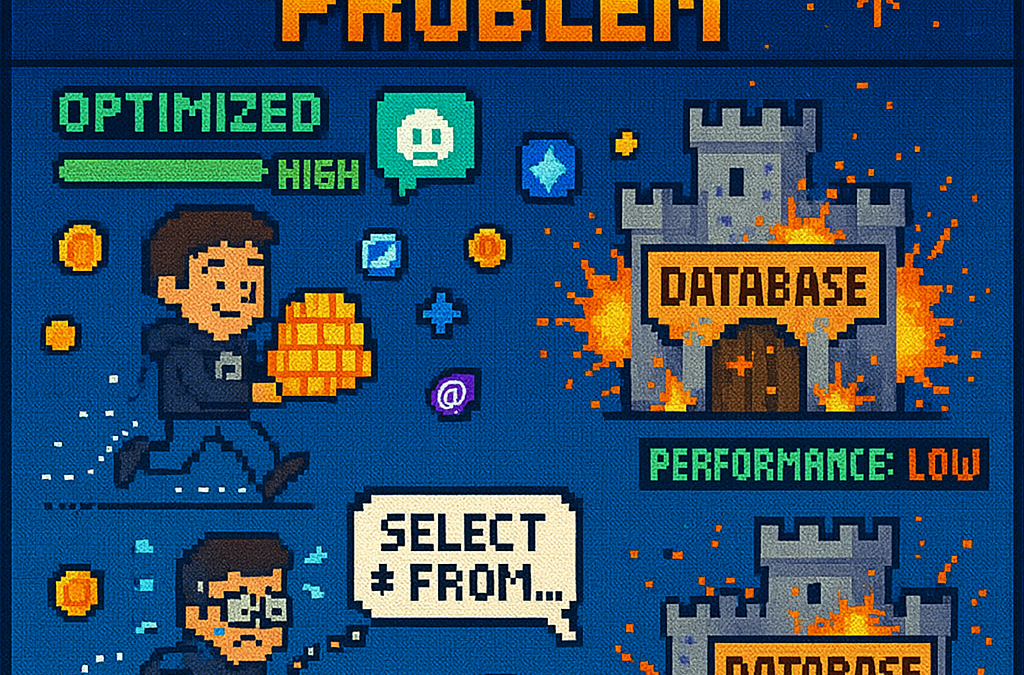
What is the N+1 Problem?
Imagine you’re running a blog website and want to display a list of all blogs along with how many posts each one has. The N+1 problem is a common database performance issue that happens when your application makes way too many database trips to get this simple information.
Our Test Database Setup
Our test suite creates a realistic blog scenario with:
- 3 different blogs
- Multiple posts for each blog
- Comments on posts
- Tags associated with blogs
This mirrors real-world applications where data is interconnected and needs to be loaded efficiently.
Test Case 1: The Classic N+1 Problem (Lazy Loading)
What it does: This test demonstrates how “lazy loading” can accidentally create the N+1 problem. Lazy loading sounds helpful – it automatically fetches related data when you need it. But this convenience comes with a hidden cost.
The Code:
[Test]
public void Test_N_Plus_One_Problem_With_Lazy_Loading()
{
    var blogs = _context.Blogs.ToList(); // Query 1: Load blogs

    foreach (var blog in blogs)
    {
        var postCount = blog.Posts.Count; // Each access triggers a query!
        TestLogger.WriteLine($"Blog: {blog.Title} - Posts: {postCount}");
    }
}
The SQL Queries Generated:
-- Query 1: Load all blogs
SELECT "b"."Id", "b"."CreatedDate", "b"."Description", "b"."Title"
FROM "Blogs" AS "b"

-- Query 2: Load posts for Blog 1 (triggered by lazy loading)
SELECT "p"."Id", "p"."BlogId", "p"."Content", "p"."PublishedDate", "p"."Title"
FROM "Posts" AS "p"
WHERE "p"."BlogId" = 1

-- Query 3: Load posts for Blog 2 (triggered by lazy loading)
SELECT "p"."Id", "p"."BlogId", "p"."Content", "p"."PublishedDate", "p"."Title"
FROM "Posts" AS "p"
WHERE "p"."BlogId" = 2

-- Query 4: Load posts for Blog 3 (triggered by lazy loading)
SELECT "p"."Id", "p"."BlogId", "p"."Content", "p"."PublishedDate", "p"."Title"
FROM "Posts" AS "p"
WHERE "p"."BlogId" = 3
The Problem: 4 total queries (1 + 3) – Each time you access blog.Posts.Count, lazy loading triggers a separate database trip.
Test Case 2: Alternative N+1 Demonstration
What it does: This test manually recreates the N+1 pattern to show exactly what’s happening, even if lazy loading isn’t working properly.
The Code:
[Test]
public void Test_N_Plus_One_Problem_Alternative_Approach()
{
    var blogs = _context.Blogs.ToList(); // Query 1

    foreach (var blog in blogs)
    {
        // This explicitly loads posts for THIS blog only (simulates lazy loading)
        var posts = _context.Posts.Where(p => p.BlogId == blog.Id).ToList();
        TestLogger.WriteLine($"Loaded {posts.Count} posts for blog {blog.Id}");
    }
}
The Lesson: This explicitly demonstrates the N+1 pattern with manual queries. The result is identical to lazy loading – one query per blog plus the initial blogs query.
Test Case 3: N+1 vs Include() – Side by Side Comparison
What it does: This is the money shot – a direct comparison showing the dramatic difference between the problematic approach and the solution.
The Bad Code (N+1):
// BAD: N+1 Problem
var blogsN1 = _context.Blogs.ToList(); // Query 1
foreach (var blog in blogsN1)
{
    var posts = _context.Posts.Where(p => p.BlogId == blog.Id).ToList(); // Queries 2,3,4...
}
The Good Code (Include):
// GOOD: Include() Solution
var blogsInclude = _context.Blogs
    .Include(b => b.Posts)
    .ToList(); // Single query with JOIN

foreach (var blog in blogsInclude)
{
    // No additional queries needed - data is already loaded!
    var postCount = blog.Posts.Count;
}
The SQL Queries:
Bad Approach (Multiple Queries):
-- Same 4 separate queries as shown in Test Case 1
Good Approach (Single Query):
SELECT "b"."Id", "b"."CreatedDate", "b"."Description", "b"."Title",
       "p"."Id", "p"."BlogId", "p"."Content", "p"."PublishedDate", "p"."Title"
FROM "Blogs" AS "b"
LEFT JOIN "Posts" AS "p" ON "b"."Id" = "p"."BlogId"
ORDER BY "b"."Id"
Results from our test:
- Bad approach: 4 total queries (1 + 3)
- Good approach: 1 total query
- Performance improvement: 75% fewer database round trips!
Test Case 4: Guaranteed N+1 Problem
What it does: This test removes any doubt by explicitly demonstrating the N+1 pattern with clear step-by-step output.
The Code:
[Test]
public void Test_Guaranteed_N_Plus_One_Problem()
{
    var blogs = _context.Blogs.ToList(); // Query 1
    int queryCount = 1;

    foreach (var blog in blogs)
    {
        queryCount++;
        // This explicitly demonstrates the N+1 pattern
        var posts = _context.Posts.Where(p => p.BlogId == blog.Id).ToList();
        TestLogger.WriteLine($"Loading posts for blog '{blog.Title}' (Query #{queryCount})");
    }
}
Why it’s useful: This ensures we can always see the problem clearly by manually executing the problematic pattern, making it impossible to miss.
Test Case 5: Eager Loading with Include()
What it does: Shows the correct way to load related data upfront using Include().
The Code:
[Test]
public void Test_Eager_Loading_With_Include()
{
    var blogsWithPosts = _context.Blogs
        .Include(b => b.Posts)
        .ToList();

    foreach (var blog in blogsWithPosts)
    {
        // No additional queries - data already loaded!
        TestLogger.WriteLine($"Blog: {blog.Title} - Posts: {blog.Posts.Count}");
    }
}
The SQL Query:
SELECT "b"."Id", "b"."CreatedDate", "b"."Description", "b"."Title",
       "p"."Id", "p"."BlogId", "p"."Content", "p"."PublishedDate", "p"."Title"
FROM "Blogs" AS "b"
LEFT JOIN "Posts" AS "p" ON "b"."Id" = "p"."BlogId"
ORDER BY "b"."Id"
The Benefit: One database trip loads everything. When you access blog.Posts.Count, the data is already there.
Test Case 6: Multiple Includes with ThenInclude()
What it does: Demonstrates loading deeply nested data – blogs → posts → comments – all in one query.
The Code:
[Test]
public void Test_Multiple_Includes_With_ThenInclude()
{
    var blogsWithPostsAndComments = _context.Blogs
        .Include(b => b.Posts)
            .ThenInclude(p => p.Comments)
        .ToList();

    foreach (var blog in blogsWithPostsAndComments)
    {
        foreach (var post in blog.Posts)
        {
            // All data loaded in one query!
            TestLogger.WriteLine($"Post: {post.Title} - Comments: {post.Comments.Count}");
        }
    }
}
The SQL Query:
SELECT "b"."Id", "b"."CreatedDate", "b"."Description", "b"."Title",
       "p"."Id", "p"."BlogId", "p"."Content", "p"."PublishedDate", "p"."Title",
       "c"."Id", "c"."Author", "c"."Content", "c"."CreatedDate", "c"."PostId"
FROM "Blogs" AS "b"
LEFT JOIN "Posts" AS "p" ON "b"."Id" = "p"."BlogId"
LEFT JOIN "Comments" AS "c" ON "p"."Id" = "c"."PostId"
ORDER BY "b"."Id", "p"."Id"
The Challenge: Loading three levels of data in one optimized query instead of potentially hundreds of separate queries.
Test Case 7: Projection with Select()
What it does: Shows how to load only the specific data you actually need instead of entire objects.
The Code:
[Test]
public void Test_Projection_With_Select()
{
    var blogData = _context.Blogs
        .Select(b => new
        {
            BlogTitle = b.Title,
            PostCount = b.Posts.Count(),
            RecentPosts = b.Posts
                .OrderByDescending(p => p.PublishedDate)
                .Take(2)
                .Select(p => new { p.Title, p.PublishedDate })
        })
        .ToList();
}
The SQL Query (from our test output):
SELECT "b"."Title", (
    SELECT COUNT(*)
    FROM "Posts" AS "p"
    WHERE "b"."Id" = "p"."BlogId"), "b"."Id", "t0"."Title", "t0"."PublishedDate", "t0"."Id"
FROM "Blogs" AS "b"
LEFT JOIN (
    SELECT "t"."Title", "t"."PublishedDate", "t"."Id", "t"."BlogId"
    FROM (
        SELECT "p0"."Title", "p0"."PublishedDate", "p0"."Id", "p0"."BlogId",
               ROW_NUMBER() OVER(PARTITION BY "p0"."BlogId" ORDER BY "p0"."PublishedDate" DESC) AS "row"
        FROM "Posts" AS "p0"
    ) AS "t"
    WHERE "t"."row" <= 2
) AS "t0" ON "b"."Id" = "t0"."BlogId"
ORDER BY "b"."Id", "t0"."BlogId", "t0"."PublishedDate" DESC
Why it matters: This query only loads the specific fields needed, uses window functions for efficiency, and calculates counts in the database rather than loading full objects.
Test Case 8: Split Query Strategy
What it does: Demonstrates an alternative approach where one large JOIN is split into multiple optimized queries.
The Code:
[Test]
public void Test_Split_Query()
{
    var blogs = _context.Blogs
        .AsSplitQuery()
        .Include(b => b.Posts)
        .Include(b => b.Tags)
        .ToList();
}
The SQL Queries (from our test output):
-- Query 1: Load blogs
SELECT "b"."Id", "b"."CreatedDate", "b"."Description", "b"."Title"
FROM "Blogs" AS "b"
ORDER BY "b"."Id"

-- Query 2: Load posts (automatically generated)
SELECT "p"."Id", "p"."BlogId", "p"."Content", "p"."PublishedDate", "p"."Title", "b"."Id"
FROM "Blogs" AS "b"
INNER JOIN "Posts" AS "p" ON "b"."Id" = "p"."BlogId"
ORDER BY "b"."Id"

-- Query 3: Load tags (automatically generated)
SELECT "t"."Id", "t"."Name", "b"."Id"
FROM "Blogs" AS "b"
INNER JOIN "BlogTag" AS "bt" ON "b"."Id" = "bt"."BlogsId"
INNER JOIN "Tags" AS "t" ON "bt"."TagsId" = "t"."Id"
ORDER BY "b"."Id"
When to use it: When JOINing lots of related data creates one massive, slow query. Split queries break this into several smaller, faster queries.
Test Case 9: Filtered Include()
What it does: Shows how to load only specific related data – in this case, only recent posts from the last 15 days.
The Code:
[Test]
public void Test_Filtered_Include()
{
    var cutoffDate = DateTime.Now.AddDays(-15);
    var blogsWithRecentPosts = _context.Blogs
        .Include(b => b.Posts.Where(p => p.PublishedDate > cutoffDate))
        .ToList();
}
The SQL Query:
SELECT "b"."Id", "b"."CreatedDate", "b"."Description", "b"."Title",
       "p"."Id", "p"."BlogId", "p"."Content", "p"."PublishedDate", "p"."Title"
FROM "Blogs" AS "b"
LEFT JOIN "Posts" AS "p" ON "b"."Id" = "p"."BlogId" AND "p"."PublishedDate" > @cutoffDate
ORDER BY "b"."Id"
The Efficiency: Only loads posts that meet the criteria, reducing data transfer and memory usage.
Test Case 10: Explicit Loading
What it does: Demonstrates manually controlling when related data gets loaded.
The Code:
[Test]
public void Test_Explicit_Loading()
{
    var blogs = _context.Blogs.ToList(); // Load blogs only

    // Now explicitly load posts for all blogs
    foreach (var blog in blogs)
    {
        _context.Entry(blog)
            .Collection(b => b.Posts)
            .Load();
    }
}
The SQL Queries:
-- Query 1: Load blogs
SELECT "b"."Id", "b"."CreatedDate", "b"."Description", "b"."Title"
FROM "Blogs" AS "b"

-- Query 2: Explicitly load posts for blog 1
SELECT "p"."Id", "p"."BlogId", "p"."Content", "p"."PublishedDate", "p"."Title"
FROM "Posts" AS "p"
WHERE "p"."BlogId" = 1

-- Query 3: Explicitly load posts for blog 2
SELECT "p"."Id", "p"."BlogId", "p"."Content", "p"."PublishedDate", "p"."Title"
FROM "Posts" AS "p"
WHERE "p"."BlogId" = 2

-- ... and so on
When useful: When you sometimes need related data and sometimes don’t. You control exactly when the additional database trip happens.
Test Case 11: Batch Loading Pattern
What it does: Shows a clever technique to avoid N+1 by loading all related data in one query, then organizing it in memory.
The Code:
[Test]
public void Test_Batch_Loading_Pattern()
{
    var blogs = _context.Blogs.ToList(); // Query 1
    var blogIds = blogs.Select(b => b.Id).ToList();

    // Single query to get all posts for all blogs
    var posts = _context.Posts
        .Where(p => blogIds.Contains(p.BlogId))
        .ToList(); // Query 2

    // Group posts by blog in memory
    var postsByBlog = posts.GroupBy(p => p.BlogId).ToDictionary(g => g.Key, g => g.ToList());
}
The SQL Queries:
-- Query 1: Load all blogs
SELECT "b"."Id", "b"."CreatedDate", "b"."Description", "b"."Title"
FROM "Blogs" AS "b"

-- Query 2: Load ALL posts for ALL blogs in one query
SELECT "p"."Id", "p"."BlogId", "p"."Content", "p"."PublishedDate", "p"."Title"
FROM "Posts" AS "p"
WHERE "p"."BlogId" IN (1, 2, 3)
The Result: Just 2 queries total, regardless of how many blogs you have. Data organization happens in memory.
Test Case 12: Performance Comparison
What it does: Puts all the approaches head-to-head to show their relative performance.
The Code:
[Test]
public void Test_Performance_Comparison()
{
    // N+1 Problem (Multiple Queries)
    var blogs1 = _context.Blogs.ToList();
    foreach (var blog in blogs1)
    {
        var count = blog.Posts.Count(); // Triggers separate query
    }

    // Eager Loading (Single Query)
    var blogs2 = _context.Blogs
        .Include(b => b.Posts)
        .ToList();

    // Projection (Minimal Data)
    var blogSummaries = _context.Blogs
        .Select(b => new { b.Title, PostCount = b.Posts.Count() })
        .ToList();
}
The SQL Queries Generated:
N+1 Problem: 4 separate queries (as shown in previous examples)
Eager Loading: 1 JOIN query (as shown in Test Case 5)
Projection: 1 optimized query with subquery:
SELECT "b"."Title", (
    SELECT COUNT(*)
    FROM "Posts" AS "p"
    WHERE "b"."Id" = "p"."BlogId") AS "PostCount"
FROM "Blogs" AS "b"
Real-World Performance Impact
Let’s scale this up to see why it matters:
Small Application (10 blogs):
- N+1 approach: 11 queries (≈110ms)
- Optimized approach: 1 query (≈10ms)
- Time saved: 100ms
Medium Application (100 blogs):
- N+1 approach: 101 queries (≈1,010ms)
- Optimized approach: 1 query (≈10ms)
- Time saved: 1 second
Large Application (1000 blogs):
- N+1 approach: 1001 queries (≈10,010ms)
- Optimized approach: 1 query (≈10ms)
- Time saved: 10 seconds
Key Takeaways
- The N+1 problem gets exponentially worse as your data grows
- Lazy loading is convenient but dangerous – it can hide performance problems
- Include() is your friend for loading related data efficiently
- Projection is powerful when you only need specific fields
- Different problems need different solutions – there’s no one-size-fits-all approach
- SQL query inspection is crucial – always check what queries your ORM generates
The Bottom Line
This test suite shows that small changes in how you write database queries can transform a slow, database-heavy operation into a fast, efficient one. The difference between a frustrated user waiting 10 seconds for a page to load and a happy user getting instant results often comes down to understanding and avoiding the N+1 problem.
The beauty of these tests is that they use real database queries with actual SQL output, so you can see exactly what’s happening under the hood. Understanding these patterns will make you a more effective developer and help you build applications that stay fast as they grow.
You can find the source for this article in my here
by Joche Ojeda | May 12, 2025 | C#, SivarErp
Welcome back to our ERP development series! In previous days, we’ve covered the foundational architecture, database design, and core entity structures for our accounting system. Today, we’re tackling an essential but often overlooked aspect of any enterprise software: data import and export capabilities.
Why is this important? Because no enterprise system exists in isolation. Companies need to move data between systems, migrate from legacy software, or simply handle batch data operations. In this article, we’ll build robust import/export services for the Chart of Accounts, demonstrating principles you can apply to any part of your ERP system.
The Importance of Data Exchange
Before diving into the code, let’s understand why dedicated import/export functionality matters:
- Data Migration – When companies adopt your ERP, they need to transfer existing data
- System Integration – ERPs need to exchange data with other business systems
- Batch Processing – Accountants often prepare data in spreadsheets before importing
- Backup & Transfer – Provides a simple way to backup or transfer configurations
- User Familiarity – Many users are comfortable working with CSV files
CSV (Comma-Separated Values) is our format of choice because it’s universally supported and easily edited in spreadsheet applications like Excel, which most business users are familiar with.
Our Implementation Approach
For our Chart of Accounts module, we’ll create:
- A service interface defining import/export operations
- A concrete implementation handling CSV parsing/generation
- Unit tests verifying all functionality
Our goal is to maintain clean separation of concerns, robust error handling, and clear validation rules.
Defining the Interface
First, we define a clear contract for our import/export service:
/// <summary>
/// Interface for chart of accounts import/export operations
/// </summary>
public interface IAccountImportExportService
{
    /// <summary>
    /// Imports accounts from a CSV file
    /// </summary>
    /// <param name="csvContent">Content of the CSV file as a string</param>
    /// <param name="userName">User performing the operation</param>
    /// <returns>Collection of imported accounts and any validation errors</returns>
    Task<(IEnumerable<IAccount> ImportedAccounts, IEnumerable<string> Errors)> ImportFromCsvAsync(string csvContent, string userName);

    /// <summary>
    /// Exports accounts to a CSV format
    /// </summary>
    /// <param name="accounts">Accounts to export</param>
    /// <returns>CSV content as a string</returns>
    Task<string> ExportToCsvAsync(IEnumerable<IAccount> accounts);
}
Notice how we use C# tuples to return both the imported accounts and any validation errors from the import operation. This gives callers full insight into the operation’s results.
Implementing CSV Import
The import method is the more complex of the two, requiring:
- Parsing and validating the CSV structure
- Converting CSV data to domain objects
- Validating the created objects
- Reporting any errors along the way
Here’s our implementation approach:
public async Task<(IEnumerable<IAccount> ImportedAccounts, IEnumerable<string> Errors)> ImportFromCsvAsync(string csvContent, string userName)
{
    List<AccountDto> importedAccounts = new List<AccountDto>();
    List<string> errors = new List<string>();

    if (string.IsNullOrEmpty(csvContent))
    {
        errors.Add("CSV content is empty");
        return (importedAccounts, errors);
    }

    try
    {
        // Split the CSV into lines
        string[] lines = csvContent.Split(new[] { "\r\n", "\r", "\n" }, StringSplitOptions.RemoveEmptyEntries);

        if (lines.Length <= 1)
        {
            errors.Add("CSV file contains no data rows");
            return (importedAccounts, errors);
        }

        // Assume first line is header
        string[] headers = ParseCsvLine(lines[0]);

        // Validate headers
        if (!ValidateHeaders(headers, errors))
        {
            return (importedAccounts, errors);
        }

        // Process data rows
        for (int i = 1; i < lines.Length; i++)
        {
            string[] fields = ParseCsvLine(lines[i]);

            if (fields.Length != headers.Length)
            {
                errors.Add($"Line {i + 1}: Column count mismatch. Expected {headers.Length}, got {fields.Length}");
                continue;
            }

            var account = CreateAccountFromCsvFields(headers, fields);

            // Validate account
            if (!_accountValidator.ValidateAccount(account))
            {
                errors.Add($"Line {i + 1}: Account validation failed for account {account.AccountName}");
                continue;
            }

            // Set audit information
            _auditService.SetCreationAudit(account, userName);

            importedAccounts.Add(account);
        }

        return (importedAccounts, errors);
    }
    catch (Exception ex)
    {
        errors.Add($"Error importing CSV: {ex.Message}");
        return (importedAccounts, errors);
    }
}
Key aspects of this implementation:
- Early validation – We quickly detect and report basic issues like empty input
- Row-by-row processing – Each line is processed independently, allowing partial success
- Detailed error reporting – We collect specific errors with line numbers
- Domain validation – We apply business rules from
AccountValidator
- Audit trail – We set audit fields for each imported account
The ParseCsvLine method handles the complexities of CSV parsing, including quoted fields that may contain commas:
private string[] ParseCsvLine(string line)
{
    List<string> fields = new List<string>();
    bool inQuotes = false;
    int startIndex = 0;

    for (int i = 0; i < line.Length; i++)
    {
        if (line[i] == '"')
        {
            inQuotes = !inQuotes;
        }
        else if (line[i] == ',' && !inQuotes)
        {
            fields.Add(line.Substring(startIndex, i - startIndex).Trim().TrimStart('"').TrimEnd('"'));
            startIndex = i + 1;
        }
    }

    // Add the last field
    fields.Add(line.Substring(startIndex).Trim().TrimStart('"').TrimEnd('"'));

    return fields.ToArray();
}
Implementing CSV Export
The export method is simpler, converting domain objects to CSV format:
public Task<string> ExportToCsvAsync(IEnumerable<IAccount> accounts)
{
    if (accounts == null || !accounts.Any())
    {
        return Task.FromResult(GetCsvHeader());
    }

    StringBuilder csvBuilder = new StringBuilder();

    // Add header
    csvBuilder.AppendLine(GetCsvHeader());

    // Add data rows
    foreach (var account in accounts)
    {
        csvBuilder.AppendLine(GetCsvRow(account));
    }

    return Task.FromResult(csvBuilder.ToString());
}
We take special care to handle edge cases like null or empty collections, making the API robust against improper usage.
Testing the Implementation
Our test suite verifies both the happy paths and various error conditions:
- Import validation – Tests for empty content, missing headers, etc.
- Export formatting – Tests for proper CSV generation, handling of special characters
- Round-trip integrity – Tests exporting and re-importing preserves data integrity
For example, here’s a round-trip test to verify data integrity:
[Test]
public async Task RoundTrip_ExportThenImport_PreservesAccounts()
{
    // Arrange
    var originalAccounts = new List<IAccount>
    {
        new AccountDto
        {
            Id = Guid.NewGuid(),
            AccountName = "Cash",
            OfficialCode = "11000",
            AccountType = AccountType.Asset,
            // other properties...
        },
        new AccountDto
        {
            Id = Guid.NewGuid(),
            AccountName = "Accounts Receivable",
            OfficialCode = "12000",
            AccountType = AccountType.Asset,
            // other properties...
        }
    };

    // Act
    string csv = await _importExportService.ExportToCsvAsync(originalAccounts);
    var (importedAccounts, errors) = await _importExportService.ImportFromCsvAsync(csv, "Test User");

    // Assert
    Assert.That(errors, Is.Empty);
    Assert.That(importedAccounts.Count(), Is.EqualTo(originalAccounts.Count));

    // Check first account
    var firstOriginal = originalAccounts[0];
    var firstImported = importedAccounts.First();
    Assert.That(firstImported.AccountName, Is.EqualTo(firstOriginal.AccountName));
    Assert.That(firstImported.OfficialCode, Is.EqualTo(firstOriginal.OfficialCode));
    Assert.That(firstImported.AccountType, Is.EqualTo(firstOriginal.AccountType));

    // Check second account similarly...
}
Integration with the Broader System
This service isn’t meant to be used in isolation. In a complete ERP system, you’d typically:
- Add a controller to expose these operations via API endpoints
- Create UI components for file upload/download
- Implement progress reporting for larger imports
- Add transaction support to make imports atomic
- Include validation rules specific to your business domain
Design Patterns and Best Practices
Our implementation exemplifies several important patterns:
- Interface Segregation – The service has a focused, cohesive purpose
- Dependency Injection – We inject the
IAuditService rather than creating it
- Early Validation – We validate input before processing
- Detailed Error Reporting – We collect and return specific errors
- Defensive Programming – We handle edge cases and exceptions gracefully
Future Extensions
This pattern can be extended to other parts of your ERP system:
- Customer/Vendor Data – Import/export contact information
- Inventory Items – Handle product catalog updates
- Journal Entries – Process batch financial transactions
- Reports – Export financial data for external analysis
Conclusion
Data import/export capabilities are a critical component of any enterprise system. They bridge the gap between systems, facilitate migration, and support batch operations. By implementing these services with careful error handling and validation, we’ve added significant value to our ERP system.
In the next article, we’ll explore building financial reporting services to generate balance sheets, income statements, and other critical financial reports from our accounting data.
Stay tuned, and happy coding!
About Us
YouTube
https://www.youtube.com/c/JocheOjedaXAFXAMARINC
Our sites
Let’s discuss your XAF
This call/zoom will give you the opportunity to define the roadblocks in your current XAF solution. We can talk about performance, deployment or custom implementations. Together we will review you pain points and leave you with recommendations to get your app back in track
https://calendly.com/bitframeworks/bitframeworks-free-xaf-support-hour
Our free A.I courses on Udemy

by Joche Ojeda | Apr 2, 2025 | Testing
In the last days, I have been dealing with a chat prototype that uses SignalR. I’ve been trying to follow the test-driven development (TDD) approach as I like this design pattern. I always try to find a way to test my code and define use cases so that when I’m refactoring or writing code, as long as the tests pass, I know everything is fine.
When doing ORM-related problems, testing is relatively easy because you can set up a memory provider, have a clean database, perform your operations, and then revert to normal. But when testing APIs, there are several approaches.
Some approaches are more like unit tests where you get a controller and directly pass values by mocking them. However, I prefer tests that are more like integration tests – for example, I want to test a scenario where I send a message to a chat and verify that the message send event was real. I want to show the complete set of moving parts and make sure they work together.
In this article, I want to explore how to do this type of test with REST APIs by creating a test host server. This test host creates two important things: a handler and an HTTP client. If you use the HTTP client, each HTTP operation (POST, GET, etc.) will be sent to the controllers that are set up for the test host. For the test host, you do the same configuration as you would for any other host – you can use a startup class or add the services you need and configure them.
I wanted to do the same for SignalR chat applications. In this case, you don’t need the HTTP client; you need the handler. This means that each request you make using that handler will be directed to the hub hosted on the HTTP test host.
Here’s the code that shows how to create the test host:
// ARRANGE
// Build a test server
var hostBuilder = new HostBuilder()
    .ConfigureWebHost(webHost =>
    {
        webHost.UseTestServer();
        webHost.UseStartup<Startup>();
    });

var host = await hostBuilder.StartAsync();

//Create a test server
var server = host.GetTestServer();
And now the code for handling SignalR connections:
         // Create SignalR connection
         var connection = new HubConnectionBuilder()
             .WithUrl("http://localhost/chathub", options =>
             {
                 // Set up the connection to use the test server
                 options.HttpMessageHandlerFactory = _ => server.CreateHandler();
             })
             .Build();

         string receivedUser = null;
         string receivedMessage = null;

         // Set up a handler for received messages
         connection.On<string, string>("ReceiveMessage", (user, message) =>
         {
             receivedUser = user;
             receivedMessage = message;
         });
//if we take a closer look, we can see the creation of the test handler "server.CreateHandler"
var connection = new HubConnectionBuilder() .WithUrl("http://localhost/chathub", options =>
{
// Set up the connection to use the test server
options.HttpMessageHandlerFactory = _ => server.CreateHandler();
}) .Build();
Now let’s open a SignalR connection and see if we can connect to our test server:
          string receivedUser = null;
          string receivedMessage = null;

          // Set up a handler for received messages
          connection.On<string, string>("ReceiveMessage", (user, message) =>
          {
              receivedUser = user;
              receivedMessage = message;
          });

          // ACT
          // Start the connection
          await connection.StartAsync();

          // Send a test message through the hub
          await connection.InvokeAsync("SendMessage", "TestUser", "Hello SignalR");

          // Wait a moment for the message to be processed
          await Task.Delay(100);

          // ASSERT
          // Verify the message was received correctly
          Assert.That("TestUser"==receivedUser);
          Assert.That("Hello SignalR"== receivedMessage);

          // Clean up
          await connection.DisposeAsync();
You can find the complete source of this example here: https://github.com/egarim/TestingSignalR/blob/master/UnitTest1.cs

by Joche Ojeda | Jan 14, 2025 | C#, dotnet, MetaProgramming, Reflection
The Beginning of a Digital Sorcerer
Every master of the dark arts has an origin story, and mine begins in the ancient realm of MS-DOS 6.1. What started as simple experimentation with BAT files would eventually lead me down a path to discovering one of programming’s most powerful arts: metaprogramming.
I still remember the day my older brother Oscar introduced me to the mystical DIR command. He was three years ahead of me in school, already initiated into the computer classes that would begin in “tercer ciclo” (7th through 9th grade) in El Salvador. This simple command, capable of revealing the contents of directories, was my first spell in what would become a lifelong pursuit of programming magic.
My childhood hobbies – playing video games, guitar, and piano (a family tradition, given my father’s musical lineage) – faded into the background as I discovered the enchanting world of DOS commands. The discovery that files ending in .exe were executable spells and .com files were commands that accepted parameters opened up a new realm of possibilities.
Armed with EDIT.COM, a primitive but powerful text editor, I began experimenting with every file I could find. The real breakthrough came when I discovered AUTOEXEC.BAT, a mystical scroll that controlled the DOS startup ritual. This was my first encounter with automated script execution, though I didn’t know it at the time.
The Path of Many Languages
My journey through the programming arts led me through many schools of magic: Turbo Pascal, C++, Fox Pro (more of an application framework than a pure language), Delphi, VB6, VBA, VB.NET, and finally, my true calling: C#.
During my university years, I co-founded my first company with my cousin “Carlitos,” supported by my uncle Carlos Melgar, who had been like a father to me. While we had some coding experience, our ambition to create our own ERP system led us to expand our circle. This is where I met Abel, one of two programmers we recruited who were dating my cousins at the time. Abel, coming from a Delphi background, introduced me to a concept that would change my understanding of programming forever: reflection.
Understanding the Dark Arts of Metaprogramming
What Abel revealed to me that day was just the beginning of my journey into metaprogramming, a form of magic that allows code to examine and modify itself at runtime. In the .NET realm, this sorcery primarily manifests through reflection, a power that would have seemed impossible in my DOS days.
Let me share with you the secrets I’ve learned along this path:
The Power of Reflection: Your First Spell
// A basic spell of introspection
Type stringType = typeof(string);
MethodInfo[] methods = stringType.GetMethods();
foreach (var method in methods)
{
    Console.WriteLine($"Discovered spell: {method.Name}");
}
This simple incantation allows your code to examine itself, revealing the methods hidden within any type. But this is just the beginning.
Conjuring Objects from the Void
As your powers grow, you’ll learn to create objects dynamically:
public class ObjectConjurer
{
    public T SummonAndEnchant<T>(Dictionary<string, object> properties) where T : new()
    {
        T instance = new T();
        Type type = typeof(T);

        foreach (var property in properties)
        {
            PropertyInfo prop = type.GetProperty(property.Key);
            if (prop != null && prop.CanWrite)
            {
                prop.SetValue(instance, property.Value);
            }
        }
        return instance;
    }
}
Advanced Rituals: Expression Trees
Expression<Func<int, bool>> ageCheck = age => age >= 18;
var parameter = Expression.Parameter(typeof(int), "age");
var constant = Expression.Constant(18, typeof(int));
var comparison = Expression.GreaterThanOrEqual(parameter, constant);
var lambda = Expression.Lambda<Func<int, bool>>(comparison, parameter);
The Price of Power: Security and Performance
Like any powerful magic, these arts come with risks and costs. Through my journey, I learned the importance of protective wards:
Guarding Against Dark Forces
// A protective ward for your reflective operations
[SecurityPermission(SecurityAction.Demand, ControlEvidence = true)]
public class SecretKeeper
{
    private readonly string _arcaneSecret = "xyz";

    public string RevealSecret(string authToken)
    {
        if (ValidateToken(authToken))
            return _arcaneSecret;
        throw new ForbiddenMagicException("Unauthorized attempt to access secrets");
    }
}
The Cost of Power
| Ritual Type |
Energy Cost (ms) |
Mana Usage |
| Direct Cast |
1 |
Baseline |
| Reflection |
10-20 |
2x-3x |
| Cached Cast |
2-3 |
1.5x |
| Compiled |
1.2-1.5 |
1.2x |
To mitigate these costs, I learned to cache my spells:
public class SpellCache
{
    private static readonly ConcurrentDictionary<string, MethodInfo> SpellBook
        = new ConcurrentDictionary<string, MethodInfo>();

    public static MethodInfo GetSpell(Type type, string spellName)
    {
        string key = $"{type.FullName}.{spellName}";
        return SpellBook.GetOrAdd(key, _ => type.GetMethod(spellName));
    }
}
Practical Applications in the Modern Age
Today, these dark arts power many of our most powerful frameworks:
- Entity Framework uses reflection for its magical object-relational mapping
- Dependency Injection containers use it to automatically wire up our applications
- Serialization libraries use it to transform objects into different forms
- Unit testing frameworks use it to create test doubles and verify behavior
Wisdom for the Aspiring Sorcerer
From my journey from DOS batch files to the heights of .NET metaprogramming, I’ve gathered these pieces of wisdom:
- Cache your incantations whenever possible
- Guard your secrets with proper wards
- Measure the cost of your rituals
- Use direct casting when available
- Document your dark arts thoroughly
Conclusion
Looking back at my journey from those first DOS commands to mastering the dark arts of metaprogramming, I’m reminded that every programmer’s path is unique. That young boy who first typed DIR in MS-DOS could never have imagined where that path would lead. Today, as I work with advanced concepts like reflection and metaprogramming in .NET, I’m reminded that our field is one of continuous learning and evolution.
The dark arts of metaprogramming may be powerful, but like any tool, their true value lies in knowing when and how to use them effectively. Remember, while the ability to make code write itself might seem like sorcery, the real magic lies in understanding the fundamentals and growing from them. Whether you’re starting with basic commands like I did or diving straight into advanced concepts, every step of the journey contributes to your growth as a developer.
And who knows? Maybe one day you’ll find yourself teaching these dark arts to the next generation of digital sorcerers.

by Joche Ojeda | Jun 3, 2024 | C#, Data Synchronization
Writing Reusable Tests for SyncFramework Interfaces in C#
When creating a robust database synchronization framework like SyncFramework, ensuring that each component adheres to its defined interface is crucial. Reusable tests for interfaces are an essential aspect of this verification process. Here’s how you can approach writing reusable tests for your interfaces in C#:
1. Understand the Importance of Interface Testing
Interfaces define contracts that all implementing classes must follow. By testing these interfaces, you ensure that every implementation behaves as expected. This is especially important in frameworks like SyncFramework, where different components (e.g., IDeltaStore) need to be interchangeable.
2. Create Base Test Classes
Create abstract test classes for each interface. These test classes should contain all the tests that verify the behavior defined by the interface.
using Microsoft.VisualStudio.TestTools.UnitTesting;

public abstract class BaseDeltaStoreTest
{
    protected abstract IDeltaStore GetDeltaStore();

    [TestMethod]
    public void TestAddDelta()
    {
        var deltaStore = GetDeltaStore();
        deltaStore.AddDelta("delta1");
        Assert.IsTrue(deltaStore.ContainsDelta("delta1"));
    }

    [TestMethod]
    public void TestRemoveDelta()
    {
        var deltaStore = GetDeltaStore();
        deltaStore.AddDelta("delta2");
        deltaStore.RemoveDelta("delta2");
        Assert.IsFalse(deltaStore.ContainsDelta("delta2"));
    }

    // Add more tests to cover all methods in IDeltaStore
}
3. Implement Concrete Test Classes
For each implementation of the interface, create a concrete test class that inherits from the base test class and provides an implementation for the abstract method to instantiate the concrete class.
using Microsoft.VisualStudio.TestTools.UnitTesting;

[TestClass]
public class ConcreteDeltaStoreTest : BaseDeltaStoreTest
{
    protected override IDeltaStore GetDeltaStore()
    {
        return new ConcreteDeltaStore();
    }
}
4. Use a Testing Framework
Utilize a robust testing framework such as MSTest, NUnit, or xUnit to ensure all tests are run across all implementations.
5. Automate Testing
Integrate your tests into your CI/CD pipeline to ensure that every change is automatically tested across all implementations. This ensures that any new implementation or modification adheres to the interface contracts.
6. Document Your Tests
Clearly document your tests and the rationale behind reusable tests for interfaces. This will help other developers understand the importance of these tests and encourage them to add tests for new implementations.
Example of Full Implementation
// IDeltaStore Interface
public interface IDeltaStore
{
    void AddDelta(string delta);
    void RemoveDelta(string delta);
    bool ContainsDelta(string delta);
}

// Base Test Class
using Microsoft.VisualStudio.TestTools.UnitTesting;

public abstract class BaseDeltaStoreTest
{
    protected abstract IDeltaStore GetDeltaStore();

    [TestMethod]
    public void TestAddDelta()
    {
        var deltaStore = GetDeltaStore();
        deltaStore.AddDelta("delta1");
        Assert.IsTrue(deltaStore.ContainsDelta("delta1"));
    }

    [TestMethod]
    public void TestRemoveDelta()
    {
        var deltaStore = GetDeltaStore();
        deltaStore.AddDelta("delta2");
        deltaStore.RemoveDelta("delta2");
        Assert.IsFalse(deltaStore.ContainsDelta("delta2"));
    }

    // Add more tests to cover all methods in IDeltaStore
}

// Concrete Implementation
public class ConcreteDeltaStore : IDeltaStore
{
    private readonly HashSet _deltas = new HashSet();

    public void AddDelta(string delta)
    {
        _deltas.Add(delta);
    }

    public void RemoveDelta(string delta)
    {
        _deltas.Remove(delta);
    }

    public bool ContainsDelta(string delta)
    {
        return _deltas.Contains(delta);
    }
}

// Concrete Implementation Test Class
using Microsoft.VisualStudio.TestTools.UnitTesting;

[TestClass]
public class ConcreteDeltaStoreTest : BaseDeltaStoreTest
{
    protected override IDeltaStore GetDeltaStore()
    {
        return new ConcreteDeltaStore();
    }
}

// Running the tests
// Ensure to use a test runner compatible with MSTest to execute the tests